Showing posts with label Jingle Belles Challenges 2021. Show all posts

Wednesday, November 3, 2021

Jingle Belles - Holiday Creature Feature Part 2

Still adding creatures to this Jingle Belles Challenge.  Using up the rest of the images that I colored from the Snome Time set by Craft Consortium.  I used a forest die for the background on these and again the evergreens from Cottage Cutz.  Oh, and the banner and Merry Christmas message are Sizzix dies.  


I had some other images stamped and colored for this challenge but haven't got to them yet but that doesn't mean they won't make it into my Christmas card stash.  Time to count up what I have done and figure out how many more I will need as we've entered November.  

So I will now head over to the Jingle Belles blog and check out the other creatures featured there.  I noticed they've got quite a few.  It's always nice to see what the others have made and to gather ideas for cards in the future.  


Wednesday, October 13, 2021

Jingle Belles - Dreaming of a Pink Christmas

If you follow along with the Jingle Belles and here you will know that this time of year is saved for a very special challenge - the Pink Challenge for Breast Cancer Awareness Month.  Pink holiday cards with a majority of pink on them are the criteria.  

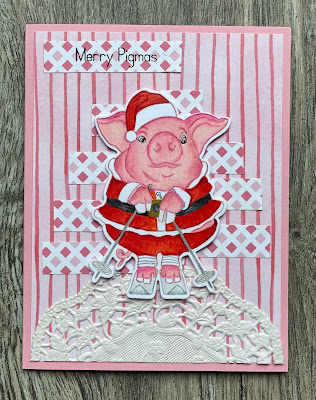
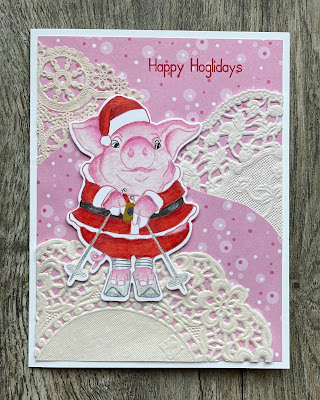
Most of you that follow know that flying pigs are special to me and even though this pig doesn't have wings it can certainly fly down a hill on those skis.  I bought this skiing Santa pig stamp from Rabbit Hole Designs last winter and didn't get around to using it until now.  A pink pig would be perfect for this challenge - but how to stage her........

But first to color her I stamped it in fade out ink and used my decades-old Prismacolor pencils with a few gel pen accents where needed.  Choosing the right shades of pink to try to match the background papers was an afterthought - well, after I finished the first one.  I searched through my papers to find backgrounds to blend with and also the card backing.  This pig's complexion proved a little harder.  Which made me glad that I didn't color the few images that I had stamped in tandem.  


I chose a different combination of pinks for this card and trust me, those doilies are white IRL, they look a little dingy in the photo.  


When I bought the stamp I also bought the die so I didn't have to fussy cut it.  The sentiments "Merry Pigmas" and "Happy Hoglidays" came with the stamp and I should note that HWNSNBP doesn't care for either, but I thought they would be okay.  Thoughts?

So, the other special part of this challenge is the donation that goes to the Breast Cancer Awareness Foundation by our Jingle Belle hostesses.  They each donate $2 for each card = $4/card combined.  

Since my pink pig has a personal tie to breast cancer awareness I thought it would be a nice idea to make a donation of $2 for each comment I get on this post (1 per user).  If you can't figure out how to make a comment, send me an e-mail and I'll count you in.  If you post as anonymous I'll need an e-mail as there could be multiple anonymous posters.  Click on my profile for my e-mail info.

I'll be visiting all the other Pink Christmas participants soon and you can too by clicking here and leaving some love.

Wednesday, October 6, 2021

Jingle Belles - Dashing Through the Snow

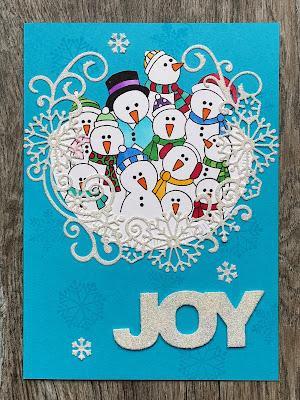
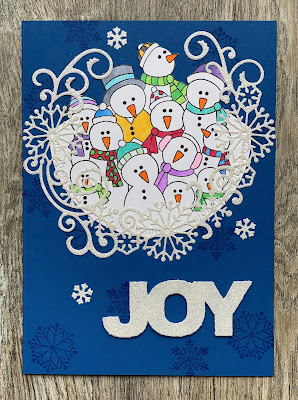
Our nights have been getting cooler but thankfully not cool enough for snow yet.  However, those Jingle Belles wanted us to be in a snowy-frame of mind and add snow, in any form, to our cards.  So here's a family of Flakes surrounded by flakes wishing Joy.


I took these photos at the same time in the same place and see how the camera changes that wood background depending on the color of the card background.  It's frustrating at times and I really should get out one of my lightboxes but I'm playing Goldilocks as one is too big and the other is too small and I thought this natural lighting would be just right.  No porridge for me!


The snowman were cut from a portion of a larger stamp by Newton's Nook - Frozen Fellowship.  The JOY die is from Ellen Hutson, and I don't know the source of the snowflake die at this time.   I used white glitter paper for that and wish I would have remembered the tip from my stamping friend LeAnne about peeling the backing off the glitter paper before die cutting it.  It was much easier to punch out that die on the second one after I had spent so much time with an exacto knife on the first when it didn't completely punch through.  I stamped some additional snowflakes onto the card base in VersaMark ink.  The little glitter snowflakes are the punchouts from the snowflake die.

I've really got to get back up into the stamp cave and tidy up, but I think I'll visit some of the other snowy contributions to the Jingle Belles first.  You can join in by clicking here.


Saturday, September 4, 2021

Jingle Belles - Cookies for Santa

Aren't these cookies adorable?  The colors are wonderful and so unexpected for holiday cookies, or cards for that matter.   Those Jingle Belles sure know how to shake things up a bit to get the creativity flowing.  So as you might have guessed, these cookies are the inspiration for this fortnight's challenge.

I knew that I had a little snowglobe die somewhere, I just had to do a little searching to find it.  It was in with the Christmas stamps and dies but was hiding.  Thankfully, I persevered and found it along with the little stamp set from Lawn Fawn that can go with it.  There were four little characters in the stamp set and the picture inspo had four colors so I decided to make a card for each of them.  


Surprisingly I found some designer paper to go with them.  The snowglobe is supposed to be a tag but I trimmed off the very top where the string would go.  I had to finagle the die cut a bit because I wanted the frame to match the base as one piece so I left one of the die pieces attached to the frame.  This meant that I had to jury-rig a piece in the back for the center cut dies to be attached to.  If I do make tags in the future, I will disconnect that part of the die so the back is nice and flat for the To:/From: stamp.  In any case, these worked out for the cards pretty well.

Each little character has it's own message and I used all of them except for the deer one because it said "You're a deer" which would be okay for a thank you, but not necessarily for Christmas.  So I used the happy holidays for that one which was also a part of the stamp set.


So looking at my Christmas card list I'm pretty sure that I can find a recipient for each of these except for the unicorn.  Not sure about that one yet.  Then again, it just says magical holiday and magically there is a Unicorn Day - April 9th.  I could save it for that..............

Okay, I'll have to get over to the Jingle Belles blog and give some love to all the other inspired cards very soon.  You can too by clicking here.  And just let me add that Lauren and Stephanie, our hostesses have some stunning inspiration cards that I love, love, love.


Wednesday, August 25, 2021

Jingle Belles - Cardstock Christmas

Yes, it's true, I made a Christmas card and I'm sneaking it in to the Jingle Belles Challenge for this fortnight of using cardstock and no patterned paper.  I was working on another project and really wanted to get a card done and this poinsettia that I had sitting on the side was screaming "use me, use me"  so I did.  I used a background snowflake die on a mid-value green background and gave that poinsettia a home.  I may decide to add a sentiment in the future, but for now it's done.   


I will have to get back to the Jingle Belles blog to check out the other beauties and leave some love.  You can join me by clicking here.


Wednesday, June 30, 2021

Jingle Belles - Neutral Noel

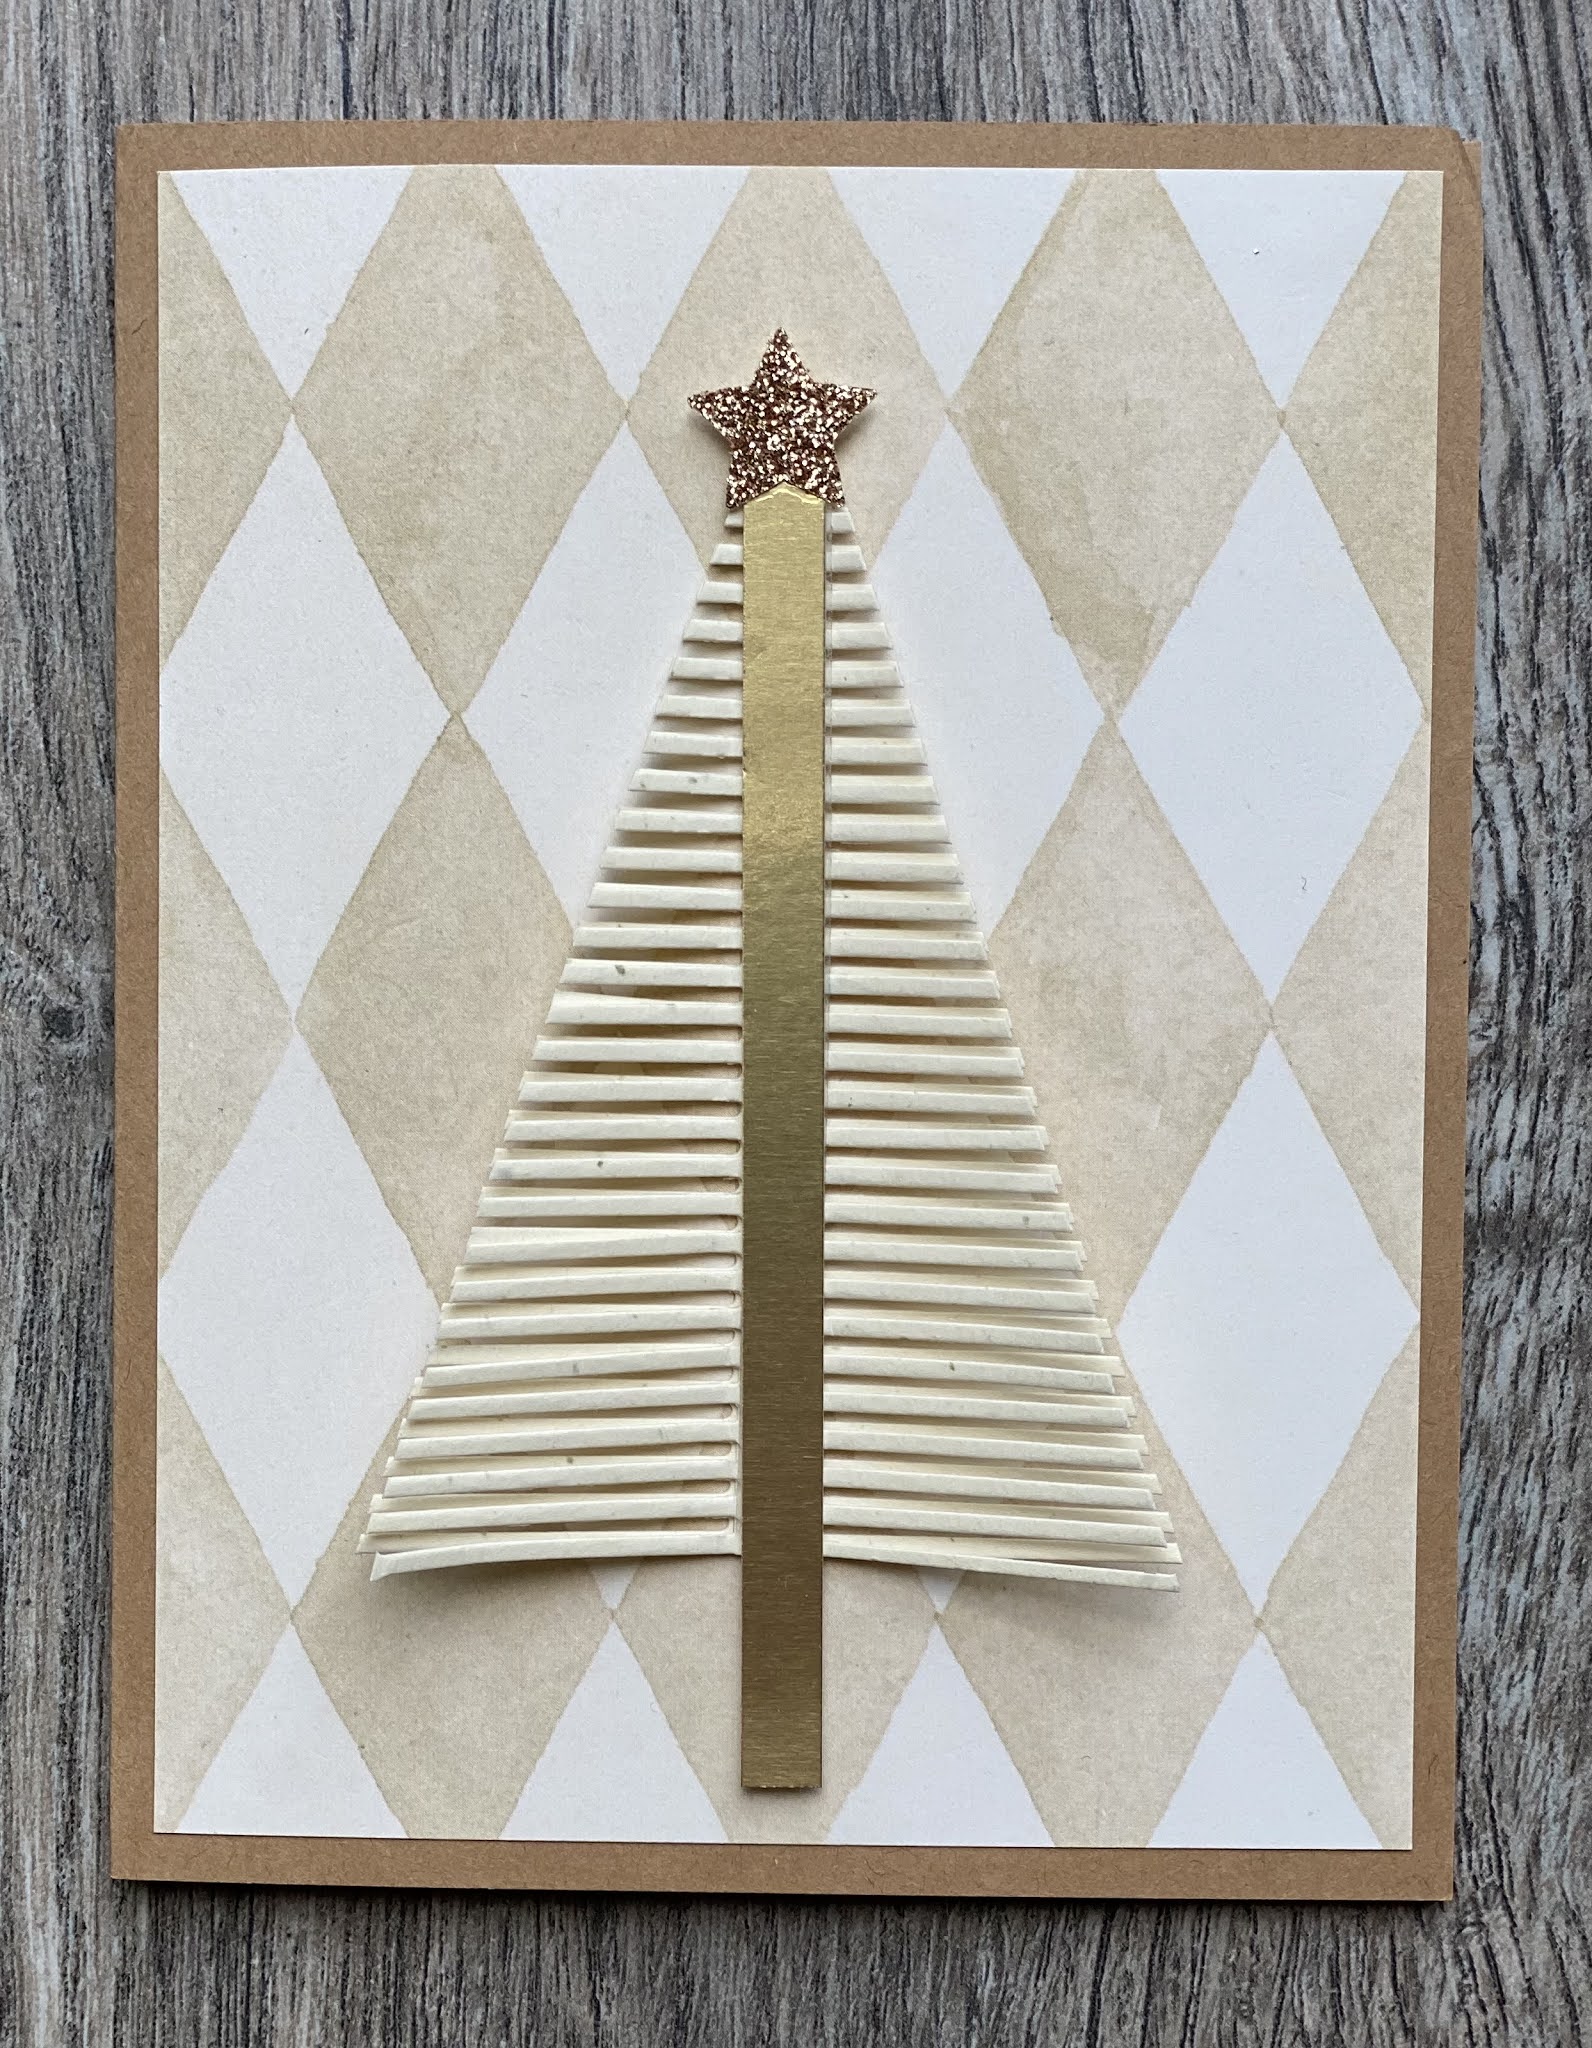
Sneaking these in very, very, very last minute.  The time just got away from me.  The Jingle Belles have challenged us to use neutral colors on our cards this time.  I did start these a few days ago, but decided to go in a different direction.  Of course that was after I had spent time making the elements for a very elaborate background.  Well, those elements will be used elsewhere I'm sure.  In the meantime, what I have here are some trees created using The Greetery's Macrame Openwork Base die inspired by this post on their blog.

This tree was made from some Confetti Cream cs to which I added a gold trunk and glittered star and added to a scrap of scrapbook paper.


The background for this Very Vanilla tree is some birch wrapping paper I have in my stash.


There are two layers to each tree and I've "fluffed up" the branches to give it a 3-d effect which is not too visible in the straight on pictures. 


I have two more trees and backgrounds on my work table that I'll have to finish another time.


Sometimes the simplest ideas that I have turn out to be the ones that take the longest.  Die cuts are easy for the most part, but when they have all that detail, you have to make sure you pick out all the pieces from what you have cut and from what gets stuck in the die.  But I still find that doing multiples is more to my advantage as opposed to coming back at a later date and starting the process over. 

Right now, as these cards stand, they can be used as both Christmas cards and thank you cards.  I still might look for a suitable sentiment to add though.  

I'll be visiting the Jingle Belles later this evening and leaving some love for the other neutral beauties.  You can do the same by clicking here.

Tuesday, June 1, 2021

Jingle Belles - Bringing the Bling

A rainy Sunday enabled me to get another card done for this challenge.  We're still adding bling to our cards as per the Jingle Belles.  This card's main focal point is repurposed from a Christmas card that we received.  I saved the little scene to use at a later date and this happens to be that date.  I used some metallic paint to highlight the areas on the back panel as they were more of a tan color.  Then I added a piece of decorative gold embossed paper that was in a package that I found in my stash recently.  And I picked up that jeweled strip at The $Tree along the way.


Yes, the weeds are calling me again, but I will be back later tonight to visit all the sparkly entries and leave some love.  You can too by clicking here.  

Friday, May 28, 2021

Jingle Belles - Bling on the Holidays

The Jingle Belles want us to Bling Up our cards this fortnight.  This card started with a gold foil card base.  To it I added the last of my handpainted tea bag papers made with all the different hues of metallic watercolor paint that I have.  That panel is framed on both sides with some gold glitter paper border using Macrame Borders and Tassels from The Greetery.   To make the lettering I actually used the gold foil wrapper from a Christmas candy that I adhered to some index card paper before I die cut the letters using the Bold Alphabet dies from The Greetery.  (Yes, I've been on a kick with The Greetery's products lately.)


This card is so shiny you can see some of my reflection in the bottom portion trying to photograph it. I'm going to check my dies again to see if I have something that would pass for musical notes to add to it....... or maybe some sequins. What do you think?

Time to jump back over to the Jingle Belles blog to give some love to the other sparkly creations.  You can join me by clicking here.
Tuesday, May 4, 2021

Jingle Belles - Gift Cards

This fortnight the Jingle Belles asked us to create cards that doubled as gift card holders.  Truth be told gift card holders are one of the things I wind up doing last minute.  I think it depends on who and what kind of gift cards we're going to need.  Well, I know that we usually give a gift card to Dunkin' Donuts to the mailperson so I went about thinking of ideas.  I remembered having an Ellen Hutson die that has somewhat of a zippered compartment that would be pretty simple to decorate.  I tried to stick to a simple decorating scheme since the top of this card get's pulled off to get to what's inside.


Here is the backside of the front panel where I hope you can see the perforations around the edge where the panel will be pulled off.  I cut a thin piece of cardstock and attached it to the back with the other end protruding through to the front so the received might have a clue as to how to open it.  I will add a note that I precreased all those perforations, in all directions so that it would be easier for the paper to tear away.  


Here is the tab I added.  I know I have a stamp set with pre-printed directions like "Pull Here" and such which I'll have to search for.  But if I don't readily find it, I can always hand print it on the tab.


I used double-sided tape to adhere the front panel to the backing but I purposely left the side of the tab opened for now so that I will be able to insert the card when it is purchase.  I'll just have to pull the backing off the tape and it will be sealed.


And since I had all the ingredients out, I made another one and now I'm glad I did because I'm thinking that I usually also give my hairdresser a little extra something at the holidays.


So now I'm off to check out the other gift cards for this Jingle Belle challenge.  You can join me by clicking here.
Tuesday, April 20, 2021

Jingle Belles - Go Planet...It's Your Earth Day

Don't our hostesses come up with the coolest post titles!  This is a busy birthday week for us and in addition to that I wanted to send out some Earth Day wishes to some friends and came up with what I thought was a great idea just before I went to bed the other night.  Unfortunately, I couldn't remember what it was when I got up the next morning.  Hopefully it will come back to me and I will recycle it for next year.  

Poor memory and all I still managed to put together a second card for the Jingle Belles Earth Day challenge.  


So what did I add to that red card base?  The patterned paper is another save from a security envelope. Red ones don't come very often. The burlap ribbon was all that was leftover from some forgotten project.  The bear was actually a gift tag, one of many I made one year for family members that I saved from the trash.  That itself was recycled from a brown paper bag when I made them.  The wreath base is a punched donut shape from a green paint chip to which I added snippets of green ribbons from the scrap bag.  The red bow on the wreath was actually the ribbon that was used as the hanger for the bear tag.  I just snipped it off the top and tied it into a bow.  

I remember growing up we didn't have much but my parents were big on books and two of the books that I loved were "The Make It Book" and "The Do It" book which showed you simple creations that you could make from everyday things around the house with very little extra needed.  And one summer our town offered an art course that was being taught by a couple of my uncle's high school friends.  I don't remember exactly the project that I worked on, but there was a prize for it - a book called "How to Make Something From Nothing".  I think those books were what influenced me to repurpose, recycle, and reuse long before Earth Day began (yes, I'm that old).

Okay, time to head over to the Jingle Belles to leave some love for the other cardmakers.  Once again, you can join me by clicking here.
Monday, April 19, 2021

Jingle Belles - Peace on Earth Day

Once again the middle of April and Earth Day brings us to one of my favorite Jingle Belle challenges where we use materials that are recycled, reused or up-cycled.  It's a time when I can take a look through all those snippets and scraps that I have been saving to see what I can repurpose into a Christmas card or two.  

This first card will feature four items that I found that seemed to blend together - a paint chip, a piece of the inside of a security envelope, a bow from a bag of specialty candy, and a graphic image from the packaging of a decorative flag that we purchased.


I trimmed down the paint chip to fit the card front (Dapper Denim cs used for that) and placed the graphic over the writing on the paint chip.  The security envelope swatch had already been torn so I left it that way.  I just had to straighten up the sides a little.  Added the bow and there you have it.  The bow is a tad bit bulky so it will probably need extra postage.  

Please take a minute to click here to see all the other creations on the Jingle Belle blog.  

Tuesday, April 6, 2021

Jingle Belles - Holiday Cards to "Die" For

Hi ho, hi ho, it's off to bed we go.  Wait - What?  What am I talking about?  Well, I'm showing off this new die that my blogging buddy Sabrina sent me for my birthday last week.  It couldn't have come at a better time as the Jingle Belle challenge for this fortnight is to use a die or dies, or even punches.  I have to admit that I've not seen this die before and was excited to use it.  It's a Joanna Sheen Signature Die called Bedtime Stocking.  I was able to find some samples on line to see how to put all the pieces together.  


You can use the headboard by itself, but I chose to layer two of them to give it the appearance of a full bed.  By running the die through my Sizzix Sidekick a few times with patterned paper I was able to fill the space in the footboard and also make two pillows for the bed.  


I used the same die for the second card but changed up the style of the room.   


Thank you again Sabrina for giving me the inspiration for these two cards, and congratulations on your 1,000th blog post.  Now I need to drop by the Jingle Belles to see how all the other participants have been inspired.  You can join me by clicking here.
Tuesday, March 23, 2021

Jingle Belles - The Holly & The Ivy

I bet you can guess from the title that this Jingle Belle challenge involves holly and ivy.  Well, it doesn't have to be both holly and ivy and it can also be other seasonal foliage.  I found a booklet of vintage style postcards in my stash and there were four of this particular motif.  What I decided to do was try a little paper tole.  That involved determining what the layers in the design were and a lot of fussy cutting.  Since I wanted more layers than I had cards, I was able to use some of the lower layers for the upper pieces as they would be covered.  


I used some of glimmer paint to highlight all the dots on the red base.  

I mounted the finished panel on a gold foil card base.  I bought a pack of those gold cards on clearance one year and still have a bunch of them.  The only thing I don't like about them is that they are very curled and hard to uncurl.  I've had them under heavy objects on a shelf for quite some time without very good results.  So I try and do a lot of hand manipulating to get them flattened before use.  If anyone knows a better way please share.  

It's not easy to see all the layers in the photos - but I tried.


When I gave up trying to photograph it and sat down across the table from it, I could see the layers better.  I hope you can see how I had used a stylus to burnish the petals and leaves from underneath before gluing them on to give them an embossed feeling.  


I'm going to see if I can sneak in another simpler card before the cut-off, but won't promise anything.  The weather today is perfect for some seed sowing in our raised box and we have to do a trial run to a find a new place I have an appointment at soon in between HWNSNBP's meetings today.  But I will be checking out all the other fantastic foliage cards at the Jingle Belles when I get the chance and you can too by clicking here.  

Wednesday, March 10, 2021

Jingle Belles - Merry Sketch-mas

 Last Minute Lorraine here again.  This fortnight there was a sketch challenge from the Jingle Belles.


I  still had those macrame dies out and got to wondering how I could use them for the sketch.  The sketch is turned on its side for the first card.  The focal point is an IKEA gift tag that I trimmed down and added some Eyelet Outlet deer brads to.


The second card has a bit of a flip to it too, but basically the same ingredients.  


I'll have to look through my sentiments and find something small and suitable to add to these.  Until then, I plan on visiting the Jingle Belles and checking out all the other sketchy cards.  You can join me by clicking here.  

Sunday, February 21, 2021

Jingle Belles - Text Me Christmas

Words, words, words.  Are you a word nerd?  I am.  This is the KOOK in me, the one who collects words on a dedicated Pinterest board.  One of my favorite words - absquatulate - which means "to leave abruptly".   This seems to be a family trait.  HWNSNBP, who is an ambivert is very good at absquatulating.  And our daughter, who considers herself an introvert admits to also practicing absquatulation.  But let me absquatulate from this conversation and get to the Jingle Belle challenge at hand - using text/words on our Christmas cards.

I found some texty background papers in a paper stack along with some coordinating papers and put them to work.

On this first one I added a red pick-up truck brad from Eyelet Outlet in front of some die cut trees.


And to the second one, I created a little Santa from punches that reminds me of a Weeble (you know - Weebles wobble but they won't fall down).  He even has googly eyes.  I actually spent a fair amount of time gathering up the googly eyes I had in a couple of spots in my craft room so they could all be in the same place from now on.  I didn't realize just how many different sizes I had.  I kept them in tiny ziplock bags by size and quickly ran out of room in a recycled peanut butter jar.  Luckily I found a larger clear plastic jar I could use instead.  Now they are all together and I won't need a search party to find them anymore.


I was only using half of the sheets so I figured I'd go ahead and make a second card for each whilst the supplies were all at hand.  


More for you Word Nerds - This morning both Kirby and I were enjoying the apricity while listening to the melting ice clattering through the downspouts.  He on his flank, me on my acnestis.


Okay, enough words here, time to go spread some around to the Jingle Belles participants.  If you would like to join in click here.  


Wednesday, February 10, 2021

Jingle Belles Colorful Inspiration #2

Just sneaking in here with the second Jingle Belle card inspired by the very colorful Christmas photo that was posted.  I took this inspiration from the round pillow.


I used my Gina K wreath builder and a stamps from several various sets to complete this.  

Please click here to see all the rest of the great cards created for this challenge.  

Thursday, February 4, 2021

Jingle Belles - Colorful Christmas Inspiration

A colorful Christmas inspiration indeed from the Jingle Belles this week!  This is beautiful.  So clean and crisp with a great punch of color.  Our challenge is to create a card inspired by this photo.  Anything of our liking - and there are so many ways to go with this.  Color, object, setting.  

 
The tree on the mantle caught my eye - the pastel one.


First I had to figure out what to use for the "branches".  I'm guessing that the trees in the photo were made with paint chips, but I could be wrong about that.  Not having a suitable stash of paint chips, but a more than suitable stash of scrap cardstock, the next step was what punch to use. The ovals that I have are all too big, but I did find a small ornament punch that I though would work with the basic form even though it comes to a point - it still would resemble the tree in the picture - but you get to decide that.


In the photo the peach and the pink look closer in color than they are IRL.  Once I had the tree on the background it looked a little too barren, so I added some white sequins to give it a little sparkle.

To make the tree I punched out a slew of the ornaments in all the colors and then took a rectangular  piece of cardstock that was a little narrower and shorter than the background panels.  I started by adding some repositionable tape runner to that in a tree shape and then began layering the punches from the bottom up.  The very top was finagled from tracing the ornament inverted on itself.  I then took a piece of Press and Seal and pressed it onto the tree making sure that each one of those pieces was stuck to it.  Then I gently turned it over and peeled off the cardstock from the back.  I trimmed down that rectangle to be a tad smaller than the actual tree and used a ton of double-sided tape to adhere it to the back of the tree.  Then I was able to gently peel the Press and Seal off the front making the tree was ready to add to the card.  

There is so much inspiration in that photo that I'm going to have to revisit it for a second card I fear.  In the meantime, you can check out how all the other Jingle Belles were inspired by clicking here.  

Tuesday, January 26, 2021

Jingle Belles - Think Big But Go Small

Inchies and twinchies are on the menu for the Jingle Belles challenge this fortnight.  I've used both on my cards.  I chose a little bit of an unconventional color palette for a Christmas card - blue and gray - and a cute little stamp set from Pinkfresh.  


I just might try this again with green and red - we shall see.  

Time to go and check out all the other inchies and twinchies at the Jingle Belles blog.  You can join me by clicking here.  

Monday, January 11, 2021

Jingle Belles - Something Old and Something New and Some Things That I Won Too

Ho, ho, ho - here we go with another year of Jingle Belle challenges.  This fortnight the challenge was to use something old and something new (or unused).  Well, I was pretty lucky late last year to be the winner of one of the Jingle Belle giveaways which gave me my new items and I'll share another giveaway I won also at the end of this post.

Here was the prize from the JB's - Stamps, Paper, and Embellishments that were perfect for this first challenge of the year.


I actually made two cards using some of these items, but only the first one qualifies for the challenge because it has something old on it - the red seam binding ribbon was salvaged from a box of straw Christmas decorations purchased at IKEA several years ago that resurfaced in our recent purge.  And the tag is actually the backside of the tag that came with the package.


I love the color combination of the patterned papers in this pack.  I can predict that it will be used many times over the course of the year.  


Thank you ladies for such a fun giveaway prize!

I did say that I was lucky enough to win something else, this happening to be something handmade.  It was on Instagram that I saw the work of Wendy Kirwood, a textile and mixed media artist.  I was fascinated by the project that she had featured on her feed this summer where she sewed 100 glass beads to a felt round each day for 10 days.  I totally enjoyed seeing her daily updates.  She made that piece into a giveaway which I entered but did not win.  So I was happy to see that she repeated this project and giveaway at the end of November/beginning of December.  I had a really good feeling about this one, and was pleasantly shocked when I saw that my name had been chosen by her son.  


The beads are sew on a 7" gray felt framed circle. 


The stitching on the beads is wonderful, but just look at the preciseness of the stitching around the frame, and her initial logo in silver thread blew me away.  


My pictures don't do it justice.  It really sparkles in the light.


What was also remarkable was that it only took 5 days for the package to arrive here from the UK in mid-December.  The mail has been pretty unpredictable during the holidays.

Now I will mosey on over the Jingle Belles blog to see all the lovely creations for these first couple of weeks in January.  You can join me by clicking here.