Showing posts with label Jingle Belles Challenges 2014. Show all posts

Wednesday, December 3, 2014

Jingle Belles - Christmas Feast


I'm sure those Corgi's are feasting on those candy canes as the children put together their gingerbread house.  I used my Tasha Tudor stamp again (click here for the card I made in April using it).  I usually like to stamp the images that I am going to watercolor in Basic Gray ink and I did this time too, but about half way through I started regretting that a bit.  I might have to try it in black also, though the softness of this doesn't look too bad IRL.  I'd love some constructive criticism.


I combined an MS border punch with a branch punch to fatten up the gingerbread garland.  Oh, and those tiny ginger bread men were also part of a border punch but I just chose to use the punch outs and added their little icing details with a gel pen.  

So I'm pretty sure that this is the last Jingle Belle challenge for 2014 and I want to thank Lauren and Stephanie for all the wonderful challenges and support they give throughout the year helping us to keep December a lot more manageable.  Merry Christmas ladies!

Thursday, November 13, 2014

Jingle Belles - The Great Outdoors and a Little Critter

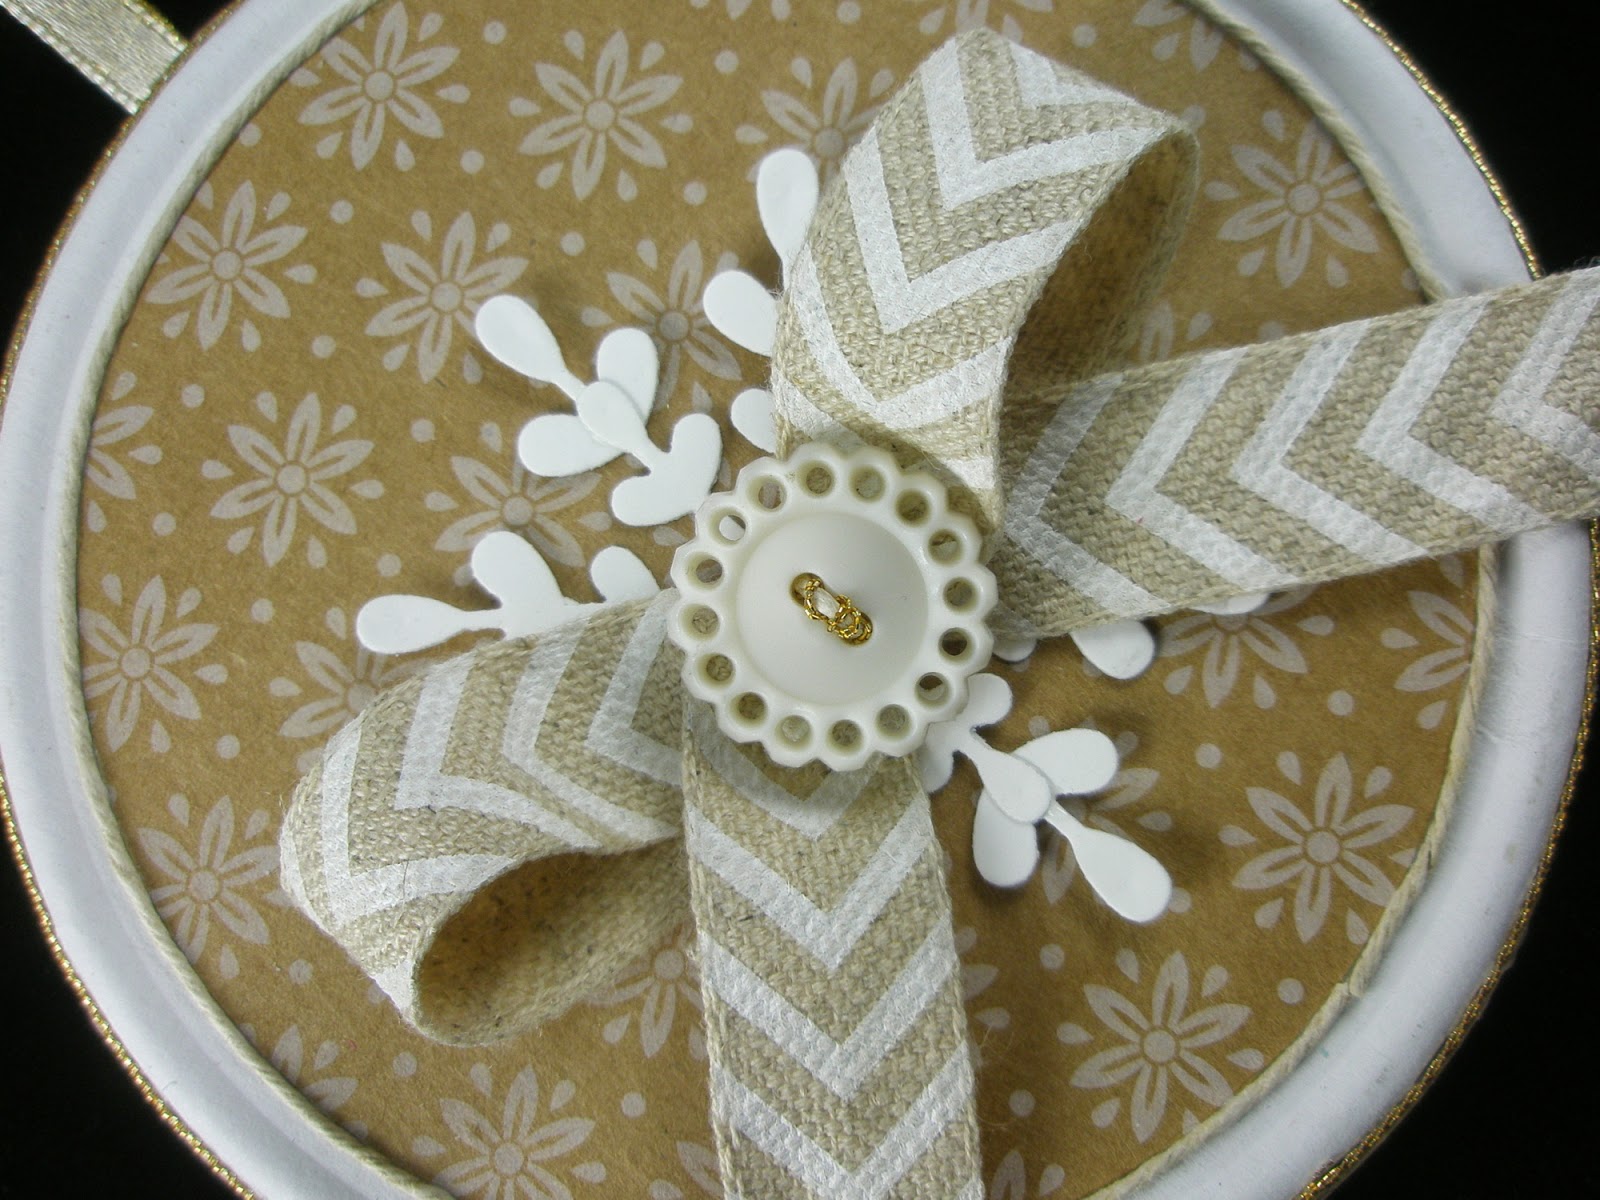
The Jingle Belles challenged us to make an outdoor scene this time.  As it happened to be, I had been working on this little scene that started with an empty paper cheese box.  I wanted to make a box card ornament.


Here is the outside of the box decorated very simply using neutral colors and a touch of gold.  


The back also has a circle of plain Crumb Cake cs so we can write a message and sign it.


Then you open it up and find the serene little Christmas scene inside.  


I used my chopped paper technique for the snow and added some glitter gel pen to the torn white edges to give it some sparkle.


I have a little stash of these boxes and plan to do some more experimenting with them as ornament cards.  Maybe I see a little village of them in the future.

I missed the deadline for the last Jingle Belles Challenge to make a card with a critter on it.  I certainly have enough Christmas critters to choose from, but I decided to go with this little owl from Purple Onion Designs.  I colored him with my Blendabilities and used my Snowflake Card Die in Coastal Cabana and Real Red.  


The Snowflake swings out when you open the card.


And on the back I added the sentiment.


This die set comes with words too.  What would you think this was looking at hit backwards and upside-down?  In my mind it looked like "ho" with an exclamation mark...........but........


it really was "joy".  Still I thought I could make "ho" out of it.


So if you look closely at the picture below you will see the marks where I took an Exacto knife and made the adjustments both on the "joy" to "ho" and I also trimmed away what I didn't like from the word snow to make the "o's" in both words look more alike.


The curl of the "j" was where I got the commas.  

On another note, this run of bad luck hasn't yet passed me by.  I now have a stress fracture in my left foot from........... wait for it................ walking!  I was walking at lunch time the week of Halloween and felt a sharp pain in the side of my foot which caused me to head back to work.  I was seeing my surgeon later that afternoon for a recheck and mentioned it to him.  He told me to stay off it as much as I could and give it a few days to make sure it got better.  Well, it didn't get better and we had to do some further investigating with an mri and a couple more visits to his office.  

Last Friday I got the bad news and tomorrow I get to see yet another doctor to find out the course of treatment for this.  Will I have a lovely new foot covering?  Crutches?  A cane?  We shall see.  

Anyhoo, it's time to go and check out the rest of the Jingle Belle creations for this week.  You can too.  Just click here.

Wednesday, October 15, 2014

Jingle Belles - Pink Christmas II

The second card I did for the Jingle Belles Pink Christmas challenge was a little labor intensive but fun too!  I used a recently purchase Memory Box die - Large Ringlets - and first used it on Whisper White.  Then I went through my cardstock and picked out all the shades of pink that I had, from the lightest Pink Pirouette to Rose Red.  I used the die on all of those colors and then popped out the different pink bubbles and added them to the white framework.  Then I added the bubbles and frame to a panel of Pink Pirouette and layered that onto the Wild Wasabi card base.  How did all those pieces stay put?  Packing tape on the back.


The trees are from SU's Festival of Trees and I used Wild Wasabi and Regal Rose Ink on them.  I added some of the leftover stars from the first card to one of the trees just for a little sparkle.  The sentiment - be merry - is another Essentials by Ellen die, Merry and Bright in Wild Wasabi. 


Hmmm, now that I've blown up these trees in the picture, I think I'll go back and add a little sparkle to the center of the pink flowers on that tree.  

So now it's time to go and check out all the lovely pinkiness that the Jingle Belles have to offer this week.  And remember, anyone can participate in these challenges and if you do make a card and post it, you'll be supporting breast cancer research through the generosity of the Jingle Belle hostesses.

Jingle Belles Pink Christmas


I have to admit that this is one of my favorite Jingle Belles Challenges.  Not just because of the generosity of Lauren and Stephanie who have pledged to donate $4 per card to the Susan G. Komen Foundation, but also because we have to use pink in our Christmas card(s).  And not just a little pink, but as much as we want to.


For my first card I went through my box (ha ha! that would be many boxes) of Christmas ribbon and pulled out those that had pink in them.  I snipped some short lengths of each of them and then played with laying them side-by-side until I found a combination that I liked.  Then, using red line tape, I taped them to some Whisper White CS and used my SU tree punch to punch out my tree.  Punching through ribbon is a little more difficult than just punching cardstock and with the added red line tape, it's even a little harder so you'll have to stand up to use your punch.  Giving your butt a break by standing now and then while crafting is a good thing.   


I found the Recollections Pink Paisley paper at Michael's and used it against a card base of Basic Gray.  I added a doily to the side of the front panel to provide a little "quiet" space for the tree.  The sentiment "Joy" is from the Essentials by Ellen Zipper Panel Die collection and actually the die says "enjoy" but I just use JOY.  That was created with Melon Mambo and layered onto the same in Brushed Silver.  I punched the stars (I hope you can see a little of the ones that I scattered all over the panel) out of silver glitter paper using my new SU star border punch.

(See above post for my second card.)


Tuesday, October 7, 2014

Doubling Up - Jingle Belles and Merry Monday

Perhaps that title is a little misleading, I'm doubling up the number of Christmas cards I'm making this time, but not combining challenges.  

The first card is for the Jingle Belles challenge to use 3 or more patterned papers on your card.  I am a slacker when it comes to using patterned paper and there's no excuse for it because I have a separate box full of Christmas-themed paper that I keep right at my feet under my work table.  See, this is why I need challenges like this so I can delve into the box and see what comes of it.  Although I did have to get HWNSNBP involved this time because I couldn't pick up the box myself.  That's always a dangerous thing..... inviting him into the stamp cave.  Even more dangerous letting him look underneath the table.  Yikes!  I was  a bit sneaky though and pulled the box out from under the table with my foot, put a big post-it on it with a big X and left him a note on the kitchen counter to please put it on my chair when he got home from work while I was at physical therapy.  


There was a technique challenge recently on Splitcoast called Punch Strips, so I tried it out with these patterned papers and a punch that resembled an ornament.  I found some glittered star buttons that fit perfectly on the top of the "ornaments" and punched a couple other stars in gold foil and gold glitter paper for the top.  I took some red rick-rack and wrapped thin gold thread around it first, made a loopy mess out of the thread and added the stars over the top of it.  


The second card was done for the Merry Monday challenge - to use neon colors on your Christmas card.  I had seen this stamp set used with watercolored backgrounds and some alcohol ink backgrounds but this one is done with daubers.  


I embossed the images from SU's The Newborn King in white EP and then swirled on the colors with my daubers.  Then I did some detail work with my SU markers on the manger scene and star.  This is definitely one of those cards that looks much better IRL.  For whatever reason, it was very difficult to take a clear picture of it, or maybe it was just my eyes last night, but I'm pretty pleased with the way this turned out.  I'd love to hear what you think.

I'm off to visit the Jingle Belles and Merry Monday to see the other wonderful creations. Take a peak!

Sunday, September 21, 2014

Jingle Belles - Sketch-tivus for the Rest of Us - Festive Friday Too!

Well it is and it possibly isn't what you think.  My family, as avid Seinfeld fans, would probably associate this title with the celebration of holidays other than Christmas - as in "Festivus" - which rhymes with our title Sketch-tivus which actually means that we have a lovely sketch guiding us to our creations this time.


I turned the sketch on it's side and used it that way for my card this time.  


I also used the inspiration photo from Festive Friday  and not one stamp believe it or not.


I went with the pink despite my thinking that perhaps, as in the past, we will be using pink in October on the Jingle Belles challenge.  But not to worry, as I'm not afraid to use pink for Christmas and if we do have that challenge, I'm up for it.

I'm actually thinking that this might be a good card for my daughter to use as hers for the holidays this year, possibly in other pastel shades or even Crumb Cake, hmmmmmmmmm...... I'll have to check with her on that.  

Just as a designing note - the sentiment banner is vellum cardstock and I had to figure out how to attach it to the card front without seeing the adhesive, therefore I adhered the PEACE die cut to the vellum first and was able to dot glue on the back of the vellum behind the die cut before, there is some sticky tape on it behind where the trees are, and another dab of glue under where I placed the sequin.  Vellum can be tricky, but not impossible, depending on how many embellishments you add.

For the deets - Pink Pirouette, Whisper White, Silver Foil, Silver Glitter, and Vellum cardstock were used.  Memory Box dies for the corner snow swirl and PEACE.  The trees where punched with SU punches.  Silver glitter gel pen was added to the edges of the sentiment banner and I started it all by using SU's Lucky Stars embossing folder.

Please head on over to the Jingle Belles and Festive Friday blogs to see the other lovely creations.

Tuesday, September 9, 2014

Jingle Belles - Baby It's GOLD Outside

Can you guess what our prompt is?  I bet you can.  GOLD.  One of the trends going on in the stamping/scrapbooking world is to use gold in your designs.  So I headed to my paper trove and found all the gold I could work with and came up with...........TAH DAH


My ornament is a Memory Box die called Lydia ornament that both cuts and embosses what you see on the top layer.  I did not purchase the die that makes the back of the ornament choosing to just trace around the edge of the die onto the texture gold paper and cutting it out with scissors.  I did have to use an Exacto knife to get the hole in the hanger part, but it wasn't difficult.  The most difficult part of using these intricate dies is gluing them down.  It's so easy to put too much glue on the back and glue smears show up terribly well on foil cardstock, but I think I managed to avoided any big messes.


I used a rectangle of gold glitter paper and the sentiment is in gold foil paper again using an Elizabeth Craft die.  The vertical ribbon is a favorite that I found at Mike's a couple of years ago, but checking the holiday ribbon selection a couple of weeks ago they have it again.  It too is a bugger to glue down, but in this case I made sure that the ribbon folded over the top and bottom of the top panel so I could use sticky tape on the back to adhere it.  Taping the glitter panel over the top also helps secure it in place.  

The top panel was embossed with a Cuttlebug embossing folder - forgot the name - and when I first added that panel to the card backing I immediately regretted not putting in another layer of gold. Fixed that however with a gold gel pen - v e r y   c a r e f u l l y.

The picture below is in normal light and don't you notice the difference in the shades of gold?  The whole card has a warmer look to it and not so brassy as when under photo light.  


I just checked my box of Christmas cards against my Christmas card list and I am sadly lacking enough cards so I think I will do this card again in another color combination.  Or maybe the gold again, but have the top embossed part of the ornament in white this time.  

Let's see how the other ladies came along with their Midas Touch beauties - click here.

Tuesday, August 26, 2014

Jingle Belles with a Dash of Festive Friday


Our Jingle Belles challenged us to make a card for a winter holiday not Christmas.  My go-to sentiment for a holiday card intended for someone you're not sure celebrates Christmas is "PEACE ON EARTH"  or just "PEACE".  Rachel always asks me to make her cards that can go to anyone.  I took my inspiration from the Festive Friday Challenge photo below.


I love this image from Comfort & Joy and embossed it and the sentiment with black EP.  I wanted a very crisp look to it.  


I added a silver foil snowflake under the sentiment to match the embossing in silver I did for the background using my Amuse Starry Night background stamp.  The ribbon was a last minute find at Michael's last week.  


I have been able to do a few little "shopping" trips but I'm finding shopping is a little tricky.  I get a cart because I shouldn't be carrying a basket in case it gets too heavy, but then I find that I can't get the items out of the cart if I put them in the basket part because I'm not allowed to bend yet.  So either I remember to use the kiddie seat for my items or, since I'm still not driving, text my driver to come in and help me check out (if they're not in the store with me already).  And then there's the items that are on the lower shelves.  I pretty much am ignoring them.  And heaven forbid that I have a case of fumble-fingers and drop something on the floor. I hate to be one of those customers that just walks away, but if no one is around I have no other choice.  But you learn to make your accommodations.  Now if I could just remember not to twist from side-to-side when looking at the shelves!  As my PT says "your nose points where your toes point"! 

Don't forget to visit the Jingle Belles and Festive Friday blogs to see what everyone else has cooked up this week.   

Tuesday, July 29, 2014

Jingle Belles - Taking a Header


jingle belles

If you haven't visited the Jingle Belles Blog this is the beautiful header designed by Lauren for 2014.

Our challenge this time was to create a card based on the header.  Here is my interpretation once again last minute.  I did spray the bottom portion of the lighter lavender paper with some silver glimmer mist that puddled horribly and wound up sopping it up with of all things some white crepe paper streamers that I had on my table.  The photo doesn't catch the shine, but IRL is a little prettier. 


The bells were actually a couple of those swirly tree dies that I had that I cut down to bell-size and backed with silver foil paper.  (Easier said than done - sorry for all the glue smudges.)  And of course I had to add a line of glittery silver jingle belles.  

Okay, let me go see what other beauties await.  Click here to check them out.  


Wednesday, June 18, 2014

Jingle Belles - Red & Green & Christmas All Over


Though not your traditional green, my card fits this week's challenge of using predominantly red and green.  

The background was made with these tape runners I found in the clearance bin at AC Moore, and even though I did use a ruler, the strips came out a bit crooked and funky.  So I added a funky looking wreath made out of multiple-sized circle punches.  Then I added a bit of red and white baker's twine and a bow of the same.  


Note to self:  It's much easier to wrap the wreath before you attach it.   Luckily I had it popped up on dimensionals so I could feed it through.

Let's see what the other Jingle Belles have to share this time - click here.

Wednesday, June 4, 2014

Jingle Belles - PEACE on Earth


Truth be told I really do have a good reason for not having this card done earlier in the challenge - I haven't been able to sit without pain in my lower back and thigh for the last week and a half.  I pushed myself doing some gardening and the Rice Krispie elves, you know Snap, Crackle, and Pop decided to pay a visit to my lower back.  Those sneaky elves herniated a disk and tore another one whilst they were visiting causing my sciatic nerve to flare up to the point that I could not walk or sit without excruciating, and I mean like 16 or more on a scale of 1-10!    

But this is not a pity party for Lorraine.  This is me trying to stamp and be creative while standing.  Well, there was some sitting, but sitting is more like listening to and watching a Jack-in-the-Box.  I can sit and the discomfort builds and builds and builds, until I finally can't take it anymore and have to stand up like the Jack-in-the-Box popping out after being wound up.  


I was going to go on about my experience, but I'll just say that I've started PT and am seeing some good results and we'll see how much of a Jack-in-the-Box I'll be when I return to work on Friday!

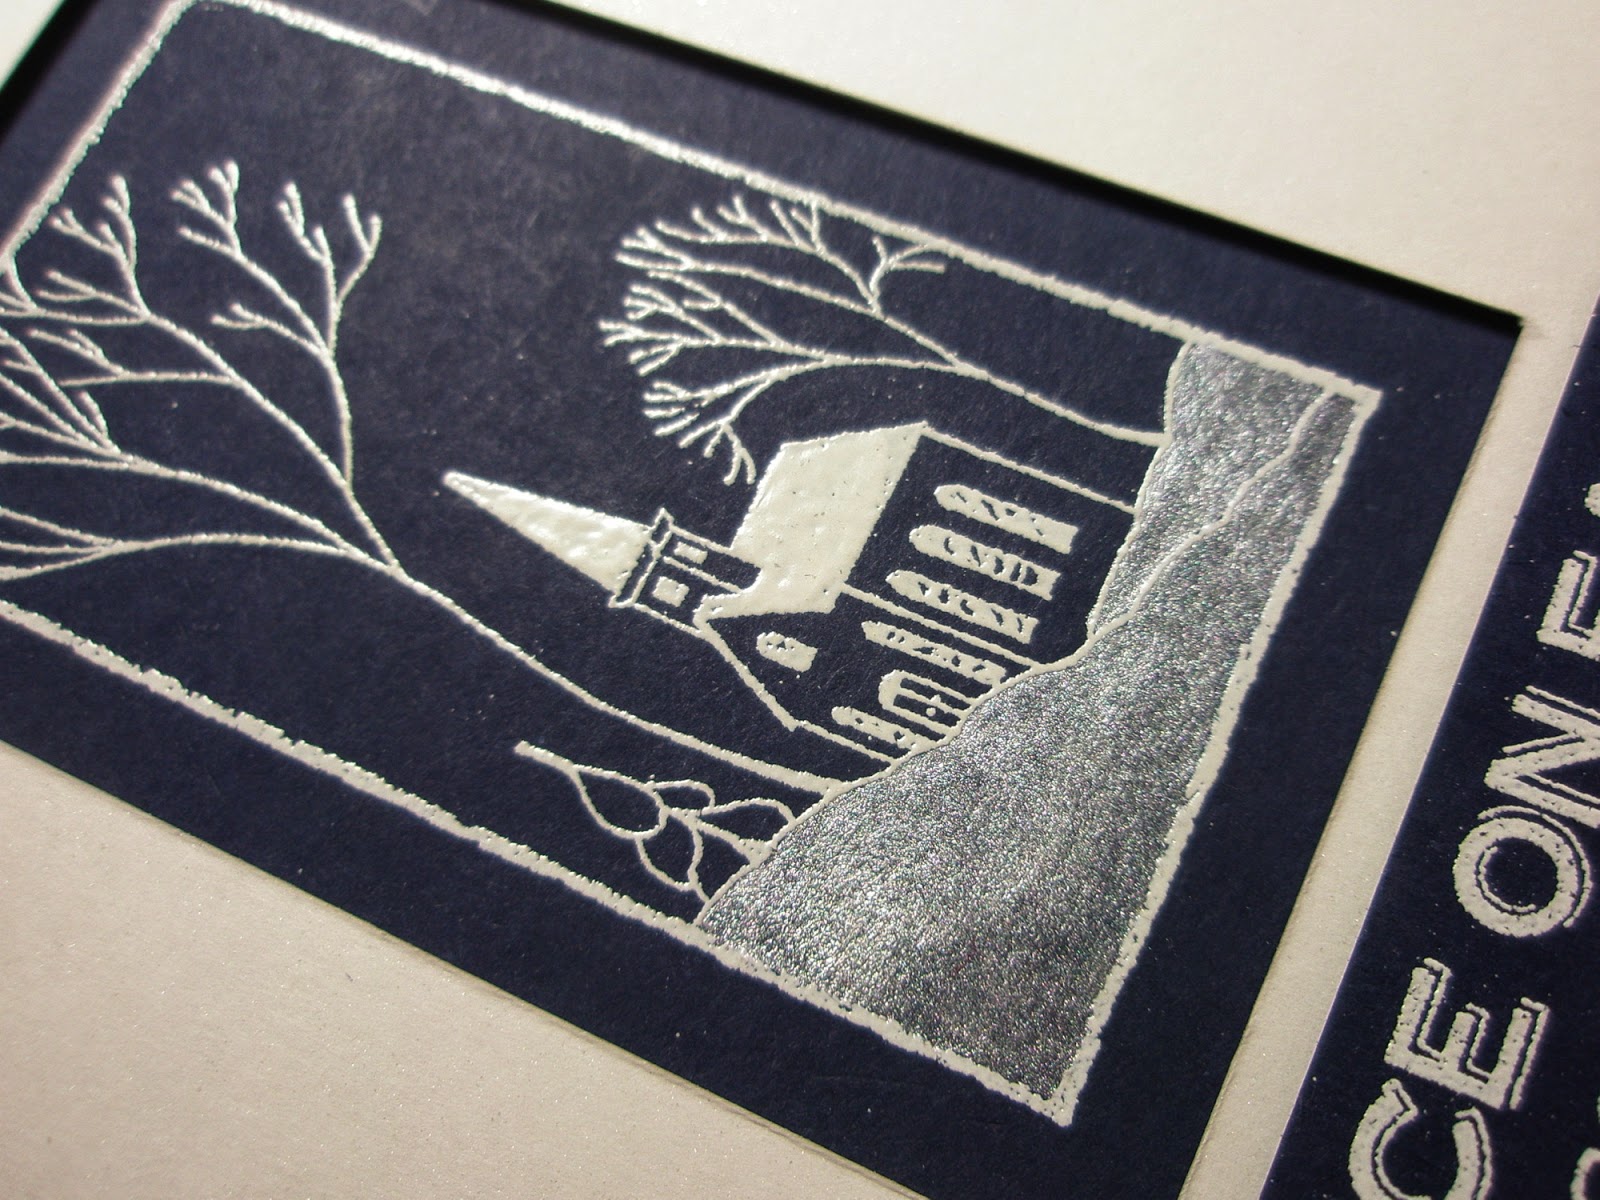
So, you know when you think that you're going to make a quick card and it turns into a not so quick card?  Yup, that would be this one.   I thought using this single image embossed in white would be a good route to go to be quick and it was, but there was a snowman on that front hill that I did not want so I had to be a little more careful when inking the stamp to avoid it.  Then I decided I didn't want the hills to be blue, so I painted on some Frosty White Shimmer paint.  And the image is underneath the white panel which meant measuring and carefully cutting the opening so I could pop up that layer over the embossed piece.  (Don't tell anyone, but the glitter brads were added to cover up some messing cutting in one of those corners.)  

The image comes from a retired SU set called Country Pleasures that I won on ebay a while ago.  (Perusing ebay can be done while standing I will add.  Whether it should be done is another question. I just hope the packages come in on days that I get home first from work!)  

The sentiment is from an AMUSE set called Holiday Greetings Inside and Out.  I used Night of Navy and Shimmer White CS.  And I highly recommend investing in a centering ruler.  It really did come in handy getting that opening for the image centered.  


Okay, time to visit some of the other ladies and their PEACEful cards here.  

I'll be posting some other "standing" projects in the next few days!

Tuesday, May 20, 2014

Jingle Belles - Tis the Season to *Jingle*


We had a wonderful sketch to work with this time and one other requirement - to add some bling.  


I've had this glittered snowflake sitting on my work table since Christmas.  It, and the green ribbon on the card were part of a decoration on a gift I received from one of the students at my school.  His mom happens to also be a stamper and she decorated the package so beautifully I almost did not want to open it.  

There are times when something just looks so right you hate to spoil it.  I find that happens with certain times of the day and when the light is just right.  It might be outside or inside, but I know that I can take a look around and just feel so happy that it looks so wonderful at that moment.  I try to take a mental photograph to remember it.  It can be fleeting or last until let's say, a cloud passes overhead, or the sun sets, or even when the seasons change.  

Strange to say that would also refer to how a package is presented, but if you follow what I'm trying to say I think you can understand.  

Keeping the package intact would not have been possible in order to enjoy the contents (which I did by the way), so saving the pieces was the next best thing.  It's just a wooden snowflake generously glittered, but it was too pretty to toss away.  

I decided to use a snowflake embossing folder on Crumb Cake and then I swiped it with my Gold Encore ink pad.  the ribbon is layered onto a strip of gold foil paper.  I took this out of the package for the first time and thought that it really had nice weight to it, it almost felt like foil.  Then I cut it on the paper cutter and it was then that I realized that there were two sheets and I had just cut both of them (this is when I smacked myself in the head!).  

The snowflake was pretty blingy but I thought the card needed something else.  So I went through my stash of jewels and things and found this green swirly one that I believe came from the dollar bin at Mike's when it was still a dollar bin and not yet the $1.50 bin.  (That price increase still peeves me.)

The card base is Chocolate Chip and I'll add the sentiment inside.  

Thanks to the wonderful sketch this went together pretty quickly.  I missed the last Jingle Belles challenge because I was busy preparing for HWNSNBP's 60th birthday party.  Now that that's done, I hope to get back to more card making.  

You can check out the other cards for this challenge here.


Tuesday, April 22, 2014

Jingle Belles - Joy to the Earth (HAPPY EARTH DAY!)


Happy Earth Day!  I know.  It doesn't LOOK very green, but really it is.  It's not much of a challenge for me to actually have "stuff" to recycle, it's more of a challenge for me to actually do it.  Thanks to the Jingle Belles this week, I can put some of my hoarded stash to good use.

What you see on this card is actually the front of a Godiva chocolate box that I received at Christmas.  I loved the pattern and the glitter and they use boxes that are very nicely made.  I was able to slit this part away from the logo and gently peel it off the box.  There is no cardboard attached to it now. 

The little snowflakes were a bit of trial and error. I have a slew of that foam packing wrap in all different weights.  I also had a new snowflake wreath die.  I wanted to see if I used the die and snipped the wreath if it would be able to be used as a straight line and it did.  The other part of the trial and error was finding the right foam thickness.  Kind of like Goldilocks, I needed to find the one that was "just right!".    Below that little border, well actually what I first put down on the red cardstock was a piece of red shiny fabric-like paper.  The bow is from my scrap bag and most likely came from a Christmas package at some time. 


I had a piece of white glitter foam and I traced the letters J and Y on the backing and carefully cut them out (looks like I still might need a little trim here or there) and instead of knocking myself out trying to cut an O, I used a glitter sticky dot.

I don't think you can really get the effect of all the sparkles, but I knew that that box was too pretty to put in the trash.  Oh, and since I peeled the top off and left the cardboard, I still have a box to use.  Just need to replace the paper!


I really do feel good when I can reuse something and goodness knows that I have enough stuff stashed away that has possibilities. 

If you'd like to see what the other Jingle Belles have done this week with their recyclables click here.

Wednesday, April 9, 2014

Jingle Belles - Spirit of Christmas Past

What do you think of when you think of vintage Christmas?  Do you think of lace and velvet?  Or maybe ice skating and sleigh riding?  When I think of vintage Christmas it takes me back to my childhood days when I looked forward to baking cookies and doing craft projects.   So the image that I used for this card combines a little of both of those.  


This image is a Tasha Tudor stamp.  I could go on about the sweet little books that Tasha Tudor wrote and illustrated, but to keep it short I'll just say that I purchased this stamp, not so much for myself, but to use for my cousin who happens to have a passion about all things Tasha Tudor.  

I stamped the image in Marina Mist on a piece of school drawing paper in the hopes that it would resemble a page that you might see in an old coloring book.  A vintage coloring book maybe?  And I used the plaid background because it reminded me of the comfortable flannel pajamas that we wore in those days.  


Oh, and the buttons and seam binding - well, what would a Christmas craft be without buttons and ribbons?  

Join me here to check out all the other Spirits of Christmas Past.

Thursday, March 27, 2014

Jingle Belles - The Holly and the Ivy


The Jingle Belles challenge was to use foliage, not necessarily just holly and ivy. 

Yep, yep, yep.  I missed another deadline.  I so wanted to have this posted by 6:00 last night, but I am my own worst enemy with time these days.  I spent a good amount of time peacefully watercoloring these images on Sunday and then fussy cutting the one on the card on top out.  Well, that cutting process proved to be very tiring for my bum hand so I set that aside missing a few berries and leaves and cut the second one with a simple border (below). 

When I found the ivy cut file I knew I wanted to use it for one card, and then I got fixated.  Fixated on finding my pastels.  I wanted to add a little blue shading to the ivy leaves on the background like I did with the ink when I was coloring the image.  I have decent light above my craft space, but below, well, let's just say the craft castle has a dungeon.  One never knows what lurks in the dark recesses of the dungeon after a certain hour of the day. 


I had told HWNSNBP that I would be downstairs by dark and when I wasn't, after a while he came looking for me only to find me on my hands and knees, draped over my chair, flashlight in hand under the table with my butt facing the door.  Of course the obvious question would be "what are you doing?" and he did ask, but all it took was glare in his direction and he backed out mumbling "nevermind, sorry I asked" and he retreated down the stairs. 


I followed shortly after still not finding what I was looking for and frustrated.  I said I would take a look when I got home from work the next day when it was still light.  


But I had not yet cut out that background and planned to do that the first thing when I got home from work.  Let me say that I am still learning the ins and outs of my Cameo and really need to do some more experimenting with blade depth and speed, but impatient I was, so I forged ahead with using a sub-par cut image and overlay and resorted to trying to clean up the overlay with a craft knife.  (The pieces weren't popping out on their own, they needed a little help in the corners.)  Time-consuming?  Yes.  It didn't look bad but I really didn't like the green on green and I still hadn't found the missing pastels and the sun was setting fast.

I told myself I would find them on Tuesday.  Yes, Tuesday would be good.  But when I got home from physical therapy and still could not find them I pushed it off until Wednesday.  Fixation!  I came home yesterday and sat down at the dining room table where I have my laptop and Silhouette set up and was trying to think what I could do to add that color instead of using the pastels and thought about maybe using my Prismacolor pencils which were there behind my computer.  And guess what I found?  Under the box of pencils was ............I'm sure you guessed it............ my pastels. 

So I ran upstairs and started futzing around with them on the back of the overly and, well, I didn't even like it.  Fixation!  Determined to have that blue ivy look, I grabbed a sheet of Not Quite Navy paper and ran back downstairs to cut that out.  Well, when all was said and done, I looked at the clock and it was 5:56 and even though I had the computer on, I knew I would never get the photo taken and uploaded in time.  So I blew the deadline, but I took my time adding some more details on that card like the glitter gel line around the sentiment piece and the card base (which my friend Sabrina does beautifully but I haven't mastered yet).  And then I didn't just want to discard that image that I had spent so much time cutting out so I looked through my embossing  folders and in 5 minutes that card was done. 


If I hadn't been so fixated on finding those pastels..................................................