Tuesday, May 31, 2022

End of May Round Up

Here is Mr. Blue hanging out on the worm feeder.  I was weeding in that area and got a pretty good view of him.  Mrs. Blue is still tapping on the windows.  Can't figure it out!


GS1 and GS2 at GS2's birthday celebration.  6 and 3 - halfsies.


The irises are blooming.


And I tried another Dorset button.  I fiddled around with a smaller button form and the sunflower pattern in a different color scheme.  


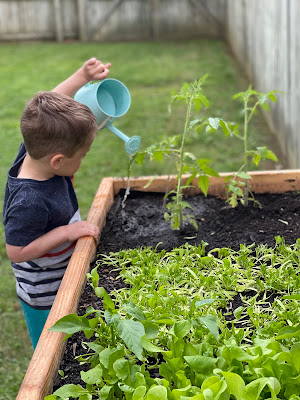
GS2 watering the tomatos that Papa started from seed and were planted in their raised bed planter.


GS1 playing goalie on a very hot Saturday morning.  


Wild geraniums in bloom.


The striped bass that HWNSNBP caught and released Saturday morning.  


Looks like a skyscraper, but no, it's Old Barney under there undergoing renovations.  The estimated time of completion is October - hoping it to be in time for the Lighthouse Challenge.


Looking up at lunch on Sunday.


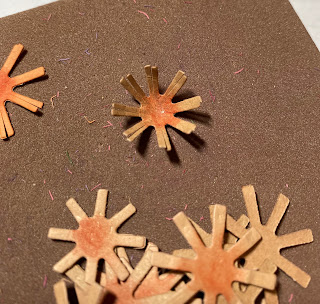
Getting ready for ICAD with my title card for this year.


Wednesday, May 18, 2022

Clouds and Flowers and Birds, Oh My!

I've been doing a lot of weeding this month and spending a lot of time looking down.  And while there are interesting things that I find in the rocks and beds surrounding our property I have to take a break every once and a while and remember to look up. Usually the birds attract my attention with their antics, but on this day it was HWNSNBP who alerted me to look up over my right shoulder because our neighbor was cutting the grass and I hadn't heard the sound of the balloon in the sky very nearby - the first of the season.


And when I looked over my left shoulder I couldn't believe the clouds.


And closer.....


and closer......


and further away .....  Can you spot the plane?


Two minutes later they were gone - all piled together.

Over by the garage the brunnera are in full bloom.


So are the barberry bushes.  Those yellow flowers are always a surprise to me.


There are several clumps of wild geraniums scattered about.  Some consider them weeds but I let them thrive hoping they'll spread some more.  The flowers don't last long but they're so pretty bouncing in the wind.


And this combination really caught my attention.  The forget-me-nots have been outstanding this year and very prolific.  This is the new poppy that we added to this bed and I love the contrast in colors of the poppies themselves as well as against the blue forget-me-nots.  


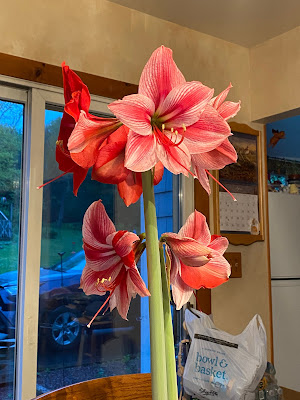
And look what HWNSNBP found in the basement a couple of weeks ago that decided to bloom.  Two stalks opened at the same time.  On the top stalk the two blooms left of the center one are solid red while all the others are striped..... very unusual.  


And here's a bluebird update.

Five eggs were laid, the last one on April 12th.


On April 27th they hatched.  This was taken a couple of days after hatching.


And this was the last picture taken the week before they fledged.  We came home on Saturday and they had all left.


But curiously, a few days before that and right up until Monday of this week, the female bluebird was acting very strangly.  She kept fluttering around and into the windows of the dining room.  


She had me really worried that she would hurt herself by hitting the window too hard.  She would grab onto the screen or the door handle and perch there intermittently.  There were mealworms in the feeder and we even put some live ones in the planter outside the window to see if she was looking to be fed, but she kept up this behavior even after that.  She finally stopped when I put some cardboard and wrapping paper along the bottom 3 feet of the windows.  It's been a couple of days since she's been here so I'll remove the cardboard and paper and see if she returns.  


And I'll circle around back to looking down and say I had a big Oh My! last night when I went to get my little gardening trolly that I sit on when I weed.  I heard some rustling in the leaves that had collected against the house and what we refer to as the well cover though the well is no longer under it.  It only took me a moment to realize that it was a snake.  I can't tell you what kind it was but it was patterned. I did not see the head or tail, I just yelled to HWNSNBP that there was a snake there.....several anxious times...... and quickly left the area.  By the time he got there, it had burried itself in the leaves again and he questioned my outburst but he had brought a shovel with him and started moving the leaves around and there it was.  I had my phone camera at the ready, but before I could snap a picture the snake decided to check out the house and slithered up under the fascia board beneath the siding.  The back of our house is very low to the ground being on a hill, so the fascia board is almost on the ground giving the snake a very short distance to get to it.  And it was gone......into the house.......who knows where it is now.  HWNSNBP doesn't believe that it got into the house, but I am not so sure.  The mice get in somehow and I reminded him of the awards banquet that we had attended at a banquet facility when Rachel was in high school where everyone in the audience could see the snake slithering around in the plants that were above and behind the head table.  In the 43 years we've lived in this house I've never seen a snake - salamanders, toads, turtles and all sorts of mammals and birds, but no snakes ..... until now. 

Jingle Belles - Winter Grays

This fortnight our lovely Jingle Belle hostesses have given us a photo inspiration challenge and they've asked us to stay true to the color palette of gray (or silver), pink, and ivory (or white).  This is a gorgeous tray of cookies and there is a lot of inspiration there.  


My card is not photographing too well this evening - it's hard to get the true colors, but the card base is light gray and I've used a shiny silver washy tape at the top and bottom with a dark pink glitter washy tape over that.  The giant pink rickrack was a die cut I haven't used in ages.... probably a decade.  I was even surprised that I remembered I had it.  In the center is a strip of pewter washy tape.  And the dark pink die cut tree is centered on a dark pewter glitter tag I had gotten at IKEA a couple years back.  The little bow on the tree was a giveaway (along with 4 other colors) from a stamp order I had recently received.  


The gray is a little more truer to life below, but the pink is off.  Oh well, I tried.  Not sure I'm feeling the love for this card as it is right now.  


Okay, now I'll be heading over to the Jingle Belles blog to check out all the other winter grays.  You can join me by clicking here.  

Monday, May 9, 2022

Another Different Kind of Button - Dorset Buttons on Hooray For Buttons Day

It's Hooray for Buttons Day and I've tried another type of button this time - Dorset Buttons.  This is my first finished one - a sunflower button and below are some of the steps in creating it.


You start with a ring and in this case I have a wooden ring that I sent away for from Gina-B Silkworks in the UK.  I also got some of my pearl cotton thread from there and splurged on the button making kit that they had as a birthday present to myself in March.  The products are great - the only drawback was the shipping time.  It took almost a month for me to get my package.  

I followed the instructions for this that I found on YouTube.  They were very easy to follow along.  You mark the ring into 20 sections to begin and then wrap the threads of your base color.  I then put the ring on the clip so I could use both hands to knot off the thread on the back.  


The second color was wrapped according to the pattern instructions.  Kind of looks like a thread spirograph at this point.  Again it is knotted off or you can thread the end of the cord and weave it into the back to finish it off.


With the third color, small gathering "stitches" were made at certain intervals to define the sections that will be used for creating the petals.


The petals were created by doing a modified chain stitch which was then subsequently woven to the center.  Sounds harder than it is.  Again the YouTube was very clear on how to do this.


Green chain stitches were added for leaves on either side of the first set of petals and then the top set of petals was added making them just a little bit looser so they have some dimension to them like real flower petals would.  The spaces between the original wrapped threads on the ring were filled with variations of threads using the button hole stitch with the edge turned to the backside rather than on the outside edge of the ring.


The extra yellow thread that was added was a simple wrap around in the appropriate space.  Maybe you can see it here on the back.  


The center is filled with brown French knots.

The second one I did below uses another shade of blue thread in the outside ring and I made the petals a little wider (which I'm not sure I like as much).  


Believe it or not, these actually took less time to do than the Yorkshire buttons that I tried a while ago.  I have pinned lots of samples for these and bought a book and more thread (I know, more craft supplies!!!) to try some more of these.  What can you do with them - you can add a pin backing for a nice little brooch, frame them, or use them as ornaments.  

And on another note - today is also Lost Sock Memorial Day and you should remember - better a lost sock fall out of your pants in public than a pair of yesterday's underwear.  

Saturday, May 7, 2022

Happy Mother's Day, Flower Tutorial (Picture Heavy), and a Recipe

Happy Mother's Day to all the wonderful women out there who nurture, care, and love us.  I didn't make any cards this year.  But I did put a little something together for my Mother and Godmother.  These little pre-made bags were decorated with one of the die cut paper zinnias so I thought I'd share how they're made.


I die cut the pieces and put them into a mini muffin tin like this to keep them sorted.


The first step is to add the pan pastels to the appropriate pieces on the teflon matt from the tool kit.  I've learned to be a little heavier with this because in handling them to put them together, some of it rubs off on my hands. I just use a make-up applicator to do this.  


Then I use the sponge matt and this tool to shape the petals by pressing down from the tip to the center.


See how it curls as you apply pressure.


Then I use this medium stylus tool to shape it even more.


Gluing the petal pieces together is next.  Gluing is done on the teflon matt. I use Tombow quick drying paper glue.


Then I prepare the stamen pieces by using the pan pastels again to give them a little more interest.


I use a small scissor to snip those stamens in half.


Then the stylus helps to cup them.


The leaves are scored on the felt matt.  First the center line and then turned over for the diagonal veins.


The little florets are cupped using the smallest stylus tool on the sponge matt.


I fluff up the stamens and glue them onto the petals.


I prefer to use my own regular tweezers to adhere the little florets to the stamens.  The tool kit has a nice pair of reverse tweezers but I have more "muscle memory" with the regular ones so I use them.  I just gently touch the floret to the glue blob (tacky glue used here) and place them onto the stamens.


They don't have to be perfectly straight and it's better not to use too much glue or they'll slide all over the place.


I add a couple of the leaves to the back of the flower and there you have it.


Now, what was in those little bags?  Biscoff Blondies from Savvy Bites.  Something new that I decided to try.  They're supposed to be able to be made in one bowl, however, the recipe was written in grams so I had to resort to measuring all my ingredients on my scale which I was lucky could convert from ounces to grams, and that meant more bowls were used.  (Thank goodness for empty Cool Whip containers.  And yes, I was able to account for the tare of the bowls when I measured.


Preheat the oven to 350º.  
Prepare a 9 x 9 pan with parchment paper.
Mix together:
350 g light brown sugar and 2 eggs
Add 225 g of melted salted butter (cooled a little)
Add
285 g of regular flour - batter will be very sticky
Spoon batter into prepared pan and smooth out
Measure out 100 g of Biscoff spread (reg. or crunchy) and drop that by tbsp. onto the batter
Take a knife and swirl it through the Biscoff spread (like you're marbling it)
Sprinkle about 50 g of crumbled Biscoff cookies over the battter
Bake for 25 mins. or until a knife inserted in the center comes out clean.


If you like fudgy brownies you will like these.  They have a fudgy texture - I think the crunchy spread would be good for these but I got the smooth.  Biscoff spread is often used in place of peanut butter for those that have nut allergies.  The cookies and spread have a caramel and cinnamon flavor.


The original recipe says to cut into 9 pieces.  I cut mine into 12 and think that they could be even smaller given how rich and fudgy they are.  You can also add to them - chocolate or nutella would be nice.  HWNSNBP had a taste and said they were okay - this is good coming from a man whose favorite flavor is vanilla.