Showing posts with label Christmas Card Challenges. Show all posts

Monday, October 21, 2024

Jingle Belles - One More Pink Christmas

Well, I made it back with my second card for the Jingle Belles Pink Christmas challenge.  I have some die cut stitched flowers that I thought resembled poinsettias.  They have tiny seed beads stitched in for their centers.  There is some pale pink ivy trailing up the side of the screen.  While I was looking for a sentiment to add, I also came across this dove die from The Greetery that I hadn't used yet. 


A closer look at the stitching and centers.


It was a little precarious adding the stitching to these flowers and leaves.  Where the petals attach to the center it is not very sturdy and I had to be really careful not to tear the petal from the center.  The floss appears white in the photo but it is the same shade of pink as the die cut ivy.  There are three shades of pink cardstock used for the main elements which is why I opted for a white background.  I had so much pink paper out I decided to use it for a birthday card I'll be posting after I get the card to the birthday girl.  I enjoy all of the lovely fall colors but it is nice to have that pink in October too.

Please click here to visit the Jingle Belles and see all the beautiful pink cards.  You won't be disappointed.  

Tuesday, October 15, 2024

Jingle Belles - Pink Christmas (For the Cure!)

Maybe it's the dropping temperatures, or the leaves changing, or, more likely, HWNSNBP's worrisome prodding that I won't have enough Christmas cards made that sent me up to the stamp cave to make sure that I got going on the latest, and one of my favorite Jingle Belles challenges.  It's October, or Pinktober to some, and that usually means that the cards are going to be predominantly pink.  Lauren and Steph have a tradition of making a $2 (apiece!) per card donation to the Breast Cancer Research Foundation and this year they are continuing that tradition.  

I recently got some dies that I thought might work well with the pastel pink colors for Christmas.  There is a bit of simplicity to this card, but I thought the bunny was so sweet and I know exactly who is going to get this card.  My PT has a pet house bunny so I think she will appreciate this. 


We've had a couple of frost warnings the last few days and the daytime temps have dropped enough for HWNSNBP to turn the heat on should we need it if the house becomes too cold.  He's starting the yard clean-up and has deposited several loads of leaves at the edge of the street so they can come and vacuum them up.  They usually do that several times right up until the end of November which is a good thing because we do not have a shortage of leaves.....ever.  Yesterday, since the lower stems and leaves of the tall zinnias were all brown, I asked him to pick the last of the blooms and he brought those in along with some of the last of the dahlias.  They greeted me on the kitchen counter this morning and I can see them in the sunlight from where I sit to use the computer.


I've got another card almost finished for the JB challenge - it needs a sentiment to complete it and I will be able to share it soon.  In the meantime, should you want to check out the entries so far just click here.  You will not only see what the challenge participants have done so far but you will definitely be treated to the always gorgeous work of Lauren and Steph.  And if you're a card maker, there's another 8 days left to come up with a pink Christmas card.  I know you can do it!

Tuesday, April 23, 2024

Jingle Belles - Peace on Earth Day

I think I must say this every year, but this is one of my favorite Jingle Belles challenges.  Goodness knows I have a plethora of items that I know most think I'm crazy for saving.  But sometimes there are just such pretty or unusual wrappings or packaging that I feel need at least a second chance at life.

So when I ventured up to the stamp cave, I did have to settle for what was within arms reach, but I didn't come up empty handed.  Instead, I found enough bits and bobs to put together three cards for this challenge.  

This first one uses a tag (Rudolph) from a notepad that I had bought as a Christmas present for one of the grandsons.  I layered it onto the red rectangle and that onto the printed rectangle that both came from a box of Christmas tea.  (The print was actually in the inside of the box.)  There were a couple of pieces of paper doily in the scrap box that fit on each end and I added a microbeaded wreath sticker.  I chose the turquoise card base to pick up the color from the tag.


The next two cards have motifs that were cut from cards that we had received.  The church scene had a silver frame and I found a gift bag in the dark blue with silver stars that I thought would be good to mount it on.  The "peace" sentiment was diecut from the silver insert of an envelope.  It's hard to see that those silver snowflakes are metallic on the backing, and the ones surrounding the church are glitter.


I saved this trio of trees from another card and mounted them on a strip of flat gold paper that I think came from the inside of a candy box.  Put that on a shiny gold card base and added some jewel sticker strips above and below.  The gold-edged mini green ribbon is a scrap found in the ribbon scrap bag.  Funny how the picture makes the card base look flat and gives more of a shine to the flat paper.  That's not a smudge at the bottom, just a light reflection.  


Now I have to chose which one of these to post on the JB blog because I put them all in the same post - I guess you'll have to click here to see which one I decided on.

Three cards doesn't yet catch me up on the challenges I missed over the last month, but that may happen over the next month or so as I'm getting more and more mobile.  

Saturday, February 24, 2024

Jingle Belles - Text Me

Jumping in with my cards for the Jingle Belles Challenge of using Text as the star.  I found some red and green texty background in my stash for the layers and this new-to-me die that features "Merry Christmas" in the scroll.  I decided to add in that piece of green and gold ivy paper behind the die and used some matt gold paper for the frame of the die.  I decided to use the red texted paper for scroll portion of the die and highlighted the sentiment by using shiny gold paper for the letters.


The shiny gold paper became an inlay and I had to remember to keep the little centers of the e, a, and r's to be able to close up those openings with the red scroll also so I saved those red letters when I die cut the red trying not to have them pop out in the process at that point.  I will say that this was easier to do by adding two sided tape to the back of the gold before die cutting it.  That made those letters into stickers and no gluing was necessary.  But those centers only needed a dot in the opening so I was able to  lay the red letter over the top and use my needle tool to just press the centers into place.


And since I had the ingredients out I did two of them.


I was looking something up on my Christmas card list yesterday and noticed that part of the file had become corrupt.  It was fine several days ago.  I keep my list in an excel spreadsheet and I usually add a picture of the card that I send to each person/family so I don't duplicate anything year-to-year.  It also helps me when someone tells me they love what they got so I know what they like and can work with that in the future.  So I was very upset and annoyed when all but three of the pictures that I had copied to that file for last year all had errors in them.  My resident excel expert was consulted and he couldn't explain what happened, why it was happening or how to fix it.  To top it off, in my process of doing this at the end of the year, I take a picture of each card with a little post-it note attached and then, after I add it to the spreadsheet, delete the picture from my phone and computer.  Thankfully I had forgotten to delete them from my Amazon photo storage, otherwise I don't remember who got what.  We did determine that I could copy and paste in a different way but it involves a lot of resizing which takes more time...... but I will get it done eventually.

At this point I have 7 Christmas cards finished and will probably be taking a break from card making for the next few weeks because I won't be climbing the stairs to the craft room for a while and I dare not send HWNSNBP up there to find anything.  (I may have said that before in a previous post - sorry - it is playing on my mind.)  

If you want to check out all the other texty cards on the Jingle Belle blog (and you should really, because our hostesses have made some beautiful and clever samples) click here.

Tuesday, February 13, 2024

Jingle Bells - Rudolph the RED Nosed Reindeer

What's right in front of Rudolph's eyes?  His red nose of course, and if he takes a look at the Jingle Belles challenge for this fortnight, he and we will be seeing a lot of RED.  Yes, our cards have to be predominantly red.

Lucky for me I happened to have these stacked gnomes on my work table that happen to be mostly red and were just waiting to be used.  I sorted through my paper stash and came up with this flocked red and white background paper.  All I had to do was use the dies to cut out the strings of ornaments and the stars.  


I don't know if it was the flocking on the paper or if there was something else in with it, but I got one of those no-see-um things in one of my fingertips after I touched the paper.  I hate when that happens and everytime you put a little pressure on it it hurts.  I tried using tape to pull it out and even tried a magnet, but finally got it to stop after I ran the blade of my scissor over it.  I've gotten metal filings in my fingers before from dies, but I wasn't working with metal so I wonder if that flocking had something to do with it.  For now, I'm not going to handle that paper too much.

Time to go and check out all the red over at the Jingle Belles blog now.  You can too by clicking here.

Wednesday, January 31, 2024

Jingle Belles - Something Old.....Something New and a PSA

This fortnight the Jingle Belles have challenged us to use something old and something new.  I procrastinated going into the stamp cave because it's been such a mess even more lately as HWNSNBP has been trying to help with the purging of lots of accumulated stuff on the shelves we have in the hallway up there to make room for me moving unused stamps out there freeing up some space next to my craft table.  We have a significant amount of books that we no longer feel the need to have around and have donated them, but I drew the line at my collection of Christmas craft books that I have a series of and anything else art related that has actual patterns in them because the internet is good for searching but you don't always find patterns for what you see.  Anyway..... let me get to what I actually did for this challenge.  

I was lucky to have been gifted the Unity Advent Stamps both last year and this year and thought that I could pull something together with those and also used a new-to-me die and some old paper.  I stamped the images that I chose from each set, colored them with alcohol markers and fussy cut them to pop up in the openings on the stamp frame die.  The cancellation stamp was also from one of the Advent sets.


I've got to make more time to get up there to reorganize things before my surgery next month, so I can get to things more easily once I'm able to get back to working up there.  Looks like there'll be a lot of boxes for donations in the next few weeks.  It's a good thing.

Oh, and my title for this post did include a PSA.  While putting our Christmas decorations away we usually take the batteries out of things that have batteries in them and there was a set of lights on one of the little trees that I had that we emptied.  It was a lucky thing that when I took them out of the device I put them on the rubber cutting matt I have on the dining room table and not directly on the wooden tabletop.  It was later that evening, when I was working on my laptop and HWNSNBP was already upstairs when I heard this loud pop and hiss.  It was loud enough to make me jump and for a minute I couldn't figure out what it was until I looked a little past my laptop and saw this.......


One of the batteries had had a little explosion and was leaking onto the matt.  So I was luck in that it was on the matt and lucky that it happened when I was awake.  If we had left it in the light set it would have been even more of a mess.  

Now I'm off to see what else is old and new with the Jingle Belles.  You can too by clicking here.

**Edited - don't know why the link at JB only allowed a partial view of my card this time, but the whole thing is visible here.

Tuesday, January 16, 2024

Jingle Belles - Wrap It Up!

Well, I haven't wrapped up my posts about December yet but our Jingle Belles hostesses are looking for a different kind of Wrap Up for this first Jingle Belle Challenge of 2024.   We're to use wrapping paper in our creations.  It can be fresh or repurposed and I went for the latter having rescued some favorite paper from being recycled or tossed.  I paired both of these cards with this new dala horse die that I found in my stash.  The first uses the geometric version and the second uses the traditional "kurbits" style and floral elements (yes, I admit I had to look that up).  Mostly you'll see dala horses in red, but they can be of other colors.  Green dala horses were carried by Norsemen to ward off evil according to legend.


Our hostess Lauren had a great hint about using wrapping paper.  She suggests first backing it with plain cardstock that you run through the Xyron before you fussy cut around it.  I wasn't fussy cutting the paper, but I thought this would also help when using the thinner wrapping paper as a background.  I cut a piece of cardstock to the size I needed for the snowflake background panel and used my roll of extra-wide double sided tape to make it stickable.  After I stuck it to the wrapping paper, I trimmed around the edge and it worked so well, much better than trying to add that tape to the back of the wrapping paper by itself (which I did with the floral paper and almost lost it).  Next time I will try to remember to use my Xyron instead of the tape.   

I have some other papers saved but I won't be getting to it before the cut-off for this challenge so I'll hope that they will fit in somewhere down the road in 2024.  This is a good start though.  Now I'm off to check out the other wrapping paper wonders on the Jingle Belles blog.  You can too by clicking here.


Tuesday, November 28, 2023

Jingle Belles - Banner Inspired Holiday

December is creeping up on us and there is just enough time for me to get in my card(s) for the last official Jingle Belles challenge of 2023 - using their blog banner for inspiration


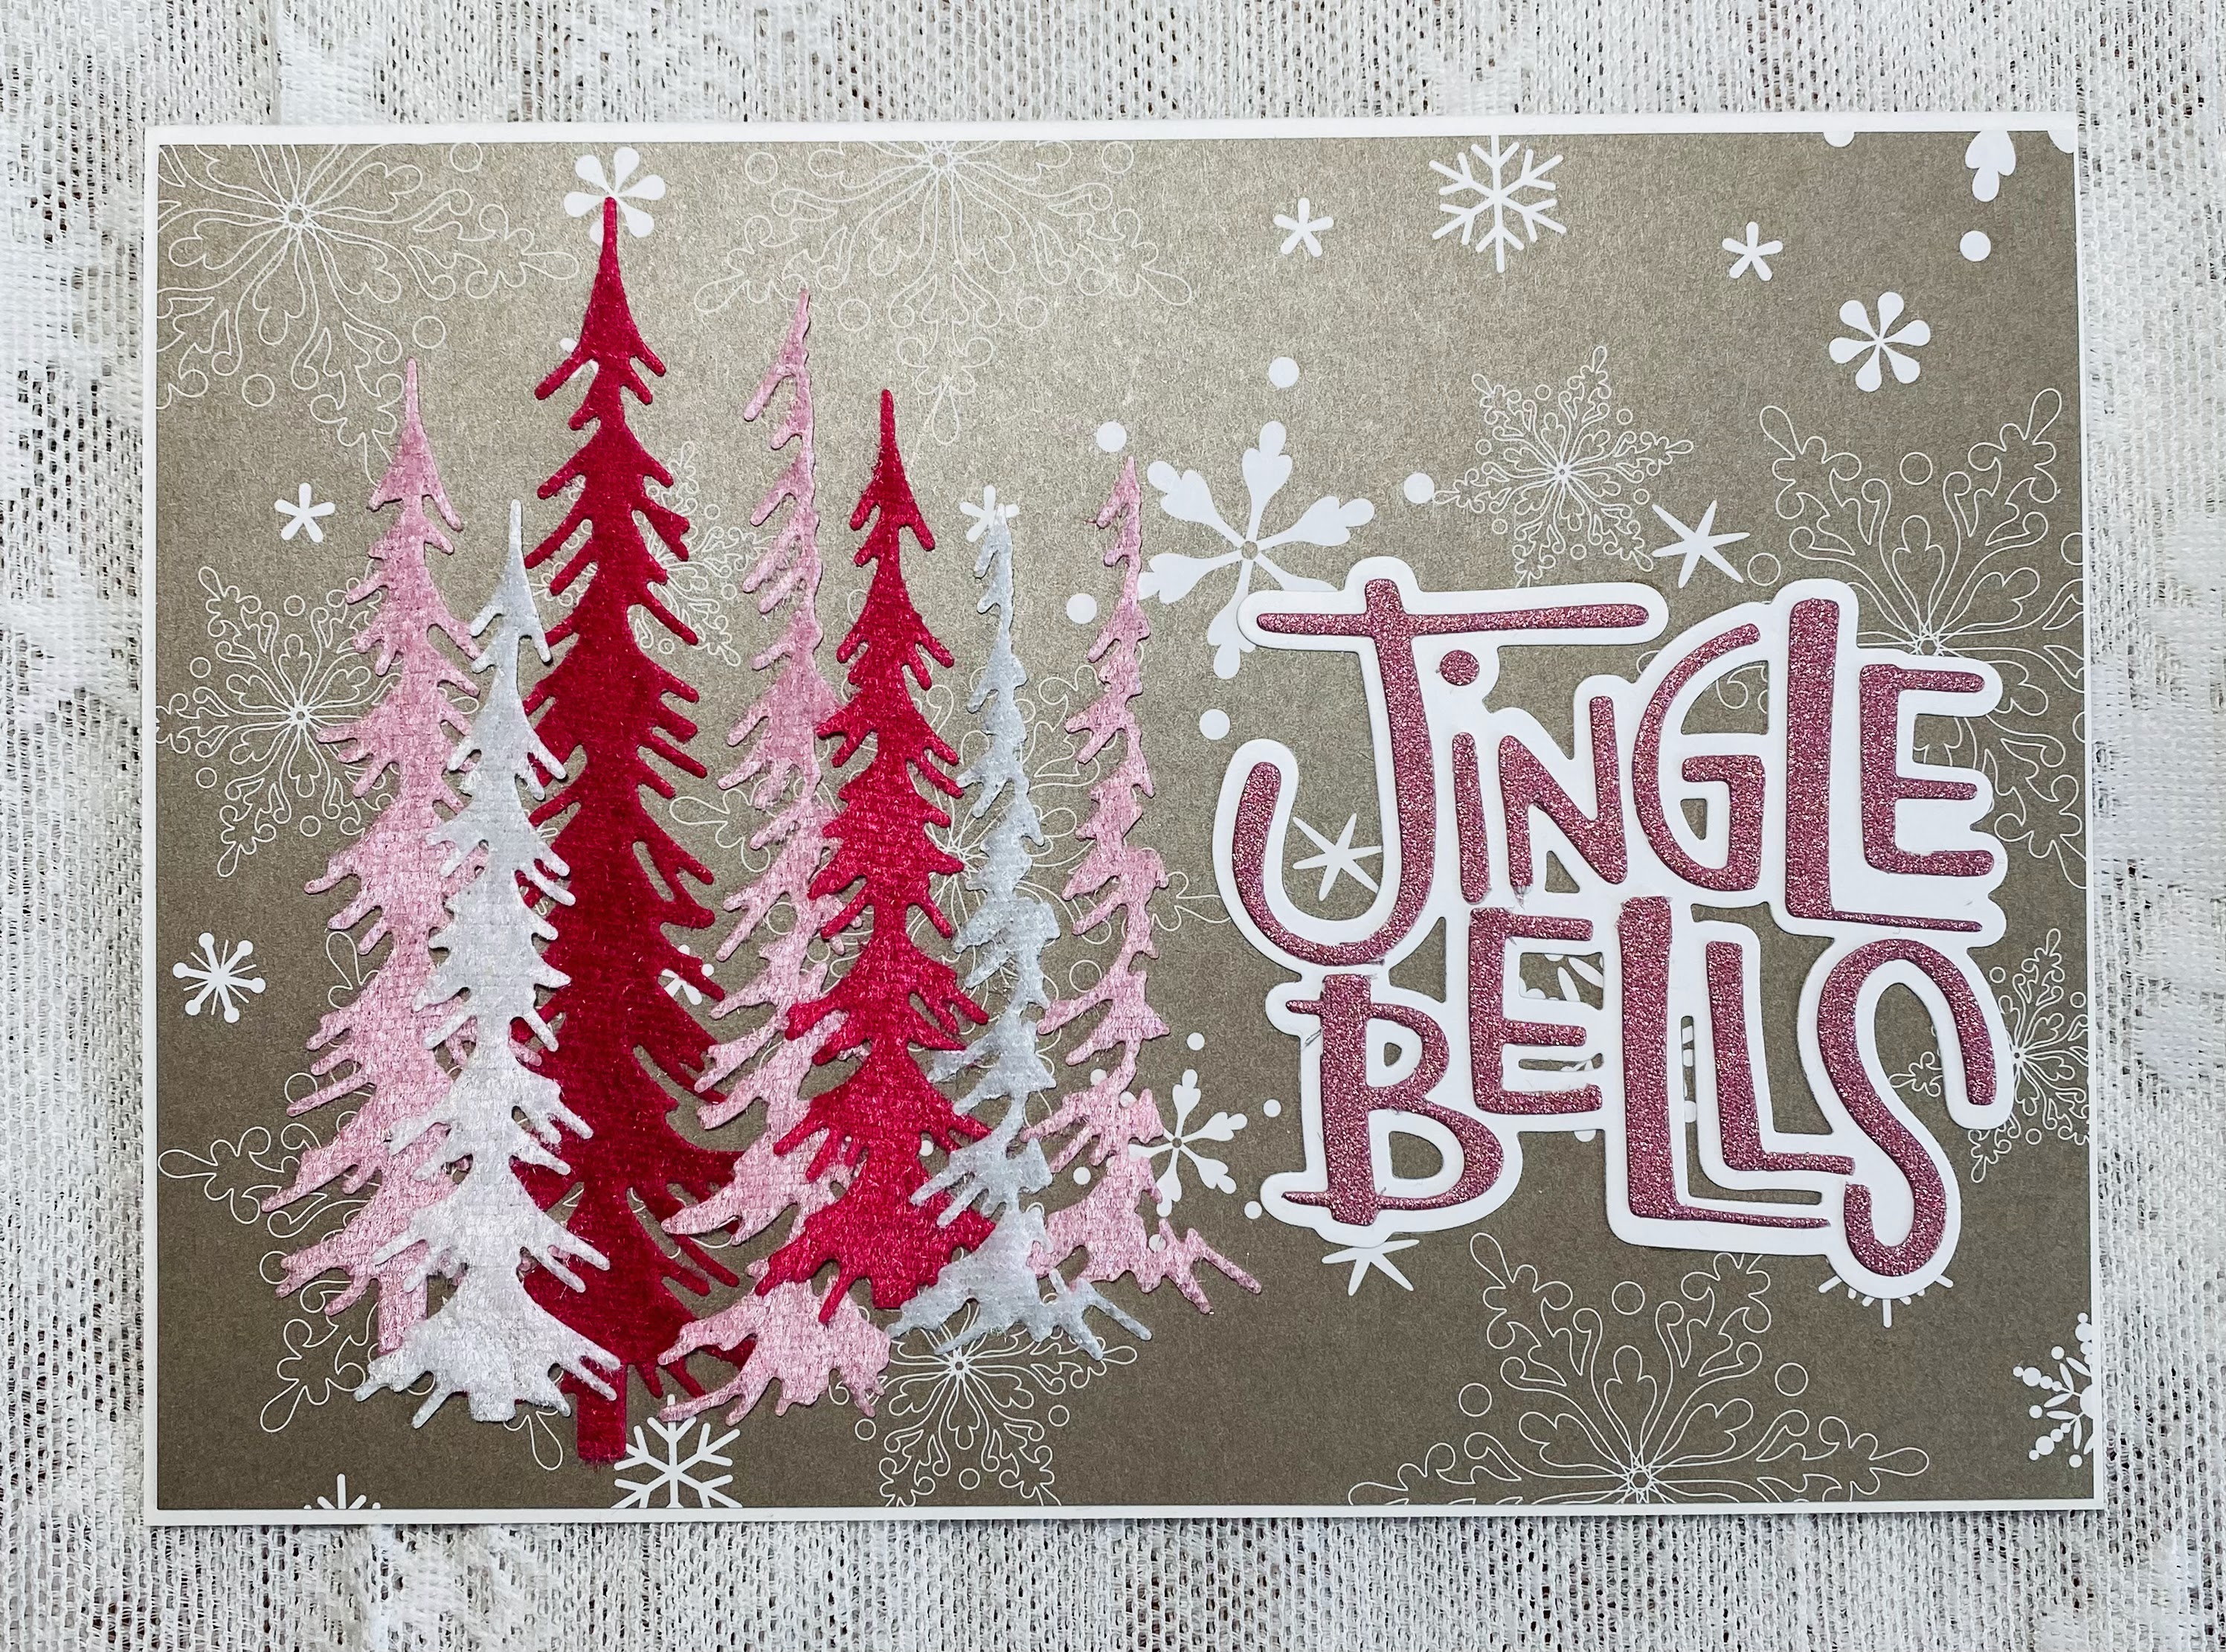
Would you believe that I have been thinking about this since February?  Yes, it's true.  I was shopping in $Tree back in February and saw that they had rolls of what I call velour ribbon in two shades of pink and also in white and it immediately reminded me of the Jingle Belles banner.  I must have been working on a challenge before I went there to have it so fresh in my mind.  But the wheels started turning......I'm sure if thought bubbles were real, you might have seen them flying around my head.  How could I use those ribbons to make trees?  Could I cut them out of the ribbon?  Probably.  Could I maybe use a tree die?  More likely.  Do I have a tree die?  Seriously(!)  Surely I must.  Those ribbon rolls were so enthusiastic they jumped right into my cart.  And then were stashed away until November at which time it was necessary to start producing some more of those thought bubbles.  


I found a tree die set that I thought I could use and started playing around with it.  The first thing that I knew I had to do was to add sticky paper on the back of the ribbon because the tree limbs were very delicate and plentiful and it could become messy using bottled glue.  Then I proceded to die cut them with the die on top of the fuzzy side.  I ran it through the Big Shot several times to hopefully get through the ribbon and the paper backing but it didn't seem to get through enough for me not to have to also use a scissor to cut it.  Then a lightbulb joined the thought bubbles and illuminated the solution for me...........it's a tree.....it doesn't have a right or wrong side...........cut through the paper and see if that works.......so what if it's a little smushed.  Well, lo and behold, I should have turned that light on sooner because it sure did enlighten me.  The only thing that I regret is that I tend to be so frugal with my supplies and tried to fit as many trees as I could on a piece of the ribbon that I did not take into consideration that the ribbon had a nap to it and cut my trees out in both directions.  So you may or may not notice on the card that those of the same color look different if they were cut out in opposite directions.


I sorted through my stash of paper to try to find something suitable for the background and came up with two possibilities.  The top card has the large chenille-like snowflakes already as part of the paper pattern but I flipped the trees and sentiment.   The one below has a little darker background with some preprinted white snowflakes already there.  Both have the Jingle Bells sentiment cut from pink glitter paper and added to a white word frame.  See how the dark pink becomes even darker just because the nap is the other direction.  You can see it too with the white trees on the bottom card.  


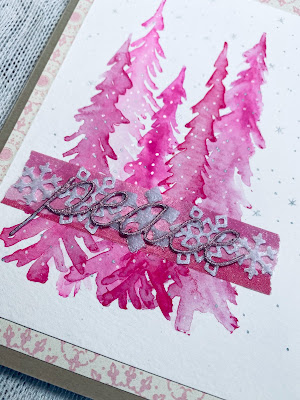
Whilst I was working on those I had another thought bubble escape.........there's always a late comer.  I had been seeing some artists on IG using things like cookie cutters, jar lids, and TP tubes to print the shape onto watercolor paper by first dipping or painting on the edges of the shape and stamping that onto the paper.  Then they take a wet paint brush and pull in the paint to the center of the shape giving it that watercolory effect.  Hmmmmmm, could I do that with a die?  It was worth a try.  So I set myself up to paint the raised edges of the die and press it down onto the paper.  The results were eh.  There wasn't much paint that transferred but I still used the paint brush to catch what I could and make the shape look like a tree.  I recently had brought home my old heat gun from the condo and used that to dry each tree before going onto the next one so they all didn't puddle together.  Tree shapes are very forgiving because they are all different and sometimes wonky.  I chose a different background altogether for this going with the pink vibe and added a swatch of tri-colored washi tape near the bottom of the trees. 


Then I listened to some more bubbles and found some small snowflake dies and added them on top of the washi tape.  And as if that wasn't enough, I die cut "peace" from the pink glitter paper and added that on top of the snowflakes.  White gel pen and a silver marker added snowflakes and stars. It's one of those cards that is better appreciated IRL.  

Well, there you have it.  The last of the Jingle Belle challenge cards for this year.  I do so appreciate having this challenge throughout the year to keep me somewhat ahead of what I need to have prepared for the holidays.  It makes it so much more doable and a lot less frustrating.  There were a number of challenges I didn't get to this summer because of one reason or the other, but I always try to keep that goal in the spotlight and will continue to do that again next year.  Hopefully, our Jingle Belle hostesses will be back in January with some fun challenges for the new year, and it's a leap year so we'll even have an extra day!  Thank you to Lauren and Steph for all their time and effort to make our Christmas cardmaking more fun!  

Wednesday, November 15, 2023

Jingle Belles - Hard Candy Christmas

Time for some sweetness on those Christmas cards say the Jingle Belles.  Our cards are to feature a favorite candy, cookie, or any sweet treat that we like during the holidays.

It's always a treat for me to go for tea at the holidays but this year my favorite tea house is temporarily closed.  That didn't stop me from putting together this gingerbread teapot for my sweet contribution though.  I even added a couple of sugar plum jellies (and used some very ancient glass beads on them).  The sentiment comes from a Neat and Tangled stamp set called Holiday Baking.


And I did manage to squeeze two of these in.


I also started down another rabbit hole the other day with some Christmas cupcake wrappers that I picked up at $Tree.  They make a cool honeycomb ornament with a little folding and some glue.  

You've got to flatten them first.


Then fold them in half.  (Note - I refolded them the opposite way after I decided that I wanted more of the pattern to show as opposed to the inside.)


Refolding in process.


I've omitted the step where you run a line of glue down the center in the same direction you see these two lines.  I made a "jig" with register marks on a scrap piece of paper to know where to run the other lines of glue.


You glue all the pieces on top of each other until you get.....


You need to add a length of ribbon or twine in the center for a hanger before you glue the sides together to get the ball.  I'm still working on that step.


I think left open they would make a nice package decoration and the mini liners might make ornaments that were smaller to hang on a tree.  These make a 4 1/2" ball.  

We're nearing the end of November and that also means that the Jingle Belles challenges will be coming to a close for this year soon.  The goal has always been to have all your Christmas cards made before December so you don't have to fill your time with making them and instead enjoy December.  I haven't done all of the challenges again this year, but I did plan ahead a little and made duplicates of some of the cards as the year progressed.  Still, I am short of what I need so I'll be doing a little catch-up but will be sure to post as I go along with them also.  

Time to check out all the other sweetness that has been shared for this challenge at the Jingle Belles blog.  You can too by clicking here.

Wednesday, October 18, 2023

Jingle Belles - Pink Christmas

The yearly pink Christmas challenge is on again at the Jingle Belles blog.  I do like this one and have tried to carve out some time to get this card done.  My inspiration came from an ad that came up in my FB feed for a piece of jewelry I thought I could do something with.


I did a rough sketch on an index card and proceeded to the stamp cave to start playing around with my punches and pink cardstock.


Here are the punches that I used on this nutcracker.


And here's my bejeweled nutcracker card.  It's a slimline card with a simple diecut sentiment.


With a close up so you can see the sparkle a little better.


Our lovely Jingle Belles, Steph and Lauren, are once again each donating $2 for every card done for this challenge.  It's so nice to see the gallery so full of pink.  You can check that out by clicking here.

Wednesday, September 20, 2023

Jingle Belles - Merry Sketch-Mas

The lovely Stephanie has provided a sketch for this round of the Jingle Belles challenge.  I'm once again squeaking in under the wire with my card.

Here's the sketch - 


I found this die on my work table while I was working on a birthday card that I need for later this week and remembered the sketch I had seen on the JB blog using a hexagon.  The physical die actually has the straight 6 sides to it but when you cut it out you get the snowflake.  I used some gold metallic thread to add the stitching forgoing beads at this time.  We were having work done in our basement today involving jack hammers and a lot of noise and doing this "embroidery" on paper helped keep my sanity a little closer to normal (for me at least).  I did two of them and then I had to decide what other elements to add to conform to the sketch.  There was some trial and error involved ..... taking more time of course...... and then I thought I had misplaced the second snowflake and spent a good amount of time searching for it before I found it in and amongst the other pieces of the cards that I was going to complete all along.  The little town scene in the circle cut is from last year's Unity advent calendar and the sentiment is from an old Stampin' Up set.  I struggled with the embossing of that sentiment because I didn't use the fine embossing powder the first time and it was very broken up.  Luckily I had been using my Misty and hadn't removed the stamp from the lid yet and was able to add more VersaMark ink and emboss it again with the finer powder.  I think it still doesn't show up too well against the dark green background paper, but I'm letting it ride this way.


I hope to be back on track with the JB challenges for the next several months and may go back and do a few that I missed so that I have all the cards that we'll need.  This summer has been busy with family events and life changes that I'm still trying to adjust to, but hopefully more arting will be in my future to share.  Please check out the Jingle Belles blog by clicking here to see all the other wonderful creations.

Wednesday, May 31, 2023

Jingle Belles - No Stamping Christmas

Despite the huge amount of stamps that I've accumulated, I often find myself making cards that don't involve much, if any stamping, preferring to put handwritten messages on the inside.  So this Jingle Belles Challenge to make cards without any stamping is right in my wheelhouse.  I should have been able to crank out a few cards for this one, but I'll squeak by with these two as family events and an inconvenient sinus infection have taken me in another direction lately.  


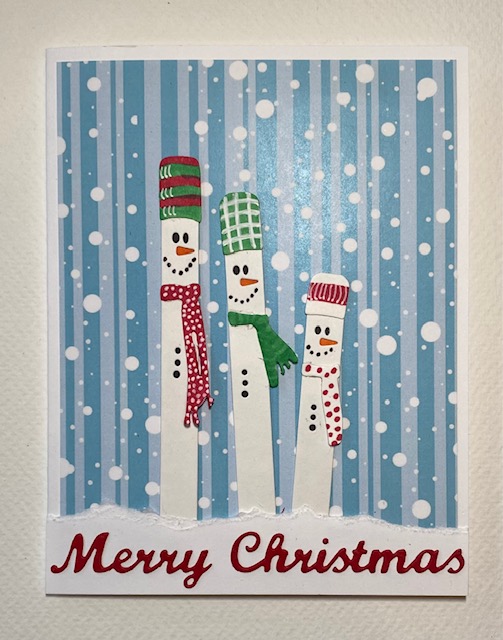
The snowman die came from Kokorosa and has seven snowpeople, seven hats, and five scarves in the die.  I kept the die together to run the whole thing through the Big Shot with white paper.  Then I colored the hats and scarves before I punched them out.  The eyes, nose, and buttons are also cut out so instead of trying to keep those tiny pieces in place, I punched them out and cut a thin strip of white cardstock and colored that to add to the back.  I did that in two pieces for each one swiping the orange and black on one piece and just black on another.  I know I could have used plain black paper for the button one, but it was just as easy to do it on the white right then and there.  I left a little space at the top of each of the piece and just added a dab of glue to adhere to the back of the snowman because I knew that I was going to add a strip of double-sided tape to the back of them to stick them to the background.  

I divided my snowpeople into two families to depict our kids and grandkids in their family units.  The die actually reminds me of  the ornaments I used to make out of tongue depressors and popsicle sticks and sold at craft fairs.  Those snowmen had top hats and I wrote the name of the person on the brim of the hat and the last name of the family and the year on a heart that held them all together.  I know I have a picture somewhere but I'll have to come back with that later as I know I'm running out of time posting this.

Please take a look at the Jingle Belles blog to see all the other stampless beauties over there. I'll be adding some love after the sun goes down.  

Wednesday, May 17, 2023

Jingle Belles - Holiday Tic-Tac-Toe

This fortnight the Jingle Belles gave us a little creative game of tic-tac-toe.  Just choose 3 in a row when creating your card.  And here I am last minute again, but I chose the first row down .....


I originally had the die cut in white and was just going to cut the stars off the gold one I had also cut but then decided to use the gold one entirely and I kind of rather like it.  


I just have to find my special eraser to get a little bit of errant glue off that gold paper.  That's what happens when you're in a rush.  

I'll be heading over to the Jingle Belles blog to leave some love for the other creatives.  You can also by clicking here.  

Wednesday, May 3, 2023

Jingle Belles - Holiday Leftovers

Leftovers.  Boy, do I have a collection of leftovers.  And not the kind in the Cool Whip containers in the refrigerator.  These are leftovers from Christmas card making.  They are easy to accumulate - those little extras and scraps.  I could probably do this challenge every week for a year.  But here we are at the beginning of May with the Jingle Belles Leftovers Challenge.  So into the bags and boxes I go.

I found some backgrounds that were stamped like snowfall and the little snowmen that had been stamped, colored and punched out with a circle punch.  In a bag I also found an assortment of die cut and punched snowflakes and was lucky when I dug further in to find a piece of dsp with the snowflake pattern that would cover the bottom of the blue panel that didn't have the snowfall.  Since there were two of the snowman circles and enough of the other elements I was able to put two cards together.


So hooray for all those extras that got to come off the bench and be part of a new game.

Now it's time to see what's been in everyone else's leftovers.  You can check out the Jingle Belles blog by clicking here.

Tuesday, April 18, 2023

Jingle Belles - Peace on EARTH Day (Part 2) Trash to Treasure

I'm back with another card for the Jingle Belles Earth Day challenge.  And I'm using yet another tissue box piece along with that sentiment that was saved from a card that we received and the squirrel which was fussy cut from some wrapping paper samples that I had taken out of the fund raising booklets when I was working at the school.   I put her on a black glittered tag from a set I got at IKEA years ago.  The tissue box panel is framed by a slice of brushed silver metallic paper which isn't showing up as shiny as it is in the picture. 


When I was checking out the other cards yesterday I saw that one of the participants said that she was using some of the scraps that she had "squirreled" away and I thought that that reference was so apropros for this challenge and for my crafting space(s).  I see the squirrels in the fall scampering around and hiding their acorns here and there and I know that there are some that they forget about which become seedlings in and around our property. (One might wonder if they are forgotten or are purposely placed around so they can make sure that they leave a food source for their descendants.)  Well, I certainly don't scamper around here much anymore but it's always interesting when I do get involved in cleaning or reorganizing and I find those "acorns" that have been squirreled away for some sort of craft project.  I know that when it comes time for someone else to clean up what I have left behind that they'll be thinking "what the heck was she saving that for?".  

This is one of the rare times that I know exactly who will be getting this card.  We were with our DIL's parents at GS1's birthday brunch recently and they were telling us about the squirrel that comes to their deck looking for peanuts and will take them right out of their hands.  Our DIL thinks it's only a matter of time before he/she ends up in the house.  I just have to remember to find out again what they told us they call him/her.  

If you haven't checked out the Jingle Belles blog yet you can by clicking here.  

PS - If you check out derrickdowneyjr on IG you can meet his squirrel friends Richard and Maxine.  He is known as the Squirrel Whisperer and is pretty funny.

Monday, April 17, 2023

Jingle Belles - Peace on EARTH DAY (Part 1)

Time to scour the stamp cave for all those bits and bobs that I've been saving relevant to Christmas card making for the annual Jingle Belles Earth Day challenge.  I did a disappearing act from my "downstairs" life yesterday and got busy making up for lost time.  Three cards were finished for this challenge along with 3 birthday cards and a thank you - all which will be posted soon.  But let me start first with these 2.

Both of these use parts of a Puffs tissue box that I had saved.  And both also include backgrounds from wrapping paper that was saved from the trash.  I also found red half pearls in with what was left from a card kit a few years back that fit perfectly over the printed berries on the trees.  I don't mind having to add a layer of cardstock over cards that have these kind of embelishments when mailing them so that they don't get crushed and lessen the chance of the canceling machine tearing them up.  So you'll see that the first one also has some wooden silver snowflakes with white pearls also.


The sentiment for this one was trimmed from a Christmas card that we received.  Who could resist using something that was already embossed perfectly.  The tinsel ribbon covers up a crease in the wrapping paper that I couldn't get rid of but I think it blends well with the other silver accents.  And you'll notice that both cards have a snowflake in the bottom left corner.  I'll let you in on a little secret.......they're there to cover up the part of the Puffs logo that I didn't trim off.  Squaring off the panels from the tissue box was also a bit challenging because of the angles of those trees.


There have been a couple of "technical" challenges lately too.  I've been so frustrated with trying to upload the pictures from my phone to my computer.  Unfortunately the software that's involved doesn't just download the most recent photos from the phone, it takes them all and then you have to pick the ones that you want to add to your albums.  It doesn't help that I have a few thousand pictures on my phone....which are backed up to the "Cloud" which I would take off the phone but it tells me that if you delete it from the phone it also deletes it from the Cloud.  I thought the Cloud was there so you didn't have to keep all those photos on your phone?  Does this make sense?  

It also doesn't make sense to me that even though I edit my pictures on my phone, when I go to download them to my computer, it shows me the original and the edited version.  And, should someone take a picture in "Live" mode, there are multiple pictures and a movie for each one.  I tried turning off the "Live" function when I edit the picture, but it still downloads those multiples which seems to be hanging up the download time.  It shouldn't take more time than e-mailing myself the pictures and downloading them that way but it does.  

Sorry for the rant, it'll all shake out in the end I'm sure, but technology sure can be challenging.  And let me get back to this challenge by visiting the Jingle Belles to see see what other bits of Christmas ephemera have been given new life.  You can join me by clicking here.

Tuesday, March 21, 2023

Jingle Belles - The 12 Days of Cardstock

Well I did make it back with another card before the deadline for the Jingle Belles cardstock only challenge.  My Pinterest feed was sort of bombarded with cards featuring this floating element technique and I was lucky to find a tutorial for it on a blog called Stamp With Lorraine - not me of course.  It wasn't until I started posting this that I saw that the date of her blog post was back in 2021, so I guess this is not something new to the world but just to me.  It did require me to make a sticker with my cardstock strips by adding them to a piece of acetate.  I'm hoping that acetate was fair game to use in this challenge - it doesn't have any pattern to it.  The only pattern that I have here is from the embossed cardstock piece that I found in my scraps which also happened to be chalked up so you can see the swirls.  


You can't tell from my picture that this element is floating - not sure if it's the way it's been photographed or whether the pattern behind it interferes.  Those are green jewels though they look darker here.  I used a Sizzix tree die in white.  This came together fairly quickly and was a nice way to use some of those scrap strips that I've been saving.  I have some ideas for some future cards using this technique.  

Now I really will be off to visit the other cardstock creations posted over at the Jingle Belles blog.  Click here to take a peek.

Monday, March 20, 2023

Jingle Belles - Cardstock Christmas

The Jingle Belles challenged us to create cards without any designer/scrapbook paper - only cardstock allowed.  But it could be die cut, embossed, stamped, torn, etc.  I went the die cut route.  Truth be told, I had these gnomes already cut out and assembled back in January for a previous challenge but didn't use them, so they became very useful for this challenge.  These are the Dancing Gnomes etched dies from Spellbinders.


The card that I made back then had a series of gnomes in rainbow colors and I cut out a lot of extra colors.  These were some of the colors that I didn't use.  They make a pretty cute trio I think.  All I had to do was die cut the Merry Christmas sentiment and add that to it.  I might go back and add some cardstock snowflakes or sequins.  We'll see what I can find.  


I have another idea that I want to try for this challenge and I'll have to see if I can get to it before the deadline on Wednesday.  In the meantime, I'll be checking out all the other cardstock creations at the Jingle Belles.  You can too by clicking here.