Showing posts with label Teapot Tuesday Challenges. Show all posts

Friday, March 14, 2025

There Was a Tea Party and a Birthday

Years ago, when I first started cardmaking I found a challenge on Splitcoaststampers that I used to take part in - Teapot Tuesdays.  The hostess at the time was Cindy from Colorado and there were regulars who we all got to know through Cindy's humorous way of making a story up about the teapot that she was featuring that week.  The challenge grew and some changes were made - more people shared the hostessing for instance, and people could request a "tea party" destination for a particular week.  I remember requesting a couple of tea parties myself and always had such great participation.  This time there was a "tea party" requested for me by my blogging friend and teapotter Sabrina who knew that I've been going through some emotional and challenging times since Thad passed away in October.  

As is the custom for "tea parties" Sabrina provided the hostess with some information about me/us.  She mentioned that we liked to visit lighthouses knowing that we had done the yearly NJ Lighthouse Challenge many times, most recently the weekend before he passed.  So the hostess chose a nautical theme and this is the teapot that was featured -


I should say here that I did not know about this ahead of time and was surprised when the cards started arriving.  I also belong to a RAK group on Splitcoast and I've neglected to take my name off the birthday RAK list and still receive birthday RAK's during March.  However, it became evident that these were not that when I started to notice a theme and some of the messages that were included were so heartwarming and thoughtful.  I know that I'm not alone in grieving for a loss of a spouse having had local friends express their sympathies and understanding, but hearing from strangers, some of whom have lost their husbands and have used their creative side to help keep them going was both touching and a kick in the pants to get back to doing what I love.  I have to get past the feeling of guilt for not getting everything taken care of before I can do the things that I enjoy.  But it will be in baby steps.

Monday was Thad's 71st birthday and it felt strange not making him a card.  He had said that he would be retiring this month but most people that knew him well doubted that he would because he loved what he was doing.  He was very good at what he did and knowing that he didn't need to work or "get ahead" anymore gave him a certain sense of pride as he became a mentor and confidant for those he worked with choosing to guide them to be the best at their jobs so they could get ahead.  I know this because I could hear him "coaching" his co-workers, including his bosses, and unselfishly offering them his expertise and letting them know that it was up to them whether they chose to use it or not.  He was greatly respected - I know this also because of the outpouring of condolences that I got from not only his current job, but for the coworkers he had for 30 years prior to this one.  

So on his birthday I posted pictures of the cards that I had received on Facebook and tagged him and also included the last picture of us taken together - a selfie in front of Old Barney on Saturday of the Lighthouse Challenge this past year.  And I'll share them here also.


I'm still in the paperwork state but a little less overwhelmed having hired an attorney to help with my mother's estate, and I know that things will not be "normal" again, but I'm trying to carve out a little time for myself when I'm not mentally and physically exhausted.  I have been reminded by many that I deserve my "me time" too.

Thank you Sabrina - I'm pretty sure you'll see this, but I will also e-mail you.  You truly have helped to lift my spirits.  And to those of you who regularly visit me here, I have been remiss in leaving comments, but I am still enjoying your posts and will try to be better about showing my appreciation for the time that you put into sharing your content.  

Wednesday, May 14, 2014

Clean-Up Card and the 300th Tea Party


So as I was trying to straighten up the stamp cave I kept getting distracted by some of the scraps from other projects.  It was like they were talking to me saying "we belong together".  And maybe it looks like a pretty weird color combo, but I think it works.  The green wood background was too pale for the project that I originally made it for but here, with the shades of pink and burgundy I like the contrast.  

This next card was meant to be part of the 300th Teapot Tuesday celebration.  I even used some of the featured techniques of some other challenges that week - the pillow top background technique and the ribbon flower.  But I never got around to posting it.  You were to bring a piece of furniture or a room decoration to the party.  When I saw that, I immediately thought of this chair stamp.  It looks so pale here, but it's really pretty IRL.  


I stamped the image on watercolor paper in Basic Gray ink and then used a combo of inks and aquapainter and straight marker color.  I colored the doily portion with ink and a dauber in Blushing Bride and used Calypso Coral as the card base and the ribbon flower.  The pillow top background was created with Calypso Coral and Blushing Bride ink.  


I'm sorry I missed the party.  I'm sure it was lot's of fun!

Wednesday, February 27, 2013

MMTPT239 - What Goes Around Comes Around


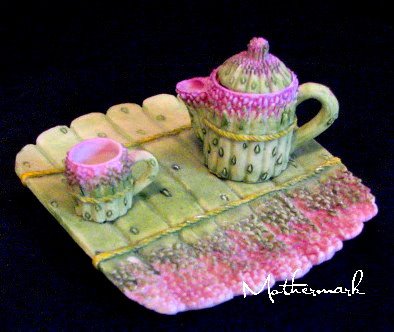
I wouldn't expect this to look familiar to many, if any, unless you've been around since 2008 and have been following my Teapot challenges.  Cindy posted this picture on her blog back in September of that year.  You can see what I did back then by clicking on this link.  Sometime after that Cindy sent this little tea set to me and I had it proudly displayed until I mailed it off to Sabrina in Ireland in December.  Cindy had dubbed us the "Sisterhood of the Traveling TeaParty" and thusly, I thought it was time for the little tea set to be enjoyed by someone else.  I did love having it  here and I'm sure that Sabrina will love it too.  

In that challenge I had used some little pink shells and I did again here but in a much different manner.   


It was a bittersweet moment when I realized that the little shop where I purchased these shells is no longer there because of Superstorm Sandy.  That particular section of the Jersey shore in Normandy Beach was hit very hard.  My father used to go to that bait and tackle store and my husband continued to do so even after my dad and later the owner passed away.  I never minded going in there because of all the shells they had.  Whether it was just to look or pick out something special.  Those are good memories.  And now, I think they make pretty flowers.

So you see how this week's theme of "What Goes Around, Comes Around" applies here in many ways.  


The only stamping on this card is the sentiment which is simply "friends" and it's from Tiny Tags.  I used my Memory Box grapevine wreath die and my Impression Obsession leaf die.  The embossing was done with the SU Vine Street folder.  There are two layers of SU ribbon.  


The shells were first glued to punched cardstock flowers.  I was finally able to find a new jar of Aleene's super tacky glue.  I really like to use that glue when I am gluing more than paper items together.  It definitely has to be in the jar (plastic) because it is so super tacky and I let it get even tackier by leaving the jar open for an hour or so when I first get it to have some more of the moisture evaporate.  I was able to hold the shells with my tweezers and just dab them in the glue since it was so close to the top of the jar, but had there been less in there a toothpick becomes the perfect applicator.  

It's a little late now but I'm trying to decide if I should have used a bolder shade of pink cardstock and ribbon.  Hmmmm, I've still got more shells so I might just give that a go. 

Here is the link to the challenge gallery - take a look at how the teapotter's have been inspired this time.

Wednesday, January 30, 2013

Teapot Tuesday 235


It's Tickle a Teapotter week and the teapotter we'll be tickling is none other than the Queen herself - Miss Cindy.  So you know that Cindy has this thing for black and white polka dots right?  Well, maybe you didn't know, but you do now!  This teapot is perfect for her.  We're celebrating her retirement.  No, she's still working her 9-5.  She's retiring from being our main Teapot Hostess and taking a break from "public" stamping for a bit.  I say "public" because I'm thinking she's gonna be stampin' at her own whim for a while.  (You know you just can't turn your back on all that paper, ink, and rubber!)  

So, instead of a random teapotter selection (as we do to choose the person you exchange your card with on tickle weeks), this week we are all tickling Cindy!  

I saw this cool 3-D card recently on Calla Lily Studio Blog (there's a link there for the YouTube tutorial) and was wanting to try it out.  Believe it or not, I do not have a very big selection of solid 12" x 12" cardstock - but I did have white, and since this is a "black and white, with a touch of color" challenge I thought I could pull it off.


I'll humbly ask you to keep in mind that it only looks crooked because of the poor photography - the blocks are all square.  Yes, but keeping with the inspiration teapot and Cindy's love of polka dots, I had to get some dots on there somewhere.  Thus the alternating squares and circles.  Oh, and the really nice thing about this is that it folds flat.   Really.  Check out the link above and you will see how nicely it does.  

I can't make up my mind if I like it or not.  Somehow, I'm getting the feeling of the decor of some cheesy banquet hall from years ago.  Well, what's done is done.

But wait, in my purging last weekend (an ongoing project around here lately), I came across a pack of blank notecards that were white with black polka dots and a roll of ribbon that was black with white polka dots.  Ha!  And I have the SU tiny purse die!  Luckily for this idea, the polka dots were printed on the front and back of the notecards and the card just fits on the die with the centerfold lined up with one of the creases on the bottom of the purse.  Bingo!  

I die cut a piece of black felt for the flap because the felt had a truer black value that matched the ribbon.  Black cardstock just did not do it!  Added the ribbon for the handle and a red button.  


You've got to fill the purse, right!  Well, the purse will have another WIP (Work In Progress) that I finally finished - a zentangled pendant.  I did four of these this past summer, each one of them different, and only had to add the cord to complete it.  I picked the one that had the most "dots".  


I started the teapot challenges a long time ago after seeing a card that Cindy had posted on SCS.  That led me to find out more about the challenge on her blog.  That was back in July 2008.  And here is the link to my first Teapot Post.  

The challenges have evolved over the years and still are a lot of fun to take part in.   But, like Cindy is doing now, I have recently taken a break from doing them regularly.  You'll see them now and again, because I do like the inspiration the teapots give me.  

I've been noticing that a lot of the blogs that I follow have slowed down and some of them have even gone dormant.  It saddens me a little, but I can certainly understand as I am guilty of the "slowing down" of posting myself.  But, that being said, I am not going to stop following because these bloggers have become my B to B friends (that's Blog to Blog) and like my F to F friends (Face to Face) there comes a time when we all need little breaks.  It makes it all the more heartwarming to see a post pop up like getting a  phone call and catching up with what's been going on.  I do wonder about the ones that have stopped posting altogether though - whether they are all right.  

I am definitely not going to stop posting because I use this as a chronicle of what I've accomplished.  Some people, myself included, make bucket lists of things that they want to do.  This  blog is me celebrating what I have done, what I have seen, and what I have created.  

Tuesday, November 27, 2012

Teapot Inspiration - MMTPT226


My friend Sabrina is hostessing the Teapot Challenge this week and she showed us this lovely Japanese teapot that was given to her by a friend who got it from a "sea-captain uncle of an old family friend" many years ago.  It is old and authentic and the inspiration for our tea party this week.  Isn't that China blue with the gold leaf beautiful!  I know this must be a very special treasure for her.  

We were challenged to make an Asian-influenced card and there were a few new "toys" that I  thought I could put to good use on this.  First and foremost was the new bamboo embossing folder.  I played with inks and sponges and my brayer, and then added some metallic pencil and shimmer paint.


Don't mind the schmutz too much between the bamboo stalks.  Just consider it some natural shadowing.  I inked the raised side of the embossing folder with Pear Pizzazz and embossed it on a panel of Marina Mist.  I really love the blue in the teapot and was trying to bring that out in this card.  The bamboo needed some extra braying after running it through the Big Shot and that's when the shadowing appeared.   I tried this a couple more times and believe it or not, this was the best.  I'm thinking that next time I will try gluing down the panel to a flat sheet of paper first because the embossing naturally puffs the paper out.  

This one wasn't too bad so I continued on and took a Prismacolor gold pencil and filled in the "stripes" on the stalks.  Needing just a little more reflection, I decided to go over the pencil with my gold shimmer paint.  When that dried I added the gold foil tape to the perimeter.  I think below you can see a little more of the shine.


The image from Asian Artistry was stamped in black Staz-on and then watercolored.  I used a gold gel pen on the edges of that panel.  The finishing accent was a gold metallic piece that has some dragons on it, to which I added some red thread.   The card base is Basic Black.

Since I had done some experimenting with the embossing folder I decided to use another one of the pieces to create the card below along with another new "toy" - my Memory Box bird die.  


This time It was just blue on blue with white accents but this time the blue went on the debossed side.  The bird, as you can see is in red, and I found another experiment on my table - the die cut doily, or part of it, which I added the red string to also.  This doily isn't too frilly so I think it fits okay with the theme.  

I haven't been to a Tea Party in a while and I enjoyed doing this this week though I may not get this posted in the forum.  I have to get down to business with my Christmas cards which I have fallen behind on.  I'll still be sending handmade cards out this year, but some of them are going to be duplicates.  

We had about 2-3 inches of snow today which didn't start until right around rush hour this morning.  Had it started at 3 a.m. as predicted we might have had a delayed opening, but I was glad that they didn't decide to have an early dismissal because that's a nightmare for us in the office.  I was thinking that I could use a snow day to catch up on some things - with power of course!

One more thing - do you think this embossing folder could pass for birch trees?  May have to try that too.  

Edited to add - After looking again at Sabrina's blog, I realized that this last card had been inspired by her lovely creation.  She is quite a talented lady!

Tuesday, September 11, 2012

MMTPT215 - Happy 110th

This week's Teapot Challenge destination is none other than Mrs. Eula Cousins.  Mrs. Cousins is a very good friend of my friend Jackie and Eula is celebrating her 110th birthday this week.

She has had "An Extraordinary Life - Well Lived".  In addition to our teapot challenge, Mrs. Cousins is having a special b'day complete with a visit from the Philadelphia mayor and possibly a call from Mrs. Obama.

Our party is a traditional birthday party this week and our cards are to depict a birthday or our memory(ies) of a memorable birthday.  We were also asked to include a note, if possible, sharing our memories with Mrs. Cousins.


In my card I wrote - 

Dear Mrs. Cousins,

Happy 110th Birthday!

We asked the ladies to share their most memorable birthdays with you and I have combined two of mine in the creation of this card.

On my 21st birthday I was still living in my parents' house.  It was a two-story red brick building and we lived upstairs from my grandparents.  I remember waiting and waiting for my then boyfriend to come and take me to dinner. He was late and I was anxious and kept going to the window to watch for his car coming down the street.  Finally he arrived and I ran down the stairs and jumped into the car.  I was a bit annoyed that he was so late and asked him what took him so long.  He smiled, fumbled around for something and pulled out a tiny box.  I don't even think it was wrapped.  My annoyance quickly gave way to joy as he proposed to me.  The date was March 31, 1976.  We will be celebrating our 35th anniversary on Sept. 24th.

The second most memorable birthday was when I turned 50, seven years ago.  I gave myself a "tea party" - a real tea party and invited 12 of my lady friends (mother & sister too!) to celebrate with me.  The theme was "I'm not an old bag!" and we ate finger sandwiches, scones, pastries, etc.   We drank hot and cold tea and then we sat at my dining room table and did a couple of "craft" projects I had planned.  We were having so much fun that no one wanted to leave. 

I hope you will be having fun reading the birthday memories from my stamping friends.  You are an inspiration to all of us!  Happy Birthday!


So here is my brick house (though we did not have shutters) and you can see through the window the tea service all set up and waiting for guests.  

The image in the window comes from a Stamps Happen stamp - Tea Party Teddy.  I used my Memory Box Grand Madison Window and shutters dies.  The brick background was embossed onto a piece of Naturals White cs using a Tim Holtz embossing folder.  Then I brayered Riding Hood Red ink across it to pop the bricks.  The curtain inside the window is a small piece of Twitterpated fabric just folded in half and given a quick little running stitch to gather it.  Red line tape was used to adhere the curtain to the inside of the window.  The window itself uses a small piece of acetate.  

I colored my image with markers and Prismacolor pencils.  

If you'd like to help celebrate "An Extraordinary Life ~ Well Lived" leave a comment and I'll share Mrs. Cousins' address with you.  I'm sure she'd love to hear from you too!  And it doesn't have to be a handmade card either.

If you'd like to see the written story that goes along with the challenge, click here.  Cindy did such a wonderful job with this challenge!

Tuesday, July 31, 2012

Teapot Tuesday 209 - Whatever The Weather

I haven't been to a Tea Party for a long time - just about 16 weeks.  There are a number of reasons why, but I won't expound on that.  Instead I'm going to take part in this challenge which happens to be a Tickle A Teapotter week and hosted by my friend Sabrina.  

Sabrina showed us the cutest Winnie-the-Pooh teapot which was a gift from her mother, and asked us to make cards that have a weather theme.

We woke up Sunday morning to find the birds having a party of sorts in the wildlife refuge behind the condo.  It had rained the day before, so the water level was up and the birds were certainly taking advantage.

There were cranes, herons, gulls, ducks, geese, and swans, and they were making a riot.  I love these days when I can go out on the back porch with my breakfast and watch and listen to the crazy sounds of the birds.  You almost think that they get so excited when they find a juicy morsel that they let go with such a belly laugh, or maybe they're just warning the guy next to them to stay away from the sweet spot they just found.  Whatever they're doing, they're certainly entertaining.


So I was inspired to use this Poppystamps crane  image knee deep in water in front of a clump of grass in the brackish water.  You can see the colors of the morning sun reflected off the clouds as it rises after a day and night of rain.


This card is of the larger size, about 5 x 7, and I purposely left off a sentiment so the teapotter who gets it can add one of their own should they decide to pass it on. 

I used sponges and daubers to get those colors mixed for the water and the sky.  I tried watercoloring it first, but I was too impatient to wait for the colors to dry enough in between and kept getting water spots.  The crane was stamped on white cs in Black Stazon and then I cut it out, cutting off it's legs at the knees on purpose so you could get the feeling of the depth of the water. 

I'm thinking I'm going to have to reproduce at least one more of this card as I got an "Oh, wow!" from HWNSNBP when I showed it to him.  He's usually appreciative of my work, but more on the lines of "very nice" (sometimes even before he actually looks up), so when I get an "Oh, wow!", well I know I've scored big with him.

Okay, off to the party to see all the other lovely cards for this week.  Great challenge Sabrina!

Wednesday, April 4, 2012

Teapot Tuesday 192


Wouldn't you say this is an elegant table setting?  Silver teapot, pink roses, crystal candlesticks and a cutwork  tablecloth certainly do look elegant to me.  I almost can't believe that we are having a tea party like this.  

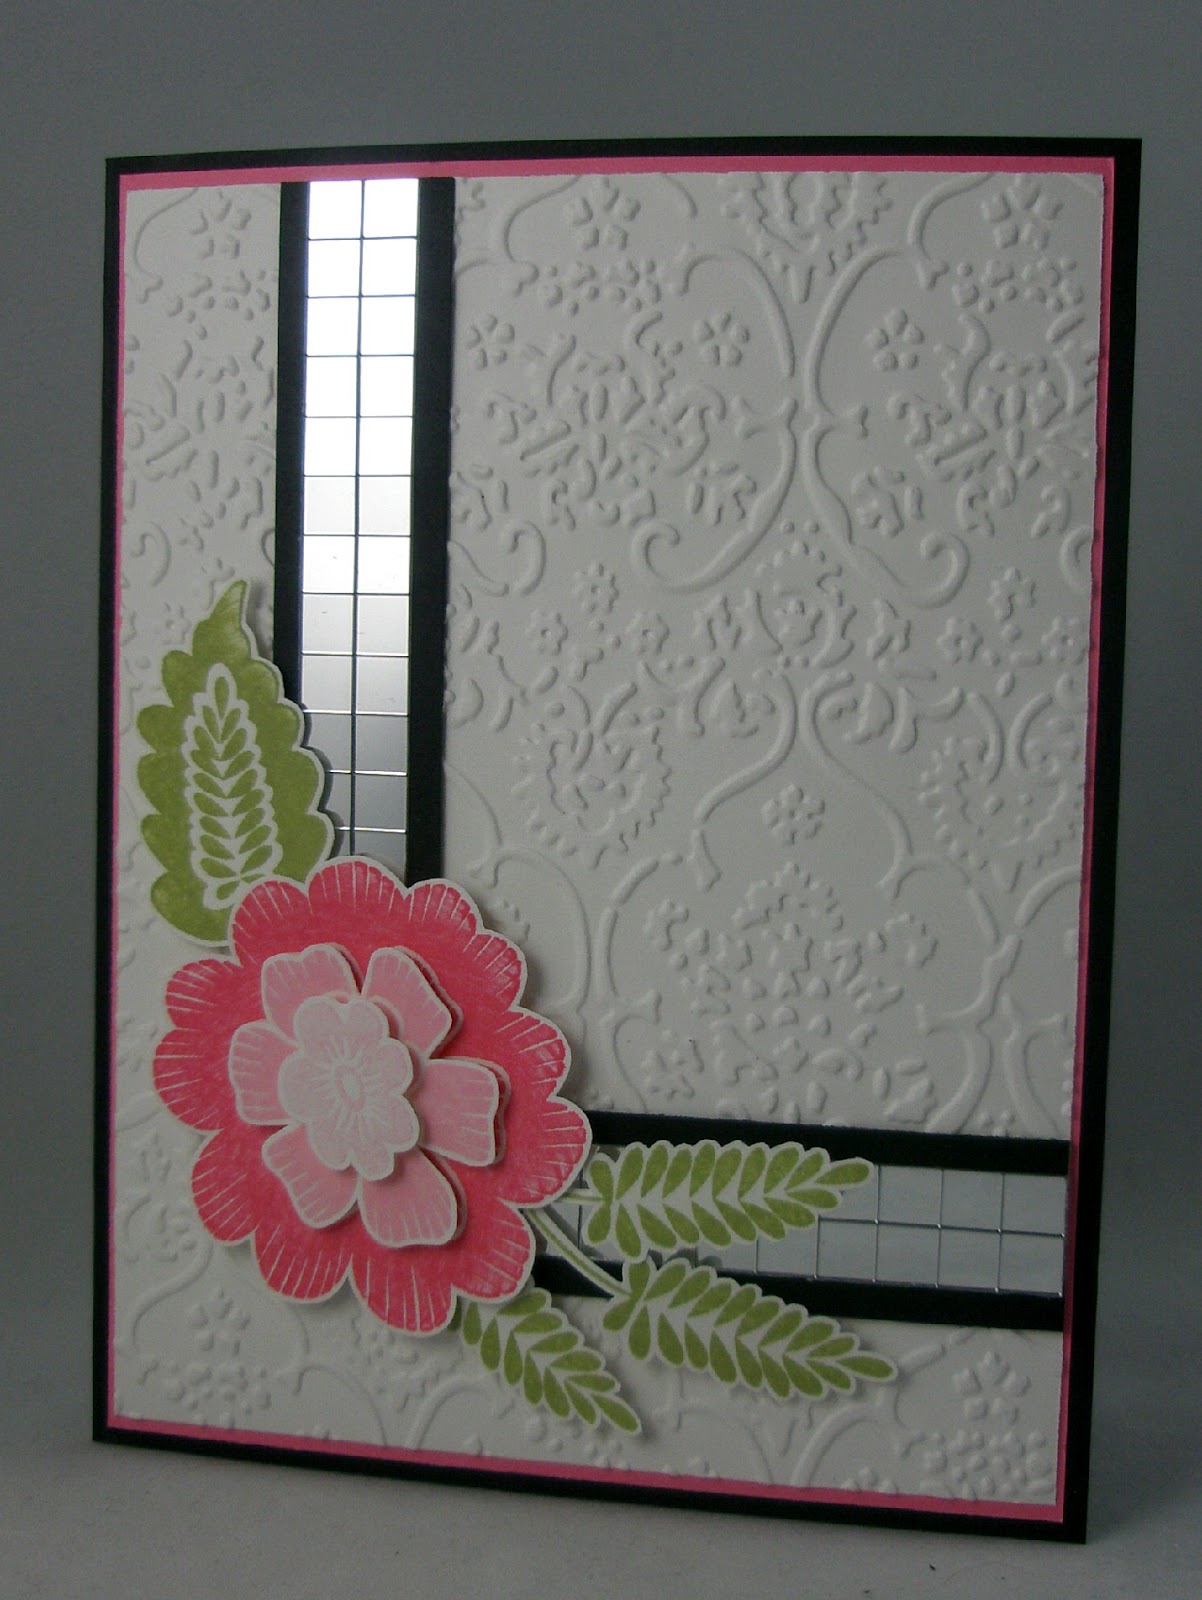
We were asked to bring a certain color combination this week.  Pink, Black, White, and Silver.   The first three colors mentioned are not problem, but silver?  Silver could be a little tricky.

Fortunately I just received a package of some lovely mirror stickers from my friend Sabrina.  They are very reflective just like the silver teapot in the picture.  Getting a good picture of this card was going to the bigger challenge for me this week.


I used a double strip of the stickers on top of some black cs.  That, in turn, was mounted on a piece of Whisper White that I had embossed.  Where the mirror strips met I added a pink layered flower and leaves from the Array of Sunshine stamp set.  All this was added onto a base of Regal Rose and then the card itself on black card stock.


Tuesday, March 27, 2012

Teapot Tuesday 191

Oui, oui.  We are going to France for the tea party this week.  Or at least we're pretending to go to France where we might see something like this......  

We have a guest hostess this week, Philsmom.  You can visit her gallery by clicking here.  She has written a lovely poem for the challenge this week and asked us to bring things that are French.  

The card that I came up with is a conglomeration of images that came from sets that had French images or names, like Carte Postale (retired) and Artistic Etchings.  I used the retiform technique.


My color choices for this are Marina Mist, Wisteria Wonder and Rich Razzleberry.  I sponged and stamped on a piece of Very Vanilla cs and then layered onto Rich Razzleberry and a Wisteria card base.  

The lace was added by punching a couple of small holes and taking a stitch at the corners of that center shape.  I just taped down the ends of the thread on the back.  

I should be visiting the gallery and commenting but I have had a very trying day week and I'm going to get some rest.  Hope you will check it out.  

Tuesday, March 20, 2012

Teapot Tuesday 190


As Cindy says, there is no limit to the number of teapots out there.  Just look at this one.  A black, white, and red beauty.  Just take a gander at that butterfly.  How sweet. 

Bring a butterfly she said, so I did.  I used one of my new Memory Box dies after I made a mess creating that background.  And let me say, it, or rather I was a mess.   I know that I did not do this technique as it was meant to be done, but I found a piece of transparency to do the fold, smash routine and in the process made a  glorified mess of myself.  

Note to self:  When working with ink refills, try very hard not to sneeze.  A sneeze will cause the ink to disperse where you don't want it, and further, where you don't want it may not just be on the project.  It could be your face.  And you might not find out about it until your color-blind husband notices it.  Oh yes, red ink under the chin and on the cheek.  Not too pretty!

But, I think it made a pretty background.  What do you think?


I stamped the flower from Creative Elements in black Stazon and then added the butterfly and the black stripes. Gave it a layer of black on a Pretty in Pink card base.

See how dimensional the butterfly is.


Join me as I check out the teapot gallery this week.  

Thursday, March 15, 2012

Triple Play - Teapot Tuesday 189, Jingle Belles - JB12:06a - Neutral Noel, and a Birthday


The Queen of Hearts is ruling over the tea party this week.  I think she might have dismantled Princess Beatrice's fascinator.  

Well, I happened to have an extra-large crown left over from last week's party that didn't fit the queen cat, but it certainly fit the Queen of Hearts.


The heart is a Memory Box die cut that I cut out of watercolor paper and used my aquapainter and ink to color.  (The red and green is the die.)   I decided to play around with the embossing of the background and I didn't want any of it under the heart die cut so it would stand out, so I turned the die over and traced the edges to make a heart pattern the size of the die.  Then I cut two card size pieces of lightweight cardboard from a discarded cake mix box and glued them together.  I carefully centered the heart pattern in the center and then traced it and cut it out.  This made it possible to emboss only the area surrounding the heart.  

The first time I tried this I did not use any ink on the embossing folder and while it didn't look bad, it still didn't appear to have enough contrast, so I added ink with a dauber to the area that would be embossed.  You can do this by holding the pattern under the folder so you can see the area that doesn't get the ink.  Making the sandwich of paper, folder, and plate was a little tricky but I got it done.  

In fact, I liked the way that this came out so much that I decided to used the same background - without the heart however - for my first Jingle Belles card this week.  Looks as though I got a little heavy handed with the dauber on this one.


We were to make a neutral Christmas card based on the photo below:


Neutrals for Christmas.  I really like this.  


Truth be told, the card below started out as my Jingle Belle card but I felt the heart was not right for Christmas.  I happen to need a birthday card for a friend who is celebrating one of those monumental birthdays and thought this would work out fine for that.  


I added the pink ribbon and the sentiment in a pink label and put the panel on a pink base.  (Geez, I sure hope she likes pink!)  

Tuesday, March 6, 2012

Teapot Tuesday 188


She sure is Purrfect!  I don't know about that green striped tail though!  Ha!  This week we needed cats. Cats and crowns or cats in crowns.  Queenly cats.  Cats that are going to a lovely lady by the name of Virginia who reads a lot, especially about Queen Elizabeth (although I don't know which one exactly), and who is currently recuperating from a nasty fall.  


This cat was inspired by another punch art cat I saw recently.  Hers is a little bit country and mine is a little bit rock-n-royal.  She's got the widow's peak and neck ruffle of Elizabeth I and the look of the current queen.  She's got her crown courtesy of Tiny Tags and the placard, which I intended to look like a scroll, says it all.  


Virginia's favorite colors are dark blue and burgundy so I tried to get that in also.  The embossed panel was made by smearing the embossing folder with Marina Mist ink before I embossed the pattern thus having the recessed areas a little darker.  

I was trying to keep myself to a limited amount of time creating this card.  But sometimes creativity just needs more time.  I had a country cat all ready to go and then I took another look at the inspiration teapot and I thought that I could make the cat more like the teapot so I started from scratch again.  I even squeezed some time in the stamp room before work today but it just wasn't enough to get it done.  But, I have to say that it felt good doing a teapot challenge again.  I've missed quite a few of them lately and that makes me sad.   

Well, I don't think I'll get to the gallery tonight, but you can go on ahead of me and take a look by clicking here.  I'm sure you won't be disappointed.

Wednesday, February 22, 2012

Teapot Tuesday 186

Another cool teapot don't you think!  Like a giant cupcake.  So much so that this week we are asked to include cupcakes, or cake, or party paraphernalia, etc. on our cards.  They will be going to a young man who  has had some recent health problems but who is going to be delivering them to the hospital that he stayed in to be used for other children there.  What a nice thing for him to do.  You can read all about the challenge here and the destination here.

I like to make interactive cards for children, so with that in mind I scoured my stamp choices and came up with this tag stamp that has a little cupcake on it.  It's from a retired hostess set.  I stamped, punched and colored four of them.  Then I got out some square punches, a little round one, and a button and made the spinner.  


See, it really does spin!


The mitered corners on the tags made them fit together so well over the square.  I punched a 1/2' hole in the square before I glued the tags on it.  I positioned the spinner on the card where it would be centered and then glued down a button that was a little smaller than the punched hole remembering to push it all the way to the top of the circle so the spinner would remain centered.


Then I added the spinner and glued the remaining squares on top of the button.  Wheeeeee!   I hope they have a lot of fun with this. 

And speaking of fun, it's going to be fun checking out all the other creations for this week's challenge.  Won't you join me here?

Wednesday, February 15, 2012

Teapot Tuesday 185

It's been a while since I've done a Teapot Tuesday Challenge.  Life does get in the way of my fun - bah!  This looked to be an interesting challenge and you can read all about here.  Cindy is such a super writer.  And she always find such great inspiration for us.  This reminds me of a lamp that my cousin bought.  But for this challenge think camouflage, pink, and hearts.


I've got camouflage, pink and hearts!  Lucky for us it's Valentine's season.  I didn't have to dig anything out cause I was using most of this stuff on other Valentine projects.  


The base is Pretty In Pink with lots of Pretty in Pink hearts I got from the Fashionable Hearts embosslit.  The little teacup is from a new set called Tea Shoppe and the tree comes from Valentine Defined.  The background looks hard but it wasn't really hard, just a little time-consuming.  What was hard was coloring the tree.  I used several different shades of green markers and the stamp had to be held just at the right angle so I could tell which little heart had been inked already.  For some reason (I think it was because I didn't do such a great job cleaning this stamp the last time I used it) I kept getting green hearts with pink outlines.  Not the effect I was going for, so I tried three times before I got one that I could live with.  

The finishing touch was adding the little white cotton thread bow.  

Okay, over to the gallery now to check things out.  Click here to join me.  

Wednesday, January 18, 2012

Teapot Tuesday 181

What a wacky teapot, huh!  She's definitely doing the "I'm a little teapot dance" but what about that bird???  Crazy!  But fun too, don't you think?  I think that might be the elusive boobie bird.  And speaking of boobies.......

We've been instructed to be funny this week.  Our destination is a young lady who loves to giggle.  Well, just looking at this teapot would give her a giggle I think.  But I took my cue from the patterns in the black and white dress and found a bird of my own.  Not the elusive boobie bird, but then again, if you look carefully you might see three sets of boobies. 


With the sentiment from Word Play that says "Laughter by definition is healthy" I had to do something to try to get a laugh, so I put the front panel on upside-down deliberately so the card opens on the top.


And on the inside I stamped this................


What's sdoo you say?   It's actually OOPS upside-down.  Well, if she doesn't laugh out loud I hope she at least smiles! 

Time to go check out the gallery.  Click here to join me.