On Sunday, HWNSNBP and I went over to the Vandermark Merrit Glass Studio and took advantage of their "Make a Glass Pumpkin" program.
Here is a montage of the steps - we each made our own pumpkin.
Retrieving the molten glass from the glory hole.
Our glass master Jake explaining to keep the bar rolling in the furnace.
Then it comes out and gets rolled into shape on the metal table.
It needs to be the size of a large candle.
Back into the furnace to reheat.
Then into the coffee can that is filled with the colored bits of glass that give the glass it's color.
After reheating the bits into the glass it then goes into the metal mold to get it's basic shape.
Here Jake is adding the air bubble to the molten blob.
Once the bubble is in, we had to add air gently to inflate the glass while Jake kept the air in the base of the pumpkin.
We added a little at a time so it didn't implode and Jake spun it and used a tool to keep the bottom straight.
Then we took it over to the stem station. By this time the pumpkin was cooling and we used a tool to snap the pumpkin off the rod with a clean break. Then Jake took some more molten glass and we (he) created the viney stem.
The last blast is from a torch to round the end of stem where it had been cut. Then he used another rod with a hook on the end to place it into a cooling oven overnight.
I chose to make a white pumpkin with a clear stem.
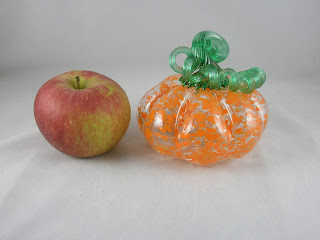
HWNSNBP made an orange and green one.
You can see the relative size next to a medium-sized apple.
Pretty cool! We're contemplating whether we want to make Christmas ornaments next month. If I remember, next year I just might want to make a blue pumpkin!


No comments:
Post a Comment
It's always so nice to hear from visitors. Thanks for stopping by and leaving a comment.