Tuesday, July 31, 2012

Teapot Tuesday 209 - Whatever The Weather

I haven't been to a Tea Party for a long time - just about 16 weeks.  There are a number of reasons why, but I won't expound on that.  Instead I'm going to take part in this challenge which happens to be a Tickle A Teapotter week and hosted by my friend Sabrina.  

Sabrina showed us the cutest Winnie-the-Pooh teapot which was a gift from her mother, and asked us to make cards that have a weather theme.

We woke up Sunday morning to find the birds having a party of sorts in the wildlife refuge behind the condo.  It had rained the day before, so the water level was up and the birds were certainly taking advantage.

There were cranes, herons, gulls, ducks, geese, and swans, and they were making a riot.  I love these days when I can go out on the back porch with my breakfast and watch and listen to the crazy sounds of the birds.  You almost think that they get so excited when they find a juicy morsel that they let go with such a belly laugh, or maybe they're just warning the guy next to them to stay away from the sweet spot they just found.  Whatever they're doing, they're certainly entertaining.


So I was inspired to use this Poppystamps crane  image knee deep in water in front of a clump of grass in the brackish water.  You can see the colors of the morning sun reflected off the clouds as it rises after a day and night of rain.


This card is of the larger size, about 5 x 7, and I purposely left off a sentiment so the teapotter who gets it can add one of their own should they decide to pass it on. 

I used sponges and daubers to get those colors mixed for the water and the sky.  I tried watercoloring it first, but I was too impatient to wait for the colors to dry enough in between and kept getting water spots.  The crane was stamped on white cs in Black Stazon and then I cut it out, cutting off it's legs at the knees on purpose so you could get the feeling of the depth of the water. 

I'm thinking I'm going to have to reproduce at least one more of this card as I got an "Oh, wow!" from HWNSNBP when I showed it to him.  He's usually appreciative of my work, but more on the lines of "very nice" (sometimes even before he actually looks up), so when I get an "Oh, wow!", well I know I've scored big with him.

Okay, off to the party to see all the other lovely cards for this week.  Great challenge Sabrina!

Saturday, July 28, 2012

Cheating Again

So let me ask this - If someone gives you a gift thanking you for all you've done, do you send a thank you card?  This is something I mull over twice a year when students and/or staff bring gifts into the office for us.  They are usually accompanied by a note of thanks from them.   But here's the thing, sometimes they're just left on my desk or delivered (like flowers or lunch or things like that), so I don't always see the person who gave the gift in person, so I think it's better to send thank you note so they know that you received the gift in the first place, and also to express my thanks.  Or maybe I'm just making more work for myself?  What do you think? 

This end-of-the-school-year we received an abundance of edible gifts (which of course did wonders for my Weight Watcher's goals!), and truly they were appreciated during all the stress of the last week of school - the chocolate covered fruit especially.  Oh, and the soft pretzel platter.  And the bag of Lindor truffles.  And the lunch order from...... well needless to say, it was diet sabotage for sure!

I keep a running list on my desk so I don't forget anything that might have been eaten used before I get it home.  Then I can easily also look up all the addresses I'll need also.

So, anyhoo, to make it simple because of the number I needed, I started with another set of notecards that I got in the $1.50 bin at Mike's.  I just loved these colors and thought the pattern would make a very nice background that wouldn't need too much additional embellishing.


I used the Four Frames stamp set in Raspberry Ripple ink on Very Vanilla cs, added Thanks (from another set I don't remember right now) in Regal Rose and then punched that out with the Decorative Label punch.  Then I added to that a butterfly die cut using the Beautiful Wings embosslit.  (That gave me a whole bunch of butterflies in the other sizes for future use too!)

Popped the whole think up with some dimensionals and Ta Da! - another cheater card..... by the dozen.

Friday, July 27, 2012

Good Bye Oscar and Gabby


Friends of ours and also my office mate lost their dogs this week.  Truth be told, I am not a dog lover but I do know it is a hard thing dealing with the loss of a pet that is part of your family.  I wanted to let them know that we are sorry for their loss so I quickly put this card together using the D is for Dog set and the grass stamp (which I forget the name of at the moment).  I used Calypso Coral, Crumb Cake, and Very Vanilla paper and ink with a little bit of Chocolate Chip sponging at the edges.  

Although it was for a sad occasion, it felt good to get a couple of cards done this week.  My stamp room is a mess and with the heat not very inviting, but I am done with my "big project" and should be getting back into my stamping if my mojo hasn't taken a vacation!

Wednesday, July 25, 2012

JB:12:15 - either red *OR* green (...but NOT both!)

I had good intentions to do two cards for this challenge before the deadline, a red one and a green one, but it looks as though it will just be the green for now. 

I dug into my pile of new stuff and found some nice green dsp and new die set, and dove into some of the old stuff for my Patterned Pines stamp set, added a bit of white embossed paper, and this is what I came up with.


That tree is popped up and so is the panel it is on.  The bow is actually on the right side, I guess I flipped the picture somehow. 

I found some bronze glittered brads for the top and bottom and the ribbon was a last minute addition and I love the thinness of it with this die and tree.


I thought about hanging a tag from the ribbon but decided against it.  The sentiment will be on the inside. 

Okay, let me see if I can visit some of the other Jingle Belles.  You can see them all here. 

Wednesday, July 18, 2012

Past Due


I am racking up quite a list of cards to get out to various friends and relations who have celebrated birthdays, need a thank you, and need a lift and I'm slowly catching up. 

This time I took a card base that I had put aside back in November of 2011 when I made two of them while completing a Teapot Challenge using mosaics.  I even had some extra paper roses set aside.  So I positioned them on the card and then added some leaves that I die cut. 

The trick was to be how to get this thing in an envelope.  But, because I was having lunch with it's recipient I didn't have to actually mail it.  So I took a 6 x 9 manilla clasp envelope and cut off about an 3 inches from the top (including the flap and clasp).  Then I punch two holes near the top, slipped the card in and used some decorative string to make a bow to close it up.  It worked perfectly.

On this next card I got to play with some new product.  First, let me say, if you're seeing a strange glowing green cardstock it really is not that color IRL.  This is the new Gumball Green color from SU.  I used my new Decorate a Daisy stamp set and VersaMark ink to stamp those flowers onto the card base.   For the centers, I found I had to use the Stamp-a-ma-jig and I chose to use the Gumball Green ink from the new style stamp pads.  Oooh, are they inky!   You really don't have to use much pressure to get a stamped inked up - this was a new way for me to get a green thumb cleaning the edges of my stamp before I stamped!


I stamped the daisy image two and a partial times with Pumpkin Pie ink on Daffodil Yellow cs and then cut out the layers.  The partial stamped image provided the three petals that I felt were foremost on the daisy to give it even more depth.   On the center circle punched image I used markers doing the whole thing in Daffodil and then adding Pumpkin to the part where the lines criss-crossed to make it look somewhat like gingham. 

The final part was to add the vines from my new Summer Silhouettes set in Gumball Green ink.   This is a thank you for my future DIL's sister for the lovely work that she did preparing the bridal shower. 

A little rambling -

After having not sat down to do some serious stamping for a while now, I was a little frustrated putting this card together.  But this is my luck it seems...... I originally wanted to stamp that flower in the Summer Starfruit ink on the same color paper, but try as I might I could not get the stamp pad to open.  I even had HWNSNBP try it (after giving him a short lesson in how to actually open a stamp pad as he had never done that!) to no avail.  When he suggested a screwdriver I opted to just put it aside and make another color choice.

Then when I went to stamp the vines, I did not realize when I mounted that stamp that it had a flaw in it - a bubble - that prohibited it from making a clean image so I wound up using a marker to fill in.

But, here's where SU is so good.  I called them the next day, and even though I had ordered these things over a month ago, they were most happy to replace them for me.  So I shall be seeing them in the mail in the next couple of days. 

Well, this was a lot of words for these two creations, but I hope you enjoy them.  And I hope to be getting back to more stamping and catching up soon. 

Monday, July 9, 2012

What's Up?


Mr. & Mrs. Blue (we're not sure if she's the new lady or the old lady) raised 5 baby bluebirds safely in the nestbox that we moved.  After a night of terror in June, we tried to make sure that the box was not accessible to racoons, or any other predator that could climb, and moved it from the garden post to a metal fence post.  We did monitor the box both from visits to the nest box and by camera.  What a joy it was to hear those babies beg for food.  We did miss the fledging though while we were away this past week.


I could not capture the true color of the sun as it appeared over the refuge one night last week.  It was a bright red ball that had that streak of red reflected in the water.  I think I'll be looking into lens filters or something - suggestions welcomed.


Last Wednesday brought the Fourth of July fireworks front and center across from the condo, and the residual haze from the fireworks proved a spectacular view of the just-passed full moon.


I've been very remiss at posting mainly because I've been working on wedding invitations.  It's been one of those projects that has needed my full attention.  I'll be finishing them up soon and hope to be back to using my creativity along with some new products soon.

Wednesday, June 27, 2012

JB:12:13 - mele kalikimaka

Sheesh, I can't believe that I haven't posted a Jingle Belle challenge in so long.  How long you ask?  Don't ask.  Life has gotten in the way of some of my favorite things lately, but rest assured, not all of it has been bad.  

In case you don't know, and probably there are a lot of people out there who don't know (I'm talking the world guys, not my blogging buddies!), mele kalikimaka means Merry Christmas in Hawaiian.  The highlighted link will take you to Bette Midler's version of the song that goes along with it - have a listen.  

So for this challenge we were asked to make our cards hot or tropical and we can "do this by using bold, saturated colors... or by incorporating tropical flora and fauna like palm trees and flamingos... or by taking santa from the north pole to the beach... OR... well, however you'd like to interpret "hot" or "tropical" in a holiday context!"

I made a cheater card of sorts.  I used some hot colors on a printed base card which is a notecard that I found in the $1.50 bins at Mike's.   I'm calling it a "Deconstructed Christmas Tree"


You see all the balls laying on the background with the streamers and lights not yet on the tree.  The only thing that made it to the tree was the little shiny star at the top.  The tree itself is actually one that I had made for a previous Jingle Belle challenge that I didn't finish - that was to be the one inspired by a Christmas Carol and I think I was going to say it was "Oh Christmas Tree", but luckily for me, the cs matched the green in the notecard and there you have it.  

I almost forgot, the directions for the tree I found on Pinterest with directions from this lovely blogger Sarah Jane.  It's cute and simple and I've been seeing them all over the place now.  (Yes, that's another hole I've fallen into - Pinterest - great for ideas, if only I used them!)


Oh, and my friend Michelle showed me a great way to do those banners and get even ends.  I know I should have taken pictures, but maybe you'll understand if I explain it.  You make a cut into the center of your strip from the end as deep as you wish your tails to be, then you snip from the corner of the strip to the center cut on each side and you have perfect sides.  Look at what she did to a toilet paper tube - click here - and you'll see her demo the banner too. 


Gotta hurry off to get some more projects done.  It's been a lovely day here - quite breezy and not too hot and I've been procrastinating with these projects.  I promise more creativity in the near future!


Let's go see the rest of the Jingle Belle creations - click here.

Tuesday, June 26, 2012

Something Old


About 58 years ago my mother received a gift for her new baby to use.  It was a little bonnet made from a lacy handkerchief, sewn together with a few stitches and some ribbon.  Twenty-two years later, that baby - me, used the hanky bonnet as my something old when I got married.  Then I put the hanky away.

Three years later, almost 32 years ago now, when I was expecting my first child I received a little box with a bonnet made from a hanky along with this poem:

I’m just a little handkerchief
As square as square  can be
But with a  stitch or two
They made a bonnet out of me.

I’ll be worn from the hospital
Or on the christening day
And after that be folded
Then carefully put away.

When on that future wedding day
So we’ve always been told
The well dressed bride must always
Carry something that is old.

So what could be more fitting
Than to find little me
And with a few fine stitches snipped
A wedding hankie be.

And if perchance it’s a boy
Someday he’ll surely wed
And his bride can have the hankie
Once worn upon his head.


This I passed on to my future daughter-in-law at her bridal shower.   


Monday, June 25, 2012

Bridal Shower

Yes, I haven't posted anything for a while because of some things going on here but hope to make up for that a little now.

My son is getting married in October and on the 16th of this month they had their Bridal Shower.  Michelle is his bride-to-be and her sister Julie and her mom put together a wonderful shower that was held at a local winery.  I'm still trying to figure out how to edit the pictures on my new camera which I used that day so they will be forthcoming.  But I do have pictures of the card I made and the gift.


My only regret here was not using a darker ink for the sentiment.  This is a 5 x 7 card with a Pool Party base.  The dsp came from various sources.  I first stamped the back image with VersaMark ink and then added the banners in the assorted papers.   Some of them had additional embellishment with punched edgings.  The oval with the sentiment was popped up and around it and down the banner I added punched flowers and starfish embellished with sticky pearls.  Two little punched hearts were also added to the sentiment oval.


The gift I made them is the Newlywed Survival Kit which begins with an empty paint can, some scrapbook paper and ribbon.   (I always go overboard buying ribbon, can you tell!)


Once you add the paper, ribbon and some paper flowers you have this...........


A few close ups of the flowers.............


They are made with a combination of punches.  The largest punch is out of dsp and all I did to that layer was to curl the petals slightly and set it aside.  The inside of the flower was made with two shades of solid cardstock and two different punches.  I first punched a hole in the center of each punched shape and before I fastened them together I spritzed them with water in a cake pan and smooshed them around in it before I wadded them up.  I unwadded them and then put them together with a brad and then shaped the petals.  Then I put them back in the cake pan and you could leave them overnight to dry or you could happen to be baking cookies or cupcakes (like we were) and you could set the cake pan on the stove top to use the heat of the oven to dry them.  (You can also stick them directly in the oven after you've turned the oven off while it's cooling down, just keep an eye on them so they don't get crispy - know what I mean!)  Then I took the dried centers and hot glued them to the bigger punched flower.  You could used dimensionals or glue dots for this, but since I was hot gluing them to the lid I just went with it.

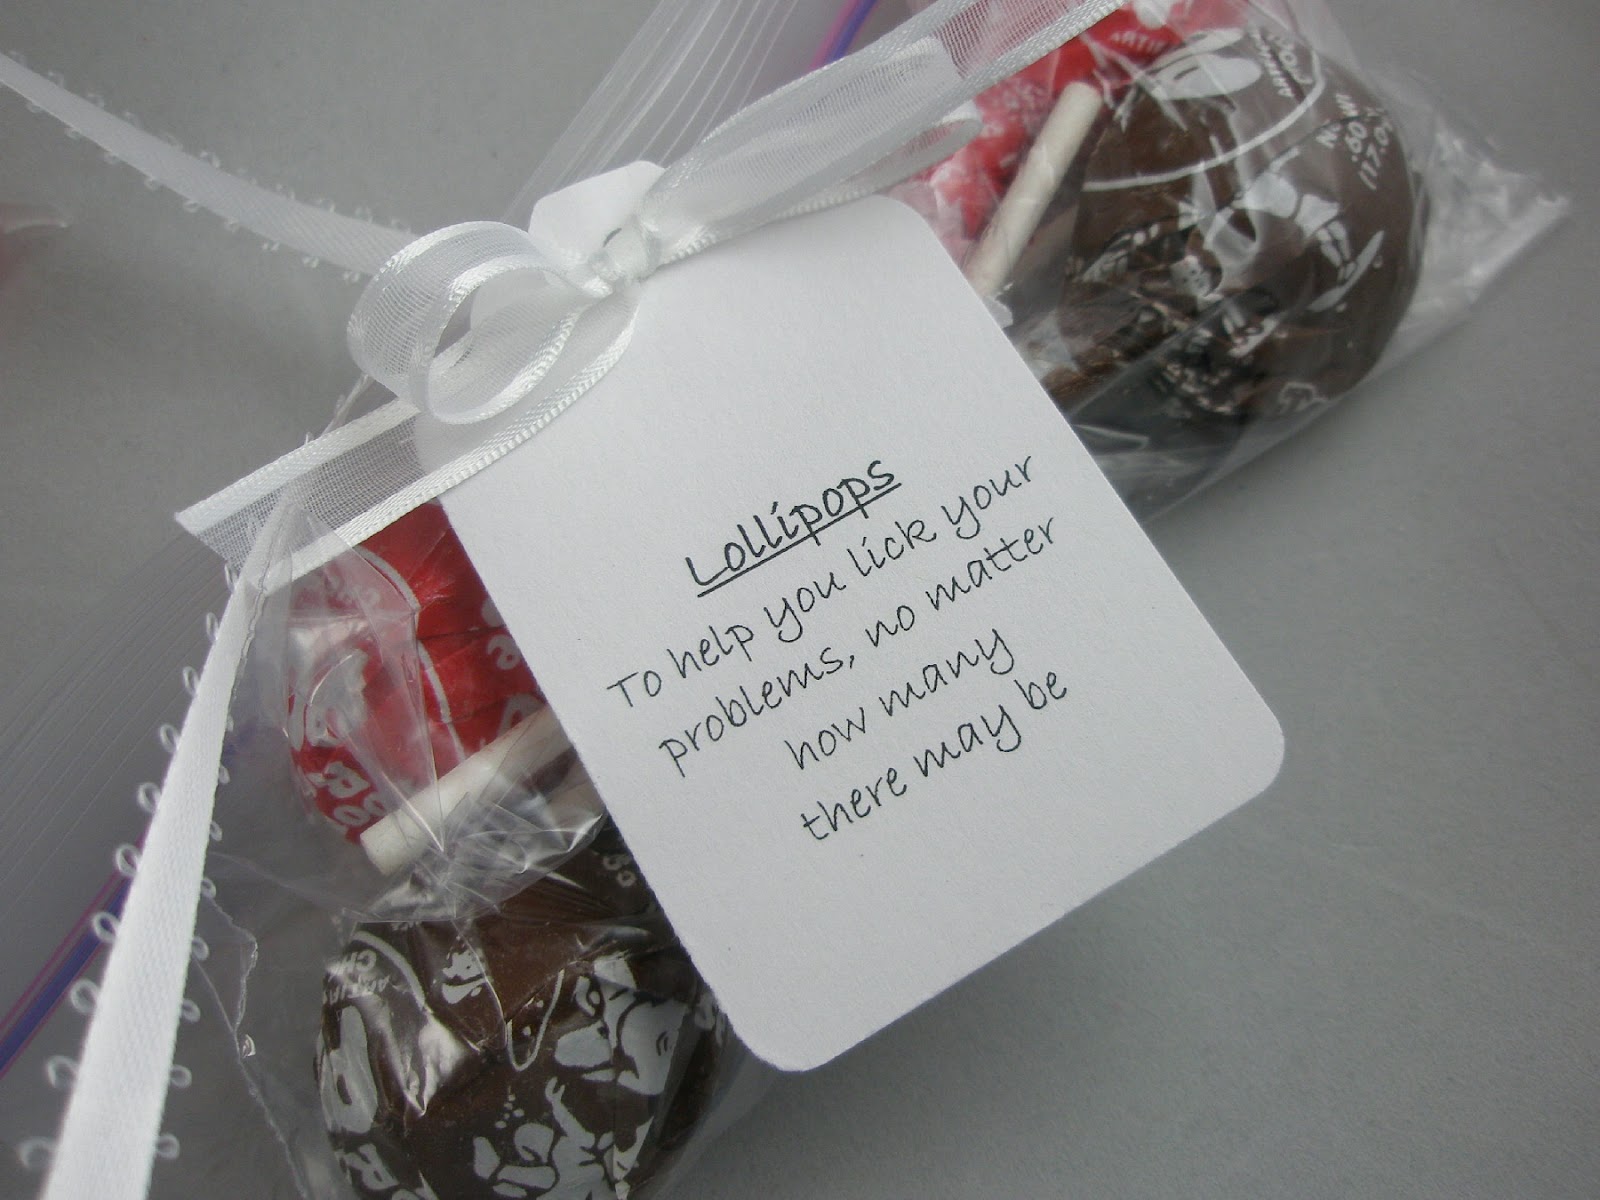
Once you open the can, here are the contents all attached to the lid via a long strand of ribbon.  Each item is in a little zip plastic bag with a tag tied on with a bow...........

(sorry, the first picture is a little blurry - if you click on the pictures you should be able to read the tags)


I like to alternate the edible packages with those you can't eat and spread the weight around also.  Some of the things are heavier than you think and will pull off.  

The end of the ribbon holds an envelope with the real gift - a gift card, gift certificate, cash, etc.  I did not attach a tag to this one this time, but you could have a tag that says "A GIFT CARD for you to use for something you did not receive at your shower" .  You can make it as personal as you would like.  


I had another gift for them that I will share a little later. 

Monday, June 11, 2012

Stamping Get Together - New Catty Products!

 At our most recent Stamping Get Together our fearless leader Debbie found some awesome projects for us to work on using some of the products from the new Stampin' Up catalog.

We used a new die for the shaped card below also incorporating a new stamp set and some paper and ribbons, and the green leaves are stamped with ink from the new stamp pads - wow!  Great coverage for those solid stamps now - can't wait to make the transition.


Another project using the die is this little holder and set of cards.


(Bonus points if you noticed the pearl out of place above.  I only noticed it after I took the photos - it belongs on the little yellow flower on the card above!)

I love, love, love the way these cards came out.  The papers and the images are so interchangeable and that was evident as all of us picked and chose to do them all different ways.


One of our lovely stampers, Carol, made these too cute origami dress cards for all of us (and with the handmade hanger too!).  I think she's vying for the Princess Origami title!!!


This cool little 3-D project is meant to be used as a pin cushion on top and inside you can add whatever your heart desires - candy, sewing notions, buttons, candy, ribbons, candy, etc.  (It was full of candy kisses which did not last long in this house!)


Debbie let us choose from her stash of SU fabrics for the tops and we all added one of the new buttons.
Great idea Deb!