Showing posts with label Jingle Belles Challenges 2012. Show all posts

Friday, October 26, 2012

JB:12:22 - Creature Feature

The Jingle Belle Challenge this time has us using a live creature on it.  Sounds like fun, especially leading up to Halloween.  There are sure to be some eclectic choices out there.  

I made two cards this week because I need to catch up and fast.  I did a rough count, including the couple of leftovers that I had from last year and I am still almost 20 cards short of what we'll be sending out.  Make that 22, I just remembered 2 more people.  Maybe they will be the lucky ones to get these cards.


I've had these Memory Box stamps for a while and they just needed to be paired together for this card challenge.  The sheep was stamped in Basic Gray on WW cardstock and colored with pencils and markers.  I cut up a piece of white cs that I had embossed with the chevron folder and wrapped them with some white yarn.  


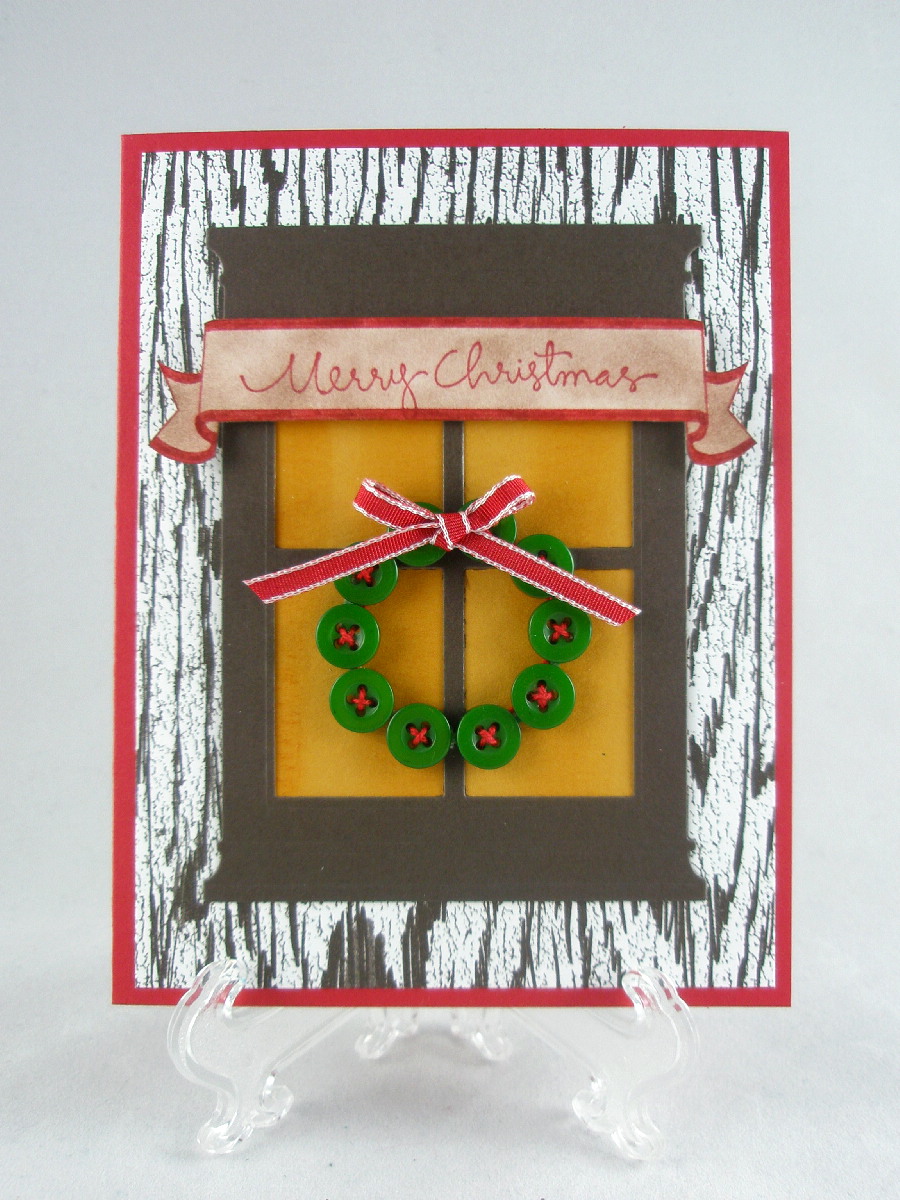
The sentiments were both stamped in Real Red and I used the fancy label punch on them.  I believe all of the background papers that I've used are retired, but I could be wrong.  I just can't keep up with that stuff anymore.  

Yes, I think the recipients of these cards will have to have a sense of humor.   

Hopefully I will be getting another two creature feature cards done by next Wednesday.  I know I have some Christmas bird stamps that I've been itching to use!

Hmmmm, now which one shall I post in the Jingle Belles gallery?  I just remembered that I can only pick one per post.   You'll have to click here to see which one I chose.

Wednesday, October 17, 2012

Jingle Belles 12:21 - Pink Christmas


A favorite October prompt for this challenge - Pink Christmas.  

This card is a case of a lovely card that I saw recently but my brain is not allowing me to remember exactly where so I can give credit to the original.  When I find it I will come back and add the link, however, the one I remember seeing wasn't in pink.  I couldn't resist dressing this little girl up in a pink coat, scarf, mittens, and tights.  There are rhinestones and pearls in the centers of the snowflakes giving it some sparkle.  The panel itself is of shimmer cardstock which was quite by accident, but worked to my advantage.  And while I was coloring the image I added pearl shimmer paint for her fur trim, gold shimmer on the tree, and silver on her pathway.  

Edited to add:  Well I went on a search this evening and I found a similar card, but it turns out that that card was based on a card on pg. 14 of the SU catalog.  I also figured out how to add a sentiment to this, but I would rather not have it going side-to-side.  Now I will be searching my stash for a sentiment that goes up and down fairly thinly to add a banner on the left side hanging from the top.

Wednesday, August 22, 2012

JB12:17 - Oh Christmas Sketch


This is the sketch that the lovely Stephanie put together for this challenge.  Pretty cool, eh!  Oh, the possibilities!

Well, I just got a new Cottage Cutz die that I fell in love with when I saw a creation by Pat Smethers recently.  The trees with the woven trunks are what I really wanted and paired with this Christmas Tree paper I think it works pretty well.


I also used the log and the bunny that came with the die. 


I know, no sentiment, but doesn't it say Merry Christmas with all those trees?

Wednesday, July 25, 2012

JB:12:15 - either red *OR* green (...but NOT both!)

I had good intentions to do two cards for this challenge before the deadline, a red one and a green one, but it looks as though it will just be the green for now. 

I dug into my pile of new stuff and found some nice green dsp and new die set, and dove into some of the old stuff for my Patterned Pines stamp set, added a bit of white embossed paper, and this is what I came up with.


That tree is popped up and so is the panel it is on.  The bow is actually on the right side, I guess I flipped the picture somehow. 

I found some bronze glittered brads for the top and bottom and the ribbon was a last minute addition and I love the thinness of it with this die and tree.


I thought about hanging a tag from the ribbon but decided against it.  The sentiment will be on the inside. 

Okay, let me see if I can visit some of the other Jingle Belles.  You can see them all here

Wednesday, June 27, 2012

JB:12:13 - mele kalikimaka

Sheesh, I can't believe that I haven't posted a Jingle Belle challenge in so long.  How long you ask?  Don't ask.  Life has gotten in the way of some of my favorite things lately, but rest assured, not all of it has been bad.  

In case you don't know, and probably there are a lot of people out there who don't know (I'm talking the world guys, not my blogging buddies!), mele kalikimaka means Merry Christmas in Hawaiian.  The highlighted link will take you to Bette Midler's version of the song that goes along with it - have a listen.  

So for this challenge we were asked to make our cards hot or tropical and we can "do this by using bold, saturated colors... or by incorporating tropical flora and fauna like palm trees and flamingos... or by taking santa from the north pole to the beach... OR... well, however you'd like to interpret "hot" or "tropical" in a holiday context!"

I made a cheater card of sorts.  I used some hot colors on a printed base card which is a notecard that I found in the $1.50 bins at Mike's.   I'm calling it a "Deconstructed Christmas Tree"


You see all the balls laying on the background with the streamers and lights not yet on the tree.  The only thing that made it to the tree was the little shiny star at the top.  The tree itself is actually one that I had made for a previous Jingle Belle challenge that I didn't finish - that was to be the one inspired by a Christmas Carol and I think I was going to say it was "Oh Christmas Tree", but luckily for me, the cs matched the green in the notecard and there you have it.  

I almost forgot, the directions for the tree I found on Pinterest with directions from this lovely blogger Sarah Jane.  It's cute and simple and I've been seeing them all over the place now.  (Yes, that's another hole I've fallen into - Pinterest - great for ideas, if only I used them!)


Oh, and my friend Michelle showed me a great way to do those banners and get even ends.  I know I should have taken pictures, but maybe you'll understand if I explain it.  You make a cut into the center of your strip from the end as deep as you wish your tails to be, then you snip from the corner of the strip to the center cut on each side and you have perfect sides.  Look at what she did to a toilet paper tube - click here - and you'll see her demo the banner too. 


Gotta hurry off to get some more projects done.  It's been a lovely day here - quite breezy and not too hot and I've been procrastinating with these projects.  I promise more creativity in the near future!


Let's go see the rest of the Jingle Belle creations - click here.

Wednesday, May 16, 2012

JB12:10b - Embossing Again


So............. for this card I embossed two ways.  I used an embossing folder for the snowflake panel and the punched tag was from the leftover cut out circle from the first card.  The little birdies in the snow image is a Picture Show Stamp (http://www.etsy.com/shop/pictureshow) that I first inked with VersaMark and then with Night of Navy ink and then clear embossed.  I then, very carefully, colored the birds with my aquapainter and inks.  I stuck that modern label punch behind it and added the navy bow.  The snowflake was an MS punch that I added a half pearl to.  I wanted something short to center at the bottom under the image and used the word PEACE.  Hmmmmmm, wish I had that stamp in just a tad bigger font!

Looking at this picture, the card does appear a little boring, but IRL the navy and white really pop.  I think it could be my picture taking skills were not up to par as I had only 12 minutes to photograph, edit, and post this post.  My fault totally - I had everything laid out last night and should only have had to put finishing touches on it.  This wasn't procrastination this time - just distraction.  I come home with a plan and in no time the plan is shot to ..........  

It's been a while since I visited that Etsy store and I'm seeing a few more things I think I'll have to indulge in! But I will have to put that off until later because the weeds are calling to me.  I'm only waiting until HWNSNBP is far enough away with the lawnmower from the area that I want to weed tonight.  It has rained over the past couple of days and the grass is begging to be cut and the weeds are trying to take over all the flower beds!

Tuesday, May 15, 2012

JB12:10a - Embossing Around the Christmas Tree

When I was trying to pick out a stamp to use this week for this challenge I was happy to find this one in my stash not having used it before.  It just had to be a bluebird.  Right?  I intended to post this last night as it was raining and I was finished with it early enough, however, if you've read my previous post, you'll know that I was a bit distressed and thought I'd better leave it for today.  

So as the title implies, we were to use some form of embossing on our cards for this challenge.  Whether it be dry or heat embossing - didn't matter, just as long as something, some part, was embossed.


The white panel is embossed and I used a circle punch to make an opening so I could fit the stamped image inside of it while using the card base as a frame for it.  The sentiment was stamped on a scrap of vellum and is glued onto the embossed panel just under the snowflakes.  IRL you can see the embossing through the vellum still giving some texture to it.


The image was stamped onto watercolor paper and I used my aquapainter and inks to color it.  You really can't see that the snowbank was painted with glimmer pearl and I took a glitter gel pen to give some sparkle to the ice.  Last step was to add the snowflakes and half pearls.  

Okay, gonna see if I can get another card done for this challenge using a different embossing technique.  But, should you want to see what the lovely Jingle Belles have done so far, click here.  

Wednesday, May 2, 2012

JB12:09a & b - Peace on Earth(Day)

As you know, April 22 was Earth Day and keeping with tradition (it is tradition if you do it more than once, right?) we were asked "to create a holiday card which re-uses, re-purposes, re-cycles, up-cycles, or in some way "rescues" a bit of... well, SOMETHING... which you'd've either thrown away, or perhaps just overlooked in terms of card-making?"  Read all about it here.

Let me think - do I have anything that I could re-use, re-purpose, or recycle?  Are you kidding me!!!!   There is a multitude of "stuff" hanging around here that I would love to put to good use.   How about some saved Christmas packaging.  There was a plaid box, a piece of red foil box, and a vibrant green piece of cardboard backing from some presents.  A dive into the ribbon scrap basket found the knotted ribbon already knotted and ready to go.


Over the last couple of weeks I have had several conversations related to this very subject.  It has taken me 8 years to realize that I will never use up all that I have accumulated for my crafting.  The 8 years being the time I have been working full time.   Every once and a while I will purge a little of it - mostly stuff that is easily replaceable - but it gets to the point of being overwhelming.  No, I am not living like someone you might see on the "hoarders" programs, although HWNSNBP and the kids might argue that point when they open up the closet door in the bathroom upstairs and find practically one whole shelf full of empty toilet paper rolls which I tell them are going to be obsolete soon according to the tv commercials, but it could easily get that way.  We do recycle as much as we can, but there are a lot of recyclables that can have another more artistic life.  The problem doesn't seem to be materials - it's time.  If only I could recycle those lost times of the day into productive times. 

When my sister passed away ten years ago, we had to go through her things and let me tell you, there was quite a lot to go through.  She was single and had 8 cats and many birds also.  And when it came to shopping, she never passed up what she thought was a good bargain.  However, there weren't enough hours in the day to possibly use all that she had accumulated.   She had a barrel, yes a barrel full of needlepoint kits.  They went to a recreation program.  She had scads of fabric and yarn, and paints, and beads, and well, practically a craft store of her own.  It was too much to assimilate into my stash so I had to be picky and choosy, but sadly, some of that stuff is still sitting, unused, 10 years later. 

I need to not be like that.  I'm not planning to leave this world soon, but when I do I don't want to leave a craft mess for someone to have to deal with.  That being said, maybe it's time for a bit more purging.  But in the interim, I am glad to have challenges like this where I can put some of the stuff to use.

This card below I like a lot better than the first one, if only for the colors.  The "snow" is a piece of that foamy wrapping stuff that I just tore a piece from and the solid trees are a bit of the leftover from the same package I used on the tree above.  Those printed trees are the inside of my dental benefits envelopes.  The swirls in the sky were made with VersaMark ink using a stamp from the $1.50 bin at Mike's and I couldn't find the longer punch so I just stamped PEACE on the turquoise punch. 


So let me ask you, what do you save to repurpose?

Wednesday, April 18, 2012

Jingle Belles 2012:08b - As I Promised


As promised, here is my second card for the Jingle Belles sketch challenge.  (The check engine light went out in the car, and they said to wait until it happens again so I had a little more time to finish this up today.)

I took my inspiration from the star in the sketch and the stars in the sky on the stamped image.  The background was made by punching out a bunch of stars and running them through my Xyron sticker maker and adding them to the card front.  (Can you tell that I really love this Marina Mist color!)  

I've also been trying to tap into some of the supplies that I've accumulated and haven't used much or at all.  For this card that would include the stamped image which was in the $bin at Mike's this winter, and the nestabilities die.  I actually have an embossing folder with stars on it that I had tried to use, but the stars were  a little to, shall we say, orderly and I wanted a more random pattern.  

The image was heat embossed with SU's pewter embossing powder and looks much nicer and shinier IRL.   I tore down the edges of the Bashful Blue and Night of Navy cs just because.  

I'll be visiting the rest of the Jingle Belles a little later to see the wonderful creations for this challenge.  You can also view them by clicking here.

Tuesday, April 17, 2012

Jingle Belles 08a - Twas the Sketch Before Christmas

Our guest hostess for this challenge is Amy Tsuruta and she came up with this great sketch for us to use.


I had parts of this card made for a previous Jingle Belle challenge which I fell behind on.  (It was the one with the neutral pillow prompt.)  So, adding a little bit of color and turning the sketch on it's side, here's my first card for this challenge. 


I inked up the embossing folder again for the background.  The swirly band is a new Memory Box die that I was dying to use.   This color combination is one of my favorites.  I could see making multiples of this.  (Hey Rachel - what do you think about this for your cards this year - just askin'?  Lovya, Mom)

I promise I will try to get the second one posted asap, but I think I might not make the cut-off tomorrow because my check engine light is on in the car and we have to take it in right after work - but I'll try.

Thursday, March 15, 2012

Triple Play - Teapot Tuesday 189, Jingle Belles - JB12:06a - Neutral Noel, and a Birthday


The Queen of Hearts is ruling over the tea party this week.  I think she might have dismantled Princess Beatrice's fascinator.  

Well, I happened to have an extra-large crown left over from last week's party that didn't fit the queen cat, but it certainly fit the Queen of Hearts.


The heart is a Memory Box die cut that I cut out of watercolor paper and used my aquapainter and ink to color.  (The red and green is the die.)   I decided to play around with the embossing of the background and I didn't want any of it under the heart die cut so it would stand out, so I turned the die over and traced the edges to make a heart pattern the size of the die.  Then I cut two card size pieces of lightweight cardboard from a discarded cake mix box and glued them together.  I carefully centered the heart pattern in the center and then traced it and cut it out.  This made it possible to emboss only the area surrounding the heart.  

The first time I tried this I did not use any ink on the embossing folder and while it didn't look bad, it still didn't appear to have enough contrast, so I added ink with a dauber to the area that would be embossed.  You can do this by holding the pattern under the folder so you can see the area that doesn't get the ink.  Making the sandwich of paper, folder, and plate was a little tricky but I got it done.  

In fact, I liked the way that this came out so much that I decided to used the same background - without the heart however - for my first Jingle Belles card this week.  Looks as though I got a little heavy handed with the dauber on this one.


We were to make a neutral Christmas card based on the photo below:


Neutrals for Christmas.  I really like this.  


Truth be told, the card below started out as my Jingle Belle card but I felt the heart was not right for Christmas.  I happen to need a birthday card for a friend who is celebrating one of those monumental birthdays and thought this would work out fine for that.  


I added the pink ribbon and the sentiment in a pink label and put the panel on a pink base.  (Geez, I sure hope she likes pink!)  

Monday, March 5, 2012

Jingle Belles - JB12:05a & b Stuck on You


For this Jingle Belle challenge we were supposed to use stickers or brads in our creation.  I have been trying, trying, and trying to clean out my craft room, aka the stamp cave, aka the stamp castle, aka the stamp..... oh, well, you get it.  Anyway, the process will be tedious at best due to the multitude of "stuff" that has accumulated.  But................lucky me to find a package of cute Mary Englebreit Santa stickers that fit perfectly for the challenge this go around. 

This card is based on a layout I saw at Butternutsage a few days ago.  I thought the three squares would be perfect to highlight the three different Santa stickers.  They are mounted on some Real Red cs that I used the Postage Stamp punch on.  The background is embossed and I added a little flag (I think they are technically called guidons) for the sentiment.  The ribbon and three little pearls were the final accents.

Now these pictures below are my second offering for this challenge (check this link for more pretty samples), although the color is not what you might be seeing.  The dark color is Early Espresso which IRL is not really this dark.  But, you will see that I used some tiny little foam stickers that I also found when cleaning.  The body of the deer is my pinky fingerprint which looks like I am really in need of some lotion to get rid of those cracks instead of whorls!  The legs and tail were just drawn on with marker. 


I added "Thank You" to these because I am always in need of Christmas thank you's as I work in a school office and even the child who brings me a bag of candy deserves a thank you. 


So I went crazy (well, not really crazy, just taking advantage of a good prompt and an easy card) and made two of these to stash away.


Really, take my word for it that they are much prettier IRL!

So now I'll be checking out the gallery and you can join me by clicking here.

Wednesday, February 22, 2012

Jingle Belles - JB12:04b All Buttoned Up


I had this idea to use some of these buttons for a wreath as I've been seeing a lot of bracelets like this on Pinterest.   This is one of those cards where I have to tell you that IRL it looks much nicer!  

Whew - got two cards done for this Jingle Belle challenge and just in the nick of time!  Gotta run to a meeting, but here's the link to see the rest of the lovelies for these last two weeks.  

Monday, February 20, 2012

Jingle Belles JB12:04 A - All Buttoned Up


So, did you guess from the title what was up with this challenge?  Buttons!  I love buttons.  Unfortunately, I tend to hoard them.  I have jars and tins full.  My love for buttons goes back to my childhood.  My grandmother "Stella", who lived downstairs from us, worked in a sewing factory and she had cookie tins full of buttons that we used to play with.  I can still picture some of my favorites.  I say picture because those tins went missing after my grandmother died and have not yet been found.  Well, truth be told, I don't think that anyone ever searched for them and they are probably still stashed away in the house as my family still lives there.  One of these days I hope they'll find them.  Until then, I am destined, I think, to snatch up any buttons that I come across. 


You're probably thinking - with all the buttons she claims to have, why are there only three on this card?  No reason other than this was the first idea that I had and that's all that was necessary.  I thought the swirly tree die would look good with some buttons, and would probably have added more if I had smaller buttons to choose from.  You can see that I added sticky pearls where buttons wouldn't fit.  

The edge of the Night of Navy cs was stamped with a stamp from Autumn Days in VersaMark and then embossed with White EP.  A simple white ribbon was added at the bottom.  I wanted the tree to stand out so I kept this pretty simple.  


I'll be back with a second card before the deadline on Wednesday.  If you'd like to get a head start checking out the entries for this challenge, click here.

Wednesday, February 8, 2012

Jingle Belles JB12:03 - A Banner Holiday 2

Here I am last minute again with my second card for the Jingle Belle challenge.  I had been playing around with this idea in my head and kept putting off sitting down to play with it on paper, but finally realized it was now or, well, it wouldn't be never, just wouldn't be in time to put in the gallery this week.

If you didn't see my previous post, the challenge was based on the new Jingle Blog Bannner - a yummy combination of colors and patterns.  You can see my previous post here.  And my card for this week ..........

Saturday, February 4, 2012

Jingle Belles JB12:03 - A Banner Holiday

Hopefully you've checked out the Jingle Belles blog, but if you haven't you'll get a little piece of it today.  The banner to be exact because that is our inspiration for this  challenge.


I love the colors in this banner so it was a lot of fun using them to create my card.    I used Baja Breeze and Riding Hood Red Ink and paper along with the red SU glitter paper for the letters.


I started this card several days ago when I found some white bells that I added some of the glitter paint to.  I had to let them dry overnight and since I also used that glitter on the dots along the lower edge, it took another day after that to actually say it was complete.  See, this is another reason why I'm doing these challenges now and not waiting until November or December to do my cards!


The images are from a few stamp sets - Baroque Motifs among them.  The bells were tied together with some Cherry Cobbler bakers twine and anchored through holes that I punched in the stamped layer.  

I have another card in the works right now and maybe will get that posted during the game tomorrow (GO GIANTS!).

Now, check out that lovely banner in person and all the entries thus far here.

Tuesday, January 24, 2012

Jingle Belles JB12:02 - Sketching Through the Snow


Yes, it's a sketch challenge this time, brought to us by the lovely Kirsty Vittetoe at Homemade Little Things.  

I must admit that I was thrown a bit, not by the sketch in general, but by what looks to me like a butterfly.  I kept trying to look past that to put Christmas in it and it really was challenging.  I guess you could say that I was trying not to interpret it too literally.  So I pondered what I would like in that focal point.  And I pondered.  And I pondered.  (Strange word "pondered" - I digress, it's late.)  Then I started scrounging around on my worktable to see what I might have going that I could use.  

I spotted a couple of die cut doilies that I had been playing around with using the new SU doily die.  It was too big for the card - drat.  

But then I saw it.  I saw how I could cut it up and make, not a butterfly with wings, but an angel.  I die cut a brand new one out of Shimmer paper and then mounted it on Glossy White cs.  The center of the die became the head which I covered with a punched circle and then a jumbo sticky pearl.  The halo is just another circle of the same size mounted in the halo position. 


I used metallic gold paper for the card base (which unfortunately is showing up mustardy in these pictures), embossing the sentiment in gold also.  The "stringy" ribbon is something I found in the holiday ribbon section at Michael's back in November or December when they were on sale.  The floral paper is again something that I picked up at Mike's just because it looked so pretty with the gold and silver metallic highlights.  


I tried to achieve some balance by adding the white punched lace border and the pearls.  Don't know if I'll get a second card made for this challenge, but at least I have one to show for it.


I peeked in the gallery and there are quite a few pretties there!  Click here to check it out.  

Wednesday, January 11, 2012

Jingle Belles JB12:01b


Whilst I was attempting to clean-up Christmas around here this past weekend, it occurred to me that the box of Christmas tea that I received from two of the teachers I work with had some lovely vintage holiday images that could be repurposed into cards and the smaller ones, bookmarks.  Then I got busy and almost totally forgot about making my card for the second week in January. 

We are using the same prompt for two weeks, and while I'm sure that it's optional whether to make two cards during that time, I thought that in this case I would.

Here's the large box which contained 9 smaller boxes and all those potential reuses.


I was lucky enough to have received from HWNSNBP the Poppystamps window die that was on my list and was thrilled that the front of the smaller boxes fits perfectly inside the window frame.


The card is on an Always Artichoke base with a layer of Cherry Cobbler and then some dsp that looks like vintage wallpaper to me.  I die cut the window out of textured Creamy Caramel cs and used a dauber with Creamy Caramel ink to bring out the texture in the cardstock.  The greenery was punched out of Always Artichoke and the banner is Cherry Cobbler seam binding. 

There is some stamping also - JOY comes from a stamp I found in the $bin at Michael's.  I colored the letters with my markers to match the cardstock and fussy cut them out.  They are popped up with dimensionals on top of that banner.

I am having the most difficult time this week finding things that I "put away" before or during the holidays. Anyone else out there having that problem?  I know that I need to organize my "stuff" better - a project that will be ongoing for the next several weeks - but this has been really driving me crazy and taking up way too much of my time.  I actually was fearful that my new die and a new stamp set I got as gifts might have been inadvertently thrown out with the recycling or garbage.  Thank goodness I found them!

Well, now I will be meandering over to the Jingle Belles blog to see all the lovely creations for this week. I'm sure I will be delighted.

Friday, December 30, 2011

Jingle Belles JB12:01

No Time Like the Present(s) is our first theme of the year.  I bet if you are a paper fanatic like myself that you probably have some of your favorite wrapping paper from this year, or any year for that matter, stashed for putting to "some good use" in the future.  Well, let that future be now - the present!

"Make a holiday card that incorporates GIFT WRAP:

as a background, as an accent, or using motifs cut from your favorite wrapping paper

OR

Make a holiday card with an image of present(s) on it!"


If you've never heard me say it, IKEA happens to be one of my favorite places to go, and not just for the meatballs!  I really love checking out their holiday decorations and papers and, case in point, I used some of the gift wrap that I had picked up there last year. 

Aren't these Gnomes with Clogs just too cute! 


These motifs came from two sets of bags that they had.  One with the snowflakes which had a coordinating striped bag, and the other with the gnomes.  As you can see from the strip across the top of the gnomes, the bags had pinked edges on top and I decided to keep that pinked edge as part of my card.  The bottom is scalloped by hand so I didn't have to cut through the hats of the gnomes below. 

I punched an additional snowflake out of the back side of the bag and edged it with a red glitter pen and then mounted it on a Real Red circle.  The button has a bow of linen thread and the holds the tag - the only stamped part of this card - on the Very Vanilla cs.


I also added some glitter pen to the outside of the snowflake layer though it's barely visible in the photo.  Three shades of red were used in this card - Poppy Parade, Real Red, and Cherry Cobbler. 

If you don't have any paper leftover it's not too late to score some in the After Holidays Clearance Sales.  As a matter of fact, this very afternoon I picked up some very pretty gift bags at Target that I definitely will be using in cards.  At $.60 a bag it's cheaper than scrapbook paper and just as, if not prettier than!

So, this year there will be a Jingle Belles Challenge every two weeks and that may mean you will see more than one card being made by me for each challenge, but don't hold me to it! 

Okay, are you ready to check out the designs of the week?  I am happy to let you know that I was asked to help start things off this year with a card in the preview.  You can join me by clicking here.