Showing posts with label Quick and Easy. Show all posts

Sunday, July 26, 2015

Merry Fishmas! (Our Beautiful World, Anything But a Card, July Photo Challenge too)

I had this idea about 4 years ago when I purchased a skinny, apple-green metallic Christmas tree in the after holiday sales that fit perfectly on the landing of the stairs of our condo.  Since we don't celebrate Christmas there, I thought it might be fun to celebrate Christmas in July when we are there or as we are calling it now Merry Fishmas!  I have been collecting "pins" in my Christmas in July Pinterest folder for that long, and just needed the opportunity to finally go through with scheduling it. Social obligations and then last year, my back injury kind of stood in the way then, but this year, since we didn't have a big celebration for my 60th birthday, we decided to finally do this.

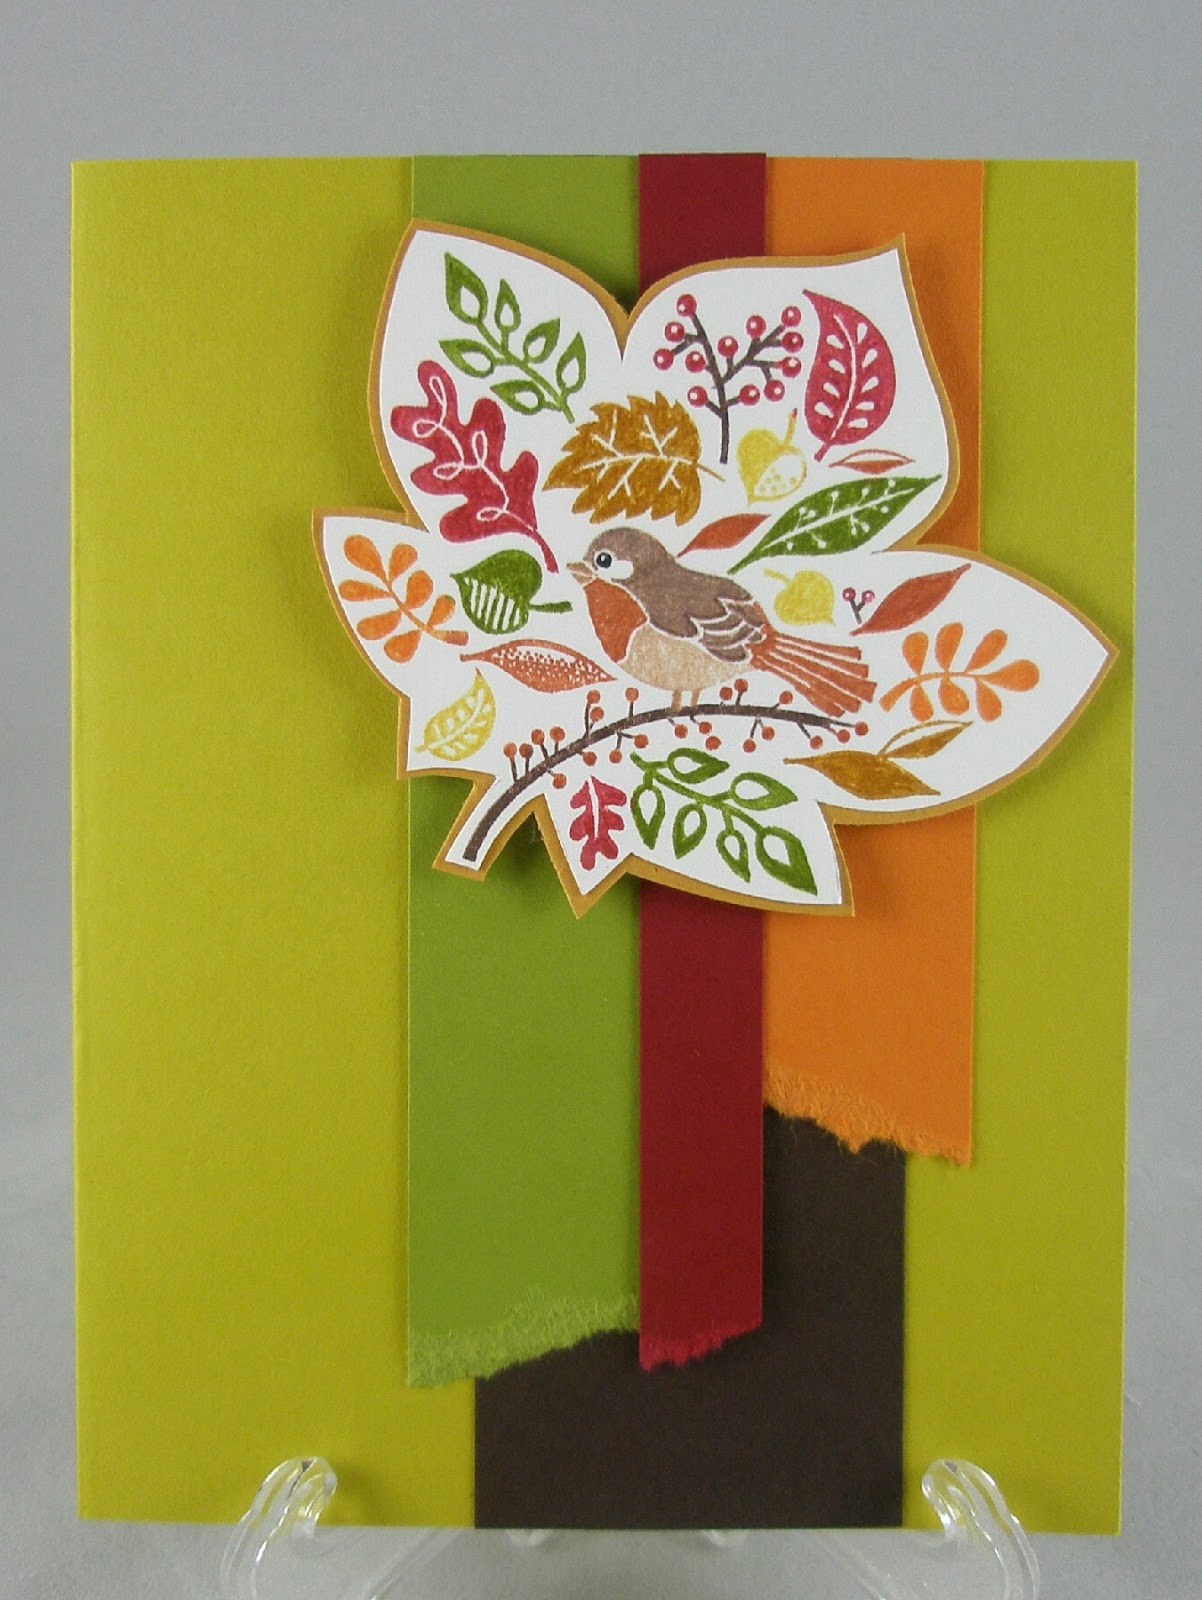
First, e-mail invites were issued back in the beginning of spring and then a few weeks ago I mailed out these reminders.  I had this fish die that I used to make into a little card and then took a stamp set that had several different sized fish and made them into a tree shape.


The message was hand-written. (Oh, and that's a little starfish on top of the fish tree.)


The tree was brought down and decorated and so were we in our Merry Fishmas shirts (via Cafe Press).


Company arrived and after some chit-chat, we got out the fishing poles and headed across the street to do some fishing at the dock.


First fish was caught by HWNSNBP (thrown back in - too small and yes, he insisted he had to change out of his shirt because he didn't want to get it fishy, but he put it back on later).


Then I caught a little non-keeper.  We took up quite a span of the dock as you can see Rachel and another friend at the rail.  (Sheesh, I really need a haircut!) And one more fish was caught after that.


I just had to take a picture of my daughter's hair.  It looked so pretty in the sunlight and you can barely see the pink highlights she had at the ends.


We had people as well as the gulls watching us.


After a bit we went back to have a bite.

Lasagna and a meatball sub accompanied by this cucumber, strawberry and feta salad with poppyseed dressing in Christmas colors.


For dessert I made a strawberry and grape Christmas tree that sat atop the fruit salad. There were Santa hat brownies, and of course, Christmas cookies.


Then we played some Go Fish.


Some friends brought little gifts including this Hallmark cupcake crab - so cute - that I immediately added it to the tree.


And while the sun set behind us, we ventured out onto the front balcony to listen to the concert at the dock across the street - the band playing hits from the 50's and 60's had us singing quietly along.


I sent our guests home with a little goody bag that included Swedish Fish, Goldfish crackers, and a Go Fish game all their own, and a little lunch box full of some of those leftover Christmas cookies.


Inside the bag was also an ornament that I made using these little denim canvas squares, rope, shells, and polished stones.  


It was a small group yesterday as some of the other's invited had obligations they couldn't get out of, but it was fun and we might just have to do this again next year. 

I'm using some of these photos for:
Our Beautiful World - our Gold Fish Game for the Game theme this week
Anything But a Card - my shell ornaments for the Anything Goes theme

My photo challenges for July 25 - Colorful (the salad) and July 26 - Black and White (the gull)

MERRY FISHMAS!

Saturday, May 2, 2015

Time, Animals, and Using Up Scraps


My April mail art desk calendar.  The catalogs are piling in now as we near the end of the school year and approaching, at least for us, the time to put together orders for the next year.  Yeah, there's cows in there - we don't order cows, but we do order cow eyes, believe it or not!  The 5th grade science curriculum includes dissecting a cow eye.  Most of the other squares are from art supply cattys.

Below - On our latest excursion to IKEA I picked up a couple of these  3-1/2" square 99 cent battery operated clocks.  Then I tangled the front of this one and placed it on my counter at work where the students and visitors sign in.  There is a clock on the wall behind me, but most people can't seem to find it (or are too lazy to look) and ask what time it is.  I was also glad it wasn't digital, so the students can still hone their skills at telling time.  This was pretty easy to do with a fine point Sharpie marker but I refrained from adding any pencil shading at this time.  I might go back and do that and then seal it with a spray sealer.  


Speaking of IKEA.  I had to snap a picture of this logo on the back of a truck as we were waiting to make the turn into the IKEA complex in Elizabeth.  Just for fun. 


And I forgot to post a picture of this dove that we saw at one of the houses along our garage sale route last weekend.  The owners of the house had it sitting in a large plastic container in their driveway and told us that they had found it injured in their backyard this past fall and nursed it back to health, and although it could no longer fly, it got around pretty well in their house.  Poor thing must have been attacked by something and had wing damage in addition to the loss of one toe.


Cleaning up some projects and using up some scraps the last week in April I came across this frame and paper flowers I had recently purchased at Michael's and 


threw them together for a little giftie.


And then used the leftover flowers as a starting point for this card. I stuck them to part of a Panera to-go cup holder.  (Theirs are quilted not corrugated like most other's I've seen.) And I used a couple of new (old) flower dies and the wooden laser cut bird also.  I think this might be a Mother's Day card.


There were some of these die cuts that kept jumping into my work space screaming "use me! use me!" (falling off the pile is more like it) so I decided to punish them and glue them to some scrap book paper and make them into a card.  This one will go into the card box for use in the future. 


It was my goal this April to reuse and recycle what I could in most of my projects and I think I did pretty well with that.  Of course, I'll continue to do that throughout the year.  Now if I could just use it up as fast as it collects.................

Friday, October 19, 2012

Getting Back to Creativity


I must admit that it has been a little difficult getting back into the swing of creating, well actually doing anything much after work these days.  I guess I've been so charged up over the wedding while trying to keep the stress out of work that it's taking me more time to rebound.  It didn't help that I had that cold the week before the wedding either.  Our office still sounds like a sick ward with all the coughing going on.  

But, slowly I have been trying to hack away at the list of cards and projects that I want to accomplish this month. 


The card above is a thank you to a dear friend who brought me a special gift and was really supportive of me during this whole wedding process.  I was literally driving myself crazy trying to find my diagonal plate to do the scoring on the wedding card (in another post) before the wedding, but last week I was able to put my hands on it and I also found the punch that I thought that I had lost.  Yippee!  

The card above uses the fancy doily die and I tried a little trick that I found on Pinterest - to put clear packing tape on the cutting side of the die so it is much easier to get those intricate cuts and pieces out.  


One of Rachel's college roommates is expecting and she wanted me to make a card for the shower. Admittedly, baby cards seem to be out of my comfort zone and I don't have very many images that I feel are usable.  So I went to the stand-by onesie stamp and stamped it onto dsp, cut it out and used some mini clothespins to hang it on some pink cotton thread over the embossed panel.  In the background is the lattice die framing the onesie panel.  Some punched paper lace at the bottom, ribbon and bow and we're done.  


The stamped image above is Tweet Leaves from the SU Holiday mini catty.  I do not yet have the leaf die that it's made for so I lightly sketched out a leaf shape of my own.  I adhered that image to a piece of More Mustard and then trimmed that to frame the leaf image.  The card base is Summer Starfruit and the other pieces are of Early Espresso, Pumpkin Pie, Old Olive, and I believe Cherry Cobbler.  Much like the marker colors used on the image.  This is going to a friend who just had some pretty serious surgery.  Hoping it will brighten her day.

The next two cards were inspired by Monday's Try a New Technique on Splitcoast - Acrylic Block Collage.  You basically take one of your acrylic blocks and add ink to it by swiping, daubing, sponging - however you want - spritz it with water (go lightly with the spritzing!)  and press it onto your paper.  


Let it dry and then mask around the edges with some post-its.  You can then stamp your image(s) over the background that you have created.  Thus creating a one-layer card.  But you will see from both of mine that there is an additional layer and that is due to the fact that I used too much water and things looked a little messy.  Fixing messy is sometimes easier than you think.


In this case I added the circle pieces on the first card on either side and on the second I stamped the leaves onto some colored cardstock and cut them out.  

The bird image is from Serene Silhouettes and the feathers are from Fine Feathers.  The sentiment is from the retired set Warmest Regards - another one of my stand-bys.

I still have a few things to catch up on and then there's also Halloween at the end of the month.  Oh, my and two birthdays I nearly forgot!  It feels good to be getting inky again!

Sunday, January 15, 2012

Hardware?


Take a few simple ingredients - some 3/8" washers from the hardware store, about a yard and a half of ribbon and the only tool you'll need is a safety pin to get something that looks like this...............


a cool little necklace that you can tie around your neck.


I used some Cherry Cobbler seambinding and 21 3/8" zinc washers and instructions that can be found here.

This was a quick project I put together this morning and gave to my daughter who was visiting for the weekend.  It was so good to have her home even though she wasn't feeling that well.  We got a little shopping in yesterday but today I really felt under the weather myself so while she and her dad made a quick visit to Costco, I put this together for her. 

I've also been working on a little secret Valentine's project I'll just tease with that uses some more hardware.


Wednesday, January 26, 2011

Pocket Calendar Redo

So it was time for a new pocket calendar and this time I got a 2-year one.  The cover was nice enough, but I decided to give it a little personal touch.


I'm trying to use up some of the multitude of dsp that I have in my stash and I had some of these papers out when trying to put together my last teapot card.  I was going for cheery colors as this winter weather is downright depressing.  More snow on the way today - possibly another 6 to 10 inches.  Yikes!

The polka-dot paper is punched out with the petal card punch and then I added some 1 1/8" circles of Ballet Blue cs to frame it.  The bird is stamped in Bashful Blue and then punched out with the bird punch.  The little flowers and leaves are also punched.  Sentiment comes from the SU set Style Beautiful.


The bird also has a rhinestone eye and the flowers are highlighted on the edges with markers of the same color. 

Hopefully the vinyl cover will last the two years!

Stay tuned for a weather update.

Sunday, September 12, 2010

All A Flutter


While I was on vacation a couple of weeks ago I tossed some supplies together quickly to bring along and played around with some of the new colors.  I used the single All A Flutter stamp and the masking technique to stamp these butterflies.  The colors are Daffodil Delight and Poppy Parade, Blushing Bride and Pear Pizzazz, Marina Mist and Concord Crush, and Peach Parfait and Cajun Craze.   


This card was stamped with Pear Pizzazz and Blushing Bride.  A little surprise was added with the new Petal Punch in Blushing Bride.


Inside is a little message from the hostess set Cute by the Inch.

I didn't add any sentiments to these cards.  I'll be keeping them in my desk at work for any quick ocassion.

Saturday, August 1, 2009

A Quick Little Something

I remembered just before I went for a haircut today that my hairdresser was celebrating her birthday this week. I quickly threw this together for her. It's something we did at one of our downline meetings last month using a chapstick in place of the drink packets.


You need to use the butterfly die to punch out two of the whole large butterfly. The sentiment is from the Oval All set and colored with markers, then punched with the medium oval punch. Under that is a layer of cs punched with the scallop oval punch.

The butterflies are placed back-to-back and the ovals (that have been adhered together) are placed where you see in the picture. I took my needle tool and pierced holes for the two brads. That's all that's holding the butterflies together.


Three packets bearly fit in this. I should have moved the brads a little closer to the edge of the paper to have a tiny bit more room.

Like I said above, you can add a tube of chapstick, some Twizzlers, a special pen or pencil, etc. Let me know if you have any additional ideas!!!

Thursday, December 11, 2008

Quick and Easy Recipe Books

We have an event at work called a Cookie Walk. Traditionally this has taken place on the Monday prior to Thanksgiving, and this year was no exception. We had eleven participants who each brought in a batch of 6 dozen or more cookies and an empty container. We meet in the faculty room after school and walk around the table taking 3 cookies at a time from each tray until the cookies are gone (we do wear gloves!). It gives us either an extra dessert for Thanksgiving or something to freeze and save for Christmas or holiday of choice.

I have put together the recipe booklet for the event for the last two years and I thought I'd share the current one.

It very simply began with a couple of packages of $1 notecards that I found at Michael's. I just added some embellishments to the front cover, typed the recipes up and stapled them into the card to make a little book.


I tried a new recipe this year which came out pretty good -

Oatmeal Coconut Crisps

1 c. flour
1 tsp. baking powder
1 tsp. salt
1/2 tsp. baking soda
3/4 c. butter or margarine (softened)
1 2/3 c. sugar
2 eggs
1 1/2 tsp. vanilla
2 1/2 c. uncooked oats
1 c. flaked coconut

Stir together flour, baking powder, salt and soda - set aside. Cream butter and sugar until light. Beat in one egg at a time. Stir in flour mixture, vanilla, oats, then coconut. Drop by teaspoonful 3" apart on ungreased cookie sheets. Bake in preheated 375° oven for 10 to 15 minutes or until lightly browned. Cool on rack.

Wednesday, July 16, 2008

New In Color Mosaic

I labeled this Quick and Easy because it was a snap. I got some new product yesterday, including the new In Colors for 2009, and between watching the lllllooooonnnnggggeeeesssstttt All-Star Game in history I wanted to make something quick to show them off. So I got out my 1 1/4" square punch, punched out 3 of each color, ran the edges along the new ink pads and mounted them on some Kraft cardstock. The button is part of the new Button Bouquet buttons that will also be in the new catalog on August 11th. Even with the pink, I think this makes a good any-sex card and will be using it to congratulate someone on a new career opportunity.

The colors, looking at the 6 squares popped up left to right: Kiwi Kiss, Tangerine Tango, Riding Hood Red, Pink Pirouette, Baja Breeze, and Pacific Point

Wednesday, June 11, 2008

CASEd Thank You

I was perusing the gallery entries on Splitcoast the other day and came across this card by Mercedes Weber. I hope she doesn't mind that I CASEd it - I did make it larger and added the ribbon element, but it is basically her card. I really liked the color combination and I was looking to make some quick and easy thank you's for the end of the school year. 3 x 3's aren't mailable which is why I made the card bigger, and the ribbon element lies flat and doesn't make much of a bump so I believe it will only need normal 42 cent postage. I recently got my new SU stamp set - Fresh Cuts - and things just fell into place. So I will whip up a couple more of these and have them with me at school to fill out and get right in the mail. Thanks Mercedes!

Recipe:
Stamps - Fresh Cuts
Paper - Soft Sky, Blue Bayou, Real Red, Whisper White
Ink - Soft Sky, Blue Bayou, Real Red
Accessories - Key tag punch, 5/8" Real Red Grosgrain

Sunday, June 8, 2008

Fruity Birthday Cards

My cousin Kathleen's birthday was this weekend and sadly I forgot until I spoke with her sister Barbara the other night and was reminded in the course of conversation.

Barbara told me that Kathleen has this "fruit thing" going on in her kitchen and the gifts she gave her sister revolved around that theme. I did have a couple of cards that I could have used, but none with fruit, and at first all I could remember was the Tart and Tangy set from the mini that I have been using. This strawberry card was quick and easy.
Then I thought of the Infinite Goodness set that I hadn't used yet. Gave that a go and here is the recipe:
Stamps: Infinite Goodness
Paper: Old Olive, Ruby Red, Brocade Blue, Watercolor
Ink: Basic Gray, Old Olive, Ruby Red, More Mustard, Brocade Blue
Accessories: Aquapainter, 1/4" More Mustard Grosgrain, Perfect Layers Tool, Dimensionals


Thursday, May 22, 2008

Time to Celebrate

My friend Linda just completed work for her Masters in Education and we will be celebrating this weekend. This is a very simple card that I made for her graduation. I don't really have any graduation stamps, but she's not doing the cap and gown thing (at least I don't think she is) so I just wanted to congratulate her on all her hard work. I was drawn to these colors for her card and now that I'm writing about it I'm remembering that for her wedding, the gowns that we wore were very close to the Wild Wasabi green that I chose for the card base. I guess I'll always equate Linda with green!

The recipe:
Stamps: Celebrate Everything
Paper: Wild Wasabi, Groovy Guava, Soft Sky, Whisper White, Afternoon Tea DSP
Ink: Wild Wasabi, Soft Sky, Chocolate Chip
Accessories: Double-stitched Wasabi, Sky, and Guava ribbon, ticket corner punch

Congratulations Linda!

Thursday, April 17, 2008

Red Hats

These little hat treats are cute...... and just a little time-consuming depending on how many you're making. They're very simple to make though. All you need is a 1 3/8" circle punch and a 3/4" circle punch. You punch 16 of the 3/4" circles and one of the larger one. Glue 5 of the smaller circles together and then use your crop-a-dile to punch a hole in the center of that stack. Glue that stack to the center of the larger circle. You then push a brad through the punched hole - that's what will attach the hat to the base paper (the white paper wrapped around the Hershey nugget). Then continue to glue/stack the rest of the 3/4" punches to complete the basic hat. You can decorate it as you like.

Note: Not an original idea of mine - I've saw it first on Wanda Pettijohn's blog. You should check out her blog - she's got some great ideas.

Another Note: If you have a Xyron sticker machine - use that instead of glue on all those little circles - goes much faster!!!!

Wednesday, April 9, 2008

A Bow Without A Knot is Still a Bow

I got the best compliment today. I brought two of the leftover cones into school today and a few people couldn't believe that they were made of paper.

You see the close up of the bow without a knot. You need something to hold it together, however, and in this case it was a brad. You could use a thinner piece of string or an eyelet, or you could even get out your needle and thread and sew it together with a button. Use a paper piercer or needle tool to make a hole in the ribbon and then put the brad in.


I didn't care for the picture in the previous post, and, well, I thought I'd try another color scheme (translation - I got some new paper in the mail today). So here you see the cone again stamped with the Swirly wheel but in More Mustard on So Saffron CS. The ribbon is More Mustard grosgrain - all Stampin' Up products.