Sunday, April 15, 2012

A Drink of What?

When HWNSNBP and I went to the Philadelphia Flower Show last month we saw some cute things in the vendor area however, some of the prices we thought were astronomical.  There was one thing in particular that I thought I could recreate for much less.

You take some little potted succulents (approx. $3 each)


Then you get a martini glass from the dollar store ($1) and some colored pebbles ($2-3 dollars a bag with a 40% off coupon at Mike's) and fill the bottom of the glass with the pebbles.  


Or you could splurge a little on a $5 terra cotta mini planter.


Add some cactus soil (approx. $3) and the succulent on top of the pebbles


And then add a layer of the pebbles over the soil.  Tah Dah!


A succulent parfait - prettier and much cheaper than the $16 price tag that we saw at the flower show!


This one's a little more mediterranean looking I think.


And if you happen to have leftover or other colored stones or crushed shells and more $1 glasses you can have a party!


PT Thanks

I recently finished up with my physical therapy.  I've graduated to the Wellness section which allows me to continue with my exercise routine without the benefit of the physical therapist (PT) but under the supervision of an exercise physiologist.  My PT helped me to learn how to stretch correctly and rebuild the strength in my hip with her hands on care.  She gave me an exercise routine for both the gym and at home that I continue to do.  The rest of the staff scheduled appointments, helped set up machines, got me equipment, made sure I was staying on the right track while I was completing my routine at the center.  The Wellness will help me to build on that and continue to strengthen my core to help with the pain that I still have from my spinal stenosis.  

I wanted to thank the staff for all the wonderful attention that they gave me during my pt so I made a card for the PT and a box of pizzelles for them all to share.  


I covered an envelope box I had brought home from work with wrapping paper and made some rolled roses out of the scraps and punched some flowers out of the brown packing paper that Stampin Up ships with.  They were just scrunched up and set in between the roses with a hot glue gun.  The tissue was actually  leftover from some that I had put through the shredder at work to make basket filler for some other project. I just stacked the cookies in plastic bags and added a bow to the twist ties.  The one on the right also has a tag with the ingredients listed and a little note from me.  

I am going to try to make a wreath out of those punched flowers - some time in the near future.

Thursday, April 12, 2012

Felt and Yo-Yo Key Chain

Last month at our stamping group gathering we had a little swap amongst ourselves and I made these little key chains as my swap.  I was challenging myself to come up with something using the Stampin Up fabric and using some of the other "stuff" I had on hand.  I found some felt and embroidery floss and some batting and thread and set to work.  


I started by using the circle die to cut the two felt circles and a piece of batting.  This batting, by the way, was the cast off of a project that we did a few years (yes, you know I am a saver!) ago at a stamp workshop.  It was from some specimen frames that we made into shadow boxes.  Everyone at our table was throwing away the batting because we didn't need it, and I couldn't just let that happen. (If I only had time to use all the good throwaways that I've rescued!  I promise, I've been trying to purge.)


I used the white embroidery floss and the blanket stitch to sew all the layers together, making a little loop with the ribbon and catching it in between.  I secured that area by sewing two buttons to the front and back. If you had a sewing machine that worked (my new one is still in the box and waiting to be set up) you could quickly sew this together, or if you're not a sewer at all, cut the batting a bit smaller than the felt and use some fabric glue to attach the felt layers.  You could also use an eyelet in place of the ribbon loop for your metal key ring.


Out of the designer fabric I used the many circles die to punch out my circles.  I chose to use the largest of them for this project.


I know it seems tedious, but making yo-yos is really simple.  You just knot your thread (I use quilting thread) and make a running/basting stitch all around the edge of the circle and then pull and knot.  For these, I knew that the centers would be covered by buttons so I did not mind the raw edges.  If you are not adding buttons, you can fold over the edge of the circle (finger pressing helps with this) and then you have a nice finished yo-yo.


I sewed the buttons to the centers of the yo-yo's and then sewed the yo-yos to the felt circle.  You could also glue them, but since I already had the thread out and didn't want to move it was the simplest way to go.  The last step was to add a metal key ring to the ribbon loop.


This could be a keychain, or a luggage tag, or zipper pull for a child's backpack, or it could just go in the drawer and sit there until it's time to clean out the drawer and you wonder - where on earth did this come from!  Come to think of it, if you added a bit of lavendar in with the batting it might make a nice sachet for the drawer or hang it on a hanger in the closet.

Wednesday, April 11, 2012

From Pig to Elephant

Sounds like a magic trick but it's not really.  I had promised to show how I had decorated my pig in the Pigs on Parade post and I finally got around to putting something together.


I couldn't believe, as I was finishing up my pig last month, that I failed to take pictures of the steps as I was decorating it.  Bad blogger!  Usually, even though I may not decide to post, I have been trying to photo document my work, even if it's just for my own future personal reference so I can recreate something.  I guess I was just too much into the experimenting part, not knowing if it would turn out the way I wanted that I just forgot all about the camera.

Well, I happened to have another little (and when I say little, I mean smaller than the pig, can you believe!) papier mache animal - an elephant.  This I picked up in the clearance bin at Mike's for a whopping 20 cents!

Here it is - standing on an empty yogurt cup to give you an idea of the size.


And here are the steps..........................................

I gave the original papier mache elephant 3 coats of white gesso.


Then, using a Sakura Micron blue pen I started drawing spiral circles.  You start with one complete one and then add from the back the partials.


Once you fill in a little, start another section the same way.  The spirals that are drawn first will be the foremost when shaded.  I did the same thing with the wings that I drew on the pig, starting with one wing and then adding from behind.  The difference with that was the pattern that I chose.  The wings had direction which I think gave them more dimension than these spirals.


Once I had enough a bunch done, I got out my Prismacolor pencils (not watercolor) in a similar shade of blue and started defining the areas to be shaded to give it some depth.  I found out very quickly that since this pattern, and the whole of the elephant, was very small, that not a lot of penciling was necessary.  Just a light line.


You can see that just the pencil alone starts to make the pattern pop a little.


To blend the pencil I use some odorless mineral spirits (oms) and a paper stump or tortillon.  I just dip the end of the  stump into the oms, being careful not to make it drippy, and then go over the pencil line.  


The more that you move the stump over the line, the more the waxy pencil mark flows.


Hopefully you can see some dimension of the drawing here after the blending was done.  


I got tired of this little pattern and added some others around the rest of the elephant as you will see below.  I even left some of it white and blended another lighter bluish turquoise into those areas.


I almost forgot - I added a couple of light coats of a spray fixative.  I use a matte finish which I think gives it just the right amount of sheen and enough protection from fingerprints and smearing.

Hmmm, I think I have a little papier mache giraffe around here - maybe he's next!

Catching Up With Sharing

I'm trying to catch up with some projects this week while I'm off from work - (yes, I decided to take some days off while school was out).  It occurred to me that I had not yet posted all the lovely handmade cards that I have received lately so here goes.

This first one is from my cousins Barbara and I'm sure that you can tell it was for St. Patrick's Day.  Don't you just love all those shades of glittery green?


The next couple of cards are BRAK's from Splitcoast members Emily, Angie, and Sally.  It's always such a surprise to receive these BRAK's.  You never know where they'll come from but it's so nice of these ladies to share their time and cardmaking skills.


The next two cards are from my friend Carol.  This is a sweet birthday card and below is a clever Easter card she put together.  I really love that layout on the Easter card.


The card from Rita is a thank you for a card that I sent to her.  She was one of our recent destination stations in one of the teapot challenges.  I'm loving that background and can't figure if it's patterned paper or a stamp.


The next card comes from my friend Sabrina.  I love interactive cards and this one is particularly pretty too!  


There's a little magnetic clasp that keeps that sun up there and when you gently open it - ta da!


A trio of lovely flowers!

The pink bag and tag below are also made by her.  The colors of these beautiful packages just make me smile!


Thank you all ladies!  I love receiving this kind of happy mail!

Sunday, April 8, 2012

Happy Easter


This lovely little lamb tea-cosy came all the way from Ireland as a birthday gift from my friend Sabrina.  I couldn't resist this photo today among the bluebells and marsh marigolds.

Wednesday, April 4, 2012

Teapot Tuesday 192


Wouldn't you say this is an elegant table setting?  Silver teapot, pink roses, crystal candlesticks and a cutwork  tablecloth certainly do look elegant to me.  I almost can't believe that we are having a tea party like this.  

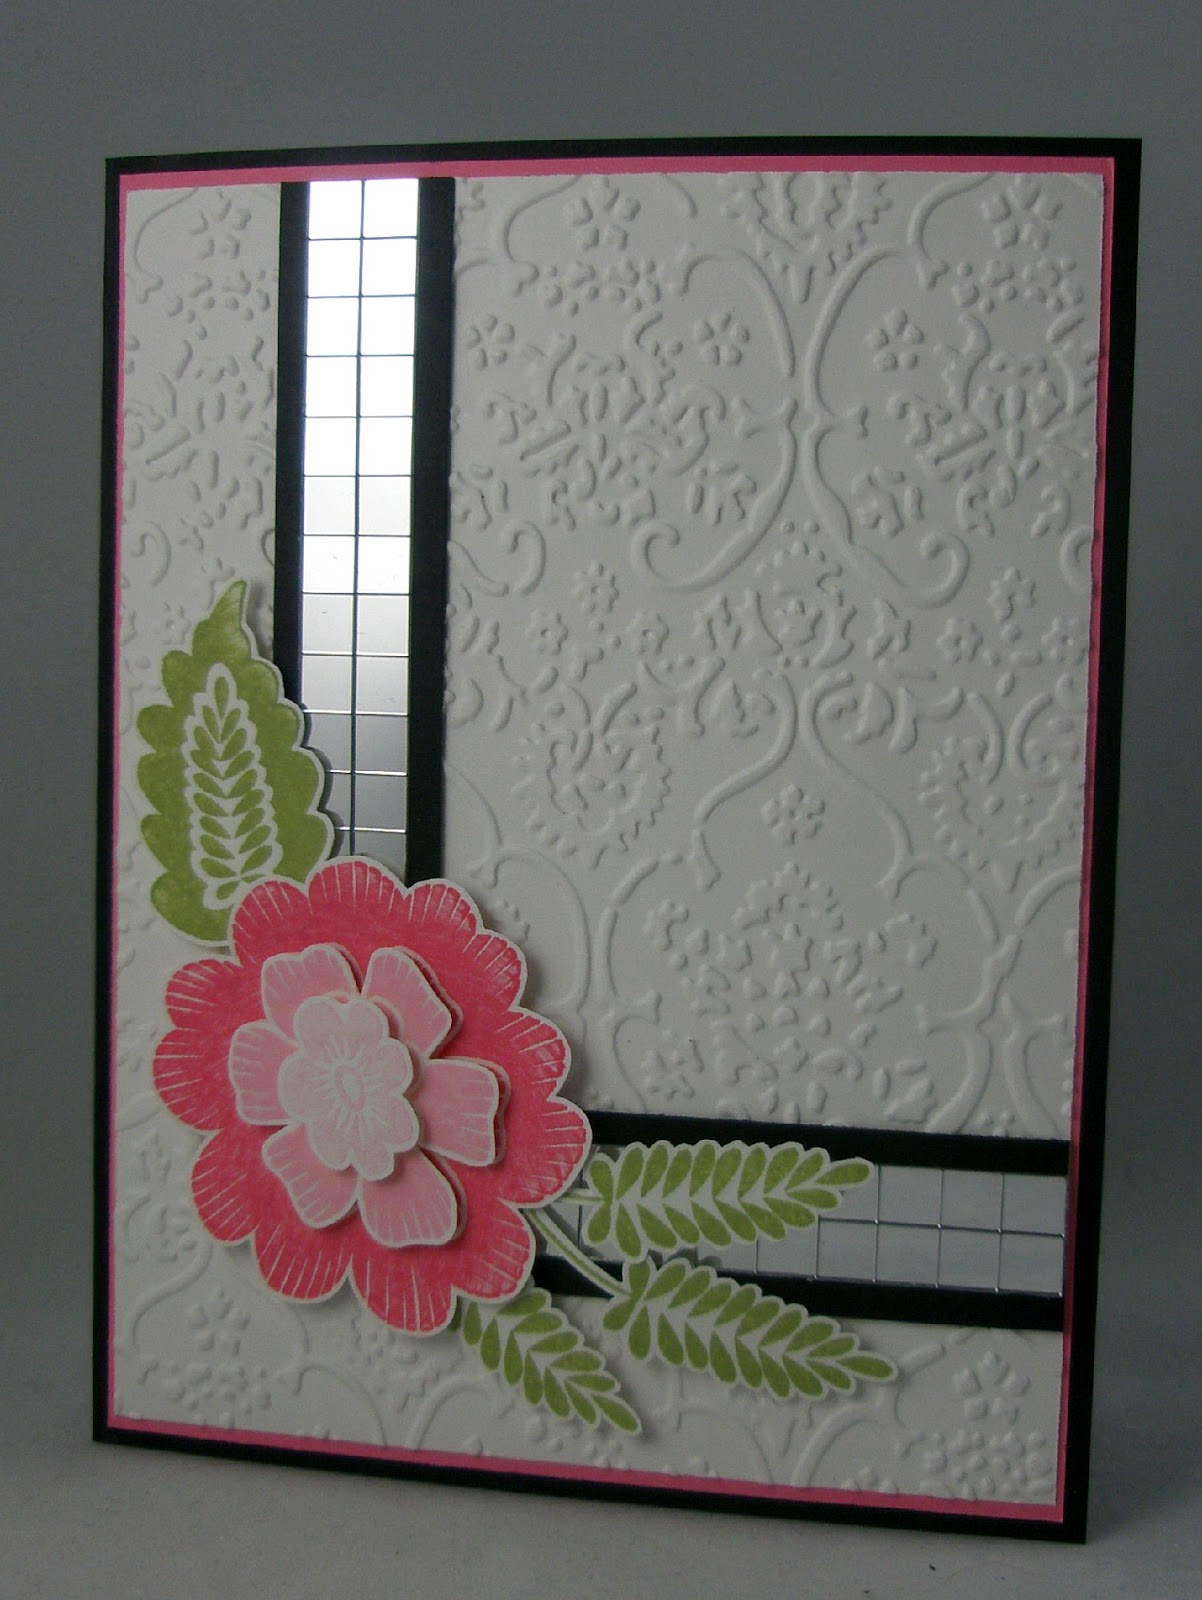
We were asked to bring a certain color combination this week.  Pink, Black, White, and Silver.   The first three colors mentioned are not problem, but silver?  Silver could be a little tricky.

Fortunately I just received a package of some lovely mirror stickers from my friend Sabrina.  They are very reflective just like the silver teapot in the picture.  Getting a good picture of this card was going to the bigger challenge for me this week.


I used a double strip of the stickers on top of some black cs.  That, in turn, was mounted on a piece of Whisper White that I had embossed.  Where the mirror strips met I added a pink layered flower and leaves from the Array of Sunshine stamp set.  All this was added onto a base of Regal Rose and then the card itself on black card stock.


Monday, April 2, 2012

Stampin' Get Together

We had a little stamping get together a little over a week ago.  My upline Debbie comes up with the greatest projects for us to do together.


We also shared swaps.  This one is from Diane.  Look at that clever way of keeping this envelope card together with those heart punches.


Carol made this brightly layered card.  It's beautiful inside and out.


And Debbie created this beauty.


And here's mine.  Not a card - a key chain.  (Details will follow in another post.)