Tuesday, March 6, 2012

Teapot Tuesday 188


She sure is Purrfect!  I don't know about that green striped tail though!  Ha!  This week we needed cats. Cats and crowns or cats in crowns.  Queenly cats.  Cats that are going to a lovely lady by the name of Virginia who reads a lot, especially about Queen Elizabeth (although I don't know which one exactly), and who is currently recuperating from a nasty fall.  


This cat was inspired by another punch art cat I saw recently.  Hers is a little bit country and mine is a little bit rock-n-royal.  She's got the widow's peak and neck ruffle of Elizabeth I and the look of the current queen.  She's got her crown courtesy of Tiny Tags and the placard, which I intended to look like a scroll, says it all.  


Virginia's favorite colors are dark blue and burgundy so I tried to get that in also.  The embossed panel was made by smearing the embossing folder with Marina Mist ink before I embossed the pattern thus having the recessed areas a little darker.  

I was trying to keep myself to a limited amount of time creating this card.  But sometimes creativity just needs more time.  I had a country cat all ready to go and then I took another look at the inspiration teapot and I thought that I could make the cat more like the teapot so I started from scratch again.  I even squeezed some time in the stamp room before work today but it just wasn't enough to get it done.  But, I have to say that it felt good doing a teapot challenge again.  I've missed quite a few of them lately and that makes me sad.   

Well, I don't think I'll get to the gallery tonight, but you can go on ahead of me and take a look by clicking here.  I'm sure you won't be disappointed.

Monday, March 5, 2012

Jingle Belles - JB12:05a & b Stuck on You


For this Jingle Belle challenge we were supposed to use stickers or brads in our creation.  I have been trying, trying, and trying to clean out my craft room, aka the stamp cave, aka the stamp castle, aka the stamp..... oh, well, you get it.  Anyway, the process will be tedious at best due to the multitude of "stuff" that has accumulated.  But................lucky me to find a package of cute Mary Englebreit Santa stickers that fit perfectly for the challenge this go around. 
This card is based on a layout I saw at Butternutsage a few days ago.  I thought the three squares would be perfect to highlight the three different Santa stickers.  They are mounted on some Real Red cs that I used the Postage Stamp punch on.  The background is embossed and I added a little flag (I think they are technically called guidons) for the sentiment.  The ribbon and three little pearls were the final accents.

Now these pictures below are my second offering for this challenge (check this link for more pretty samples), although the color is not what you might be seeing.  The dark color is Early Espresso which IRL is not really this dark.  But, you will see that I used some tiny little foam stickers that I also found when cleaning.  The body of the deer is my pinky fingerprint which looks like I am really in need of some lotion to get rid of those cracks instead of whorls!  The legs and tail were just drawn on with marker. 


I added "Thank You" to these because I am always in need of Christmas thank you's as I work in a school office and even the child who brings me a bag of candy deserves a thank you. 


So I went crazy (well, not really crazy, just taking advantage of a good prompt and an easy card) and made two of these to stash away.


Really, take my word for it that they are much prettier IRL!

So now I'll be checking out the gallery and you can join me by clicking here.

Thursday, March 1, 2012

Happy (Flying) Pig Day


The whole squadron is present and accounted for.  Well, not really all present.  There's more in the wings awaiting their flight of the day. 


I found this cute pig die and face stamp from Peachy Keen.  The die part is actually the head, arms, hooves, and a bit of the torso.  The little dress is made from two of the larger petals from the petal punch.  The legs are the small oval punch and the wings are made from the scalloped oval and trimmed.


On the back I made a little loop using the word window punch and added some gold cording as a hanger.  Then I printed out the little poem and punched it out with a 1 3/4" circle punch. 


My friend Sabrina sent me the coolest stamp with flying pigs.  We both couldn't believe that I didn't already have it. 


I picked up this pre-printed cardboard picture frame and gently pulled off the saying they had on it so that I could add my own along with the stamped image in place of a picture.

Now I am going to confess that the background was not what I had originally planned, however, somehow I got ink on my hand and when I was watercoloring the image I left little dots where I didn't want them.  So, I just kept adding more.  I've got this on my list of things to get done for my pig ladies next year!


Here are some more additions to my flying pig collection.  An ornament from another special friend.  I love that they share what they find!


This is a little mould that I purchased through Etsy with the intention of making some paper clay ornaments/pins.   Another project for the future.


This decal from another Etsian for my car window (don't tell HWNSNBP!).


And then there's the pajama bottoms that I found while on a shopping expedition with a friend.  Do you think I could get away with wearing these to physical therapy today?  Hmmmm, maybe not.


In any case, my wish to everyone today, although it's late in the day - "The Sky's The Limit"!   Press on and follow those dreams.

Please check these links for more information on why I celebrate National Pig day:
National Pig Day 2010  (this has links to all my previous Pig Day posts)

And be on the lookout this month for progress in the Pigs on Parade event I've got going.  I hope to be posting pictures of my progress decorating my pig.  

Saturday, February 25, 2012

Weekend Views & More

Dunkin' ducks.


Clear blue sky.


Solitary seagull.


Shadow shot.


Swan and friend.


Something red.


Something read.


Something red and dangerous.


Backyard bird party.


Fighting for the suet.


Cute cakepops.


Co-worker's scrumble crochet purse.


And the back.


Another co-worker's crocheted wire necklace.


The birds above landed in the yard and there were hundreds of them.  The light off the camera lens really spooked them, making shots difficult.  There were as many as seven on the suet feeder at one time.

The crocheted purse was interesting and beautiful.  The teacher told me that she met with a group of crocheters each of them bringing crocheted motifs to share with each other.  Then they attached them together and to a felt piece.  Lining was added to the inside and a braided strap to the outside.  I think it's positively beautiful and told her so.  

The wire necklace was done by another co-worker.  Another talented lady!  

Wednesday, February 22, 2012

Teapot Tuesday 186

Another cool teapot don't you think!  Like a giant cupcake.  So much so that this week we are asked to include cupcakes, or cake, or party paraphernalia, etc. on our cards.  They will be going to a young man who  has had some recent health problems but who is going to be delivering them to the hospital that he stayed in to be used for other children there.  What a nice thing for him to do.  You can read all about the challenge here and the destination here.

I like to make interactive cards for children, so with that in mind I scoured my stamp choices and came up with this tag stamp that has a little cupcake on it.  It's from a retired hostess set.  I stamped, punched and colored four of them.  Then I got out some square punches, a little round one, and a button and made the spinner.  


See, it really does spin!


The mitered corners on the tags made them fit together so well over the square.  I punched a 1/2' hole in the square before I glued the tags on it.  I positioned the spinner on the card where it would be centered and then glued down a button that was a little smaller than the punched hole remembering to push it all the way to the top of the circle so the spinner would remain centered.


Then I added the spinner and glued the remaining squares on top of the button.  Wheeeeee!   I hope they have a lot of fun with this. 

And speaking of fun, it's going to be fun checking out all the other creations for this week's challenge.  Won't you join me here?

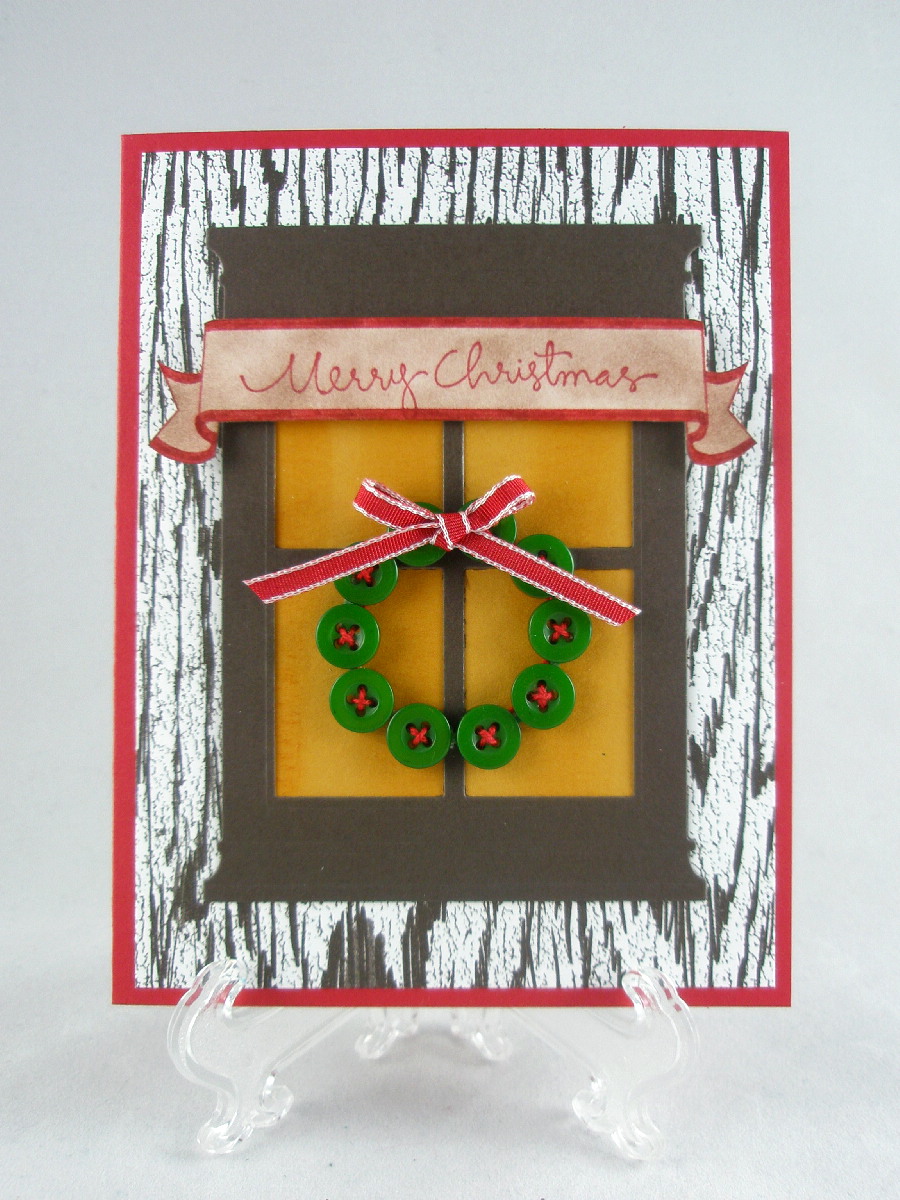
Jingle Belles - JB12:04b All Buttoned Up


I had this idea to use some of these buttons for a wreath as I've been seeing a lot of bracelets like this on Pinterest.   This is one of those cards where I have to tell you that IRL it looks much nicer!  

Whew - got two cards done for this Jingle Belle challenge and just in the nick of time!  Gotta run to a meeting, but here's the link to see the rest of the lovelies for these last two weeks.  

Monday, February 20, 2012

Jingle Belles JB12:04 A - All Buttoned Up


So, did you guess from the title what was up with this challenge?  Buttons!  I love buttons.  Unfortunately, I tend to hoard them.  I have jars and tins full.  My love for buttons goes back to my childhood.  My grandmother "Stella", who lived downstairs from us, worked in a sewing factory and she had cookie tins full of buttons that we used to play with.  I can still picture some of my favorites.  I say picture because those tins went missing after my grandmother died and have not yet been found.  Well, truth be told, I don't think that anyone ever searched for them and they are probably still stashed away in the house as my family still lives there.  One of these days I hope they'll find them.  Until then, I am destined, I think, to snatch up any buttons that I come across. 


You're probably thinking - with all the buttons she claims to have, why are there only three on this card?  No reason other than this was the first idea that I had and that's all that was necessary.  I thought the swirly tree die would look good with some buttons, and would probably have added more if I had smaller buttons to choose from.  You can see that I added sticky pearls where buttons wouldn't fit.  

The edge of the Night of Navy cs was stamped with a stamp from Autumn Days in VersaMark and then embossed with White EP.  A simple white ribbon was added at the bottom.  I wanted the tree to stand out so I kept this pretty simple.  


I'll be back with a second card before the deadline on Wednesday.  If you'd like to get a head start checking out the entries for this challenge, click here.

Sunday, February 19, 2012

Sunday Zentangle 2-19-12

Happy Birthday - You're Making Me Old!


My son turns 31 today.  He is tall, strong, smart, and handsome and I am very proud of him.  He is also engaged to be married this coming October to a wonderfully accomplished and beautiful young woman.  We are so looking forward to celebrating their new life together.  

These are a couple of photos they had taken for their engagement which I haven't shared yet.  (But have permission to do so.)


And the card that I made them for their engagement which actually happened in May.  He proposed at the beach, they had the photos taken at the beach, and they will be married at the beach.  


Happy Birthday to my 6'4" two-legged mouse.

Saturday, February 18, 2012

Pigs Gone Postal

Six little piggies are making their way to new homes in New Zealand, Ireland, California, North Carolina, Connecticut, and New Jersey.


Last night I turned some previously used boxes that I had collected from various sources inside-out, stamped and colored the pigs on them, and then reglued the joint.  It was therapeutic AND fun!

Then I took to packing them.  My apologies to the ladies because I had to use crumpled newspaper as filler as we are away for the weekend and I forgot my packing paper/popcorn.  Had to  make do to get them going.  Some of them have a very long journey.


HWNSNBP - sometimes otherwise known as my Boxman - became my Boxman again today helping me get these posted.  I think it would have been a pretty funny sight seeing me try to balance 6 boxes all stamped with pigs.  Thankfully, I didn't have to worry about that!

If you haven't seen my post about the Pigs on Parade you can find it here.  And..... as luck would have it, I found two more pigs (without recipe boxes though), so if anyone else is interested in playing along, e-mail me or leave a comment here.   I'll do my best to get them to you as soon as possible.

Wednesday, February 15, 2012

Teapot Tuesday 185

It's been a while since I've done a Teapot Tuesday Challenge.  Life does get in the way of my fun - bah!  This looked to be an interesting challenge and you can read all about here.  Cindy is such a super writer.  And she always find such great inspiration for us.  This reminds me of a lamp that my cousin bought.  But for this challenge think camouflage, pink, and hearts.


I've got camouflage, pink and hearts!  Lucky for us it's Valentine's season.  I didn't have to dig anything out cause I was using most of this stuff on other Valentine projects.  


The base is Pretty In Pink with lots of Pretty in Pink hearts I got from the Fashionable Hearts embosslit.  The little teacup is from a new set called Tea Shoppe and the tree comes from Valentine Defined.  The background looks hard but it wasn't really hard, just a little time-consuming.  What was hard was coloring the tree.  I used several different shades of green markers and the stamp had to be held just at the right angle so I could tell which little heart had been inked already.  For some reason (I think it was because I didn't do such a great job cleaning this stamp the last time I used it) I kept getting green hearts with pink outlines.  Not the effect I was going for, so I tried three times before I got one that I could live with.  

The finishing touch was adding the little white cotton thread bow.  

Okay, over to the gallery now to check things out.  Click here to join me.  

Tuesday, February 14, 2012

Happy Valentine's Day


A few more Valentine's that I put together. 


Hope you have a wonderfully sweet day!