Pages

Monday, December 29, 2014

Another Cheesebox Card


You never know what you're going to find on sale just before Christmas and lucky for me I found these kraft colored doilies at Michael's and they were the perfect size to cover the front of some more of my recycled cheesebox projects.  I first used my circle cutter to cut a circle of red cs and then adhered the doily over it.  Then, using a Martha Stewart punch and some Gumball Green cs I punched out the branches for the wreath.  After I glued them on, I took some red liquid paper and added dots to the branches for berries.  The bow on this one was made from some red and white baker's twine and I added a few punched stars in gold foil and gold glitter paper.


Inside of these I put a watercolored image from the SU set Beauty of the Season and added my chopped paper "snow" to the inside seam.


On the outside of the box I added some vintage ribbon that I came across at a flea market in September.  I knew when I saw it that I would use it at Christmas time, but I was thrilled that it was the perfect width for these boxes.


I made three of these for gifts and each one was just a little different from the rest.  Since HWNSNBP liked them so much I think I have to get busy this week and do one up for us.  I've got a few more boxes stashed away!

Friday, December 26, 2014

The Christmas Elf Was Hard at Work


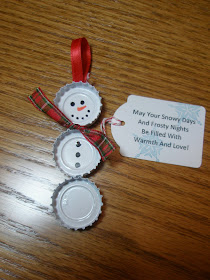
Pinterest-inspired bottle cap snowmen.  

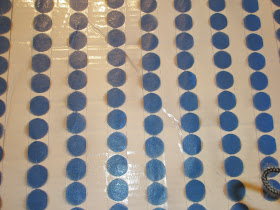
Start with scads of bottle caps - you will need three per snowman.  On a sheet of cardboard I taped down rows of blue painters tape, sticky-side-up and then lined up the bottle caps and HWNSNBP put his elf hat on and spray painted them white for me.  I chose to use spray paint for two reasons - the first being that it would take far less time than holding each bottle cap and painting the inside, and also because I felt spray paint would adhere better over the plastic that's found on the inside of the bottle caps.  I did not want to have to heat them and remove the plastic.


See what was left after I pulled them off the tape..........


Next, I separated them into 3 piles. One for faces, one for buttons, and one plain pile and used Sharpies to added the facial features and the buttons.


I cut 3/8" strips of white cardstock and using E6000 glued the bottle caps to that also adding a dab of glue between the caps where they touched.  Then I set them aside to dry.  When they were ready, I glued a strip of 1/4" red ribbon to the backs of the snowmen making a loop at the top.  The next step was to add the scarves which is just a length of plaid ribbon between the head and center section.


I printed up the tags, punched them out and stamped the snowflakes onto them before tying them to the loop.  Then they got lined up in the tray and were ready for early morning delivery.


I've been out of work again this month to further recover from my back and foot issues so I snuck in to school before anyone except the custodian was there and did my little elf thing.


I'm hoping they enjoyed them.

Thursday, December 25, 2014

Merry Christmas


Silver trees, glittered reindeer, silver reindeer, fairy lights, white owls, white birds, white mice, fairy lanterns, snowflake lights all adding a little sparkle to Christmas this year.

Hope you had a Happy Christmas!

Thursday, December 18, 2014

The Last of the Cards and "Marshmallow Day"


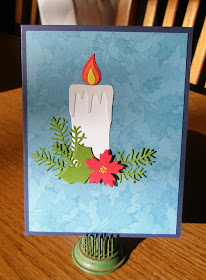
As I mentioned earlier, I fell a little short with my Jingle Belles challenge cards and thanks to this beautiful candle die, I was able to pull together the remaining cards I needed for this year.  I stamped the background with both VersaMark ink and Marina Mist stamped off once to give it that foggy look.   And then, after I cut out all the components, assembled the candle and greenery.  The centers of the flower are dabs of liquid paper (the crafty kind, not the office supply type).   Don't know if you can tell from the picture, but the drip part of the candle was cut out of glossy white paper to give the candle some dimension.    You can see below that my dining room table is a mess with cards.  HWNSNBP and I have an agreement that since I make the cards, it's his job to sign and address them...... and even pick out who gets which one once I've gone through them for the personal ones that I need.  

And speaking of a mess, Sunday was "Marshmallow Day"......... well at least here in this house.  The making of the marshmallows doesn't take that long really.  And the recipe is simple (find the link in this post).  There's just some lengthy waiting for them to set up, so I usually let them sit overnight and get a fresh start in the morning.  So I guess you could say that it's a two-day job. 


Anyway, I made a large batch each of the vanilla and the cinnamon and have divvied them up for distribution to Physical Therapy, my spine doctor's office, and for school.  There happily is a little to spare for home.  This is working out quite nicely since there is no bending involved in  making these and I'm not on my feet that long either.  I'll be making half batches of each tomorrow for some more gifts that I need for some dear friends.


Well, the tree is almost complete....... waiting for HWNSNBP to finish up with the bigger ornaments on the bottom.  And once that's done I have another little decorating project to tackle this year which I hope to share soon.  He keeps telling me that he wants everything to be done by Sunday night so we can sit down and enjoy it for a few days before Christmas and just maybe that might happen this year. 

Speaking of Sunday night, they're advertising the Sing-a-Long Sound of Music to air then.  Believe it or not, I actually went to a live, in the theater Sound of Music Sing-A-Long with my good friend JT and it was a lot of fun.  Truth be known, I usually do sing-a-long even when the words aren't on the screen at home.  We just won't have the props that they had in the theater.  

If you're in the neighborhood and want to sing-a-long with me, I'll be here and there'll be marshmallows......... just sayin'.

Thursday, December 11, 2014

Jingle Belle Round-Up and a Quick Little Tree Project


Above you see my stash of completed Jingle Belle Challenge cards for this year.  I am soooooooooooooo glad that I decided to do this again this year.  The way that things turned out health-wise, I would have been hard-pressed to get enough cards done if I had waited until this month.  I still need a few more and what I'll do is pick a couple of the easiest to recreate and do a few more of each of those and possibly a few more with some other goodies I have not yet had the chance to use.  I have a few certain cards picked out for certain people but for the most part, it will be up to HWNSNBP to choose a card, sign it from both of us and post it.  I've made it pretty easy for him with an Excel spreadsheet with all the names and addresses.  This way he gets to be a part of the process.

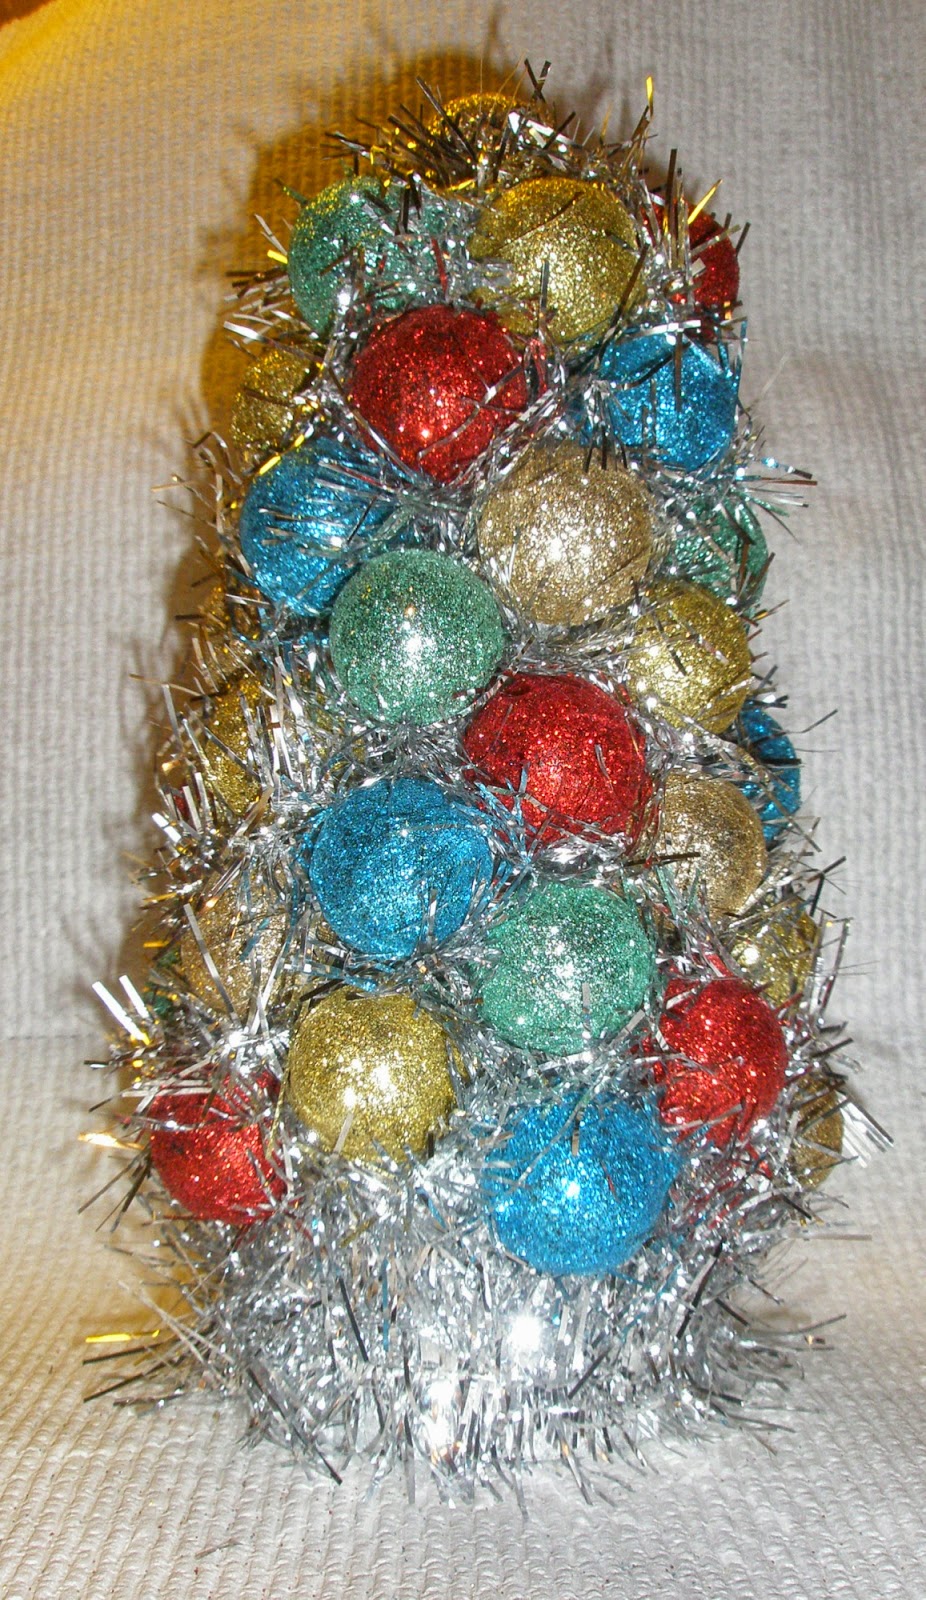
And, speaking of easy, here's a quick little project I finished this weekend.  It started with three tubes of small glittered ornaments that were in the clearance section of the Dollar Spot at Target post-Christmas last year.  I just fell in love with the colors and despite the fact that they were glittered (I do not particularly like working with glitter), I thought that they would make a splendid tree.  Getting my daughter to picture it was a little difficult.  She wasn't sure that I would have enough ornaments, but I made it work.


I started by using a pair of jewelry pliers to snap off the little hangers.  This was done because my first attempt at screwing those suckers into the styrofoam cone wasn't quite working out like I wanted (see the evidence of that fail at the bottom of the cone).  Talk about mess...........if I didn't do it just right with the right amount of pressure, they were shooting all over the room.  And I must admit that a couple of the cracked a bit, but not to worry, that wasn't going to show.


I painted the cone with some silver metallic acrylic paint and let it dry.  Then I got out my glue gun and glued them onto the cone.  I almost said randomly, but it wasn't done randomly.  There were five colors and I kept the same order for each row just moving them over a couple so the same colors were not together on each level.

Uh, yeah, well, it didn't quite look complete did it?   Maybe she was right and I should have gotten a few more of those tubes, after all they were only 25 cents each.  Hmmmm.....


A trip to Dollar Tree for some silver garland saved the day.  I snipped it into 2" pieces and then folded them and glued them between the ornaments.

Oh, yes, and the bottom, well there weren't quite enough ornaments to cover the whole cone (I know, I know, she really was right after all!) so, not wanting to cut off the ornamentless bottom, I wrapped more of the garland around the bottom giving it a sparkling silver base.


And here it is for the time being on the coffee table alongside a silver paper and glittered ornament I found in Walmart.


The total cost of the tree was less than $3 and I do like the way it turned out which made it a bonus for me even though it was not how I had pictured it in my head.  

Gotta run and finish those cards now!

Wednesday, December 3, 2014

Jingle Belles - Christmas Feast


I'm sure those Corgi's are feasting on those candy canes as the children put together their gingerbread house.  I used my Tasha Tudor stamp again (click here for the card I made in April using it).  I usually like to stamp the images that I am going to watercolor in Basic Gray ink and I did this time too, but about half way through I started regretting that a bit.  I might have to try it in black also, though the softness of this doesn't look too bad IRL.  I'd love some constructive criticism.


I combined an MS border punch with a branch punch to fatten up the gingerbread garland.  Oh, and those tiny ginger bread men were also part of a border punch but I just chose to use the punch outs and added their little icing details with a gel pen.  

So I'm pretty sure that this is the last Jingle Belle challenge for 2014 and I want to thank Lauren and Stephanie for all the wonderful challenges and support they give throughout the year helping us to keep December a lot more manageable.  Merry Christmas ladies!

Sunday, November 30, 2014

End of November and Two Inches of Art a Day


We get so much junk mail at work and some of it has really cool graphics.  I decided to cut out some of that art in the shape and size of the boxes on my desk calendar and glued them over each day as it passed.  It went a lot faster than I expected and became a lot easier when I took a scrap of transparency film and cut that out to the size to use as a lay-over pattern when deciding what graphics to use.  I found this size calendar at the Dollar Tree last December and it was the perfect size for the corner of my desk but they don't have the same one for next year, or at least not yet.  I'm hoping I'll still be able to find one this size again.

Now to finish up the Two Inches of Art a Day

Nov. 16 - Inspiration:  Squares.
(Markers and Gel Pen)


Nov. 17 - Inspiration:  Dotted Swirls.
(Metallic Sharpies and Micron Marker)


Nov. 18 - Inspiration:  Silver and Neon.
(Metallic Sharpie and Markers)


Nov. 19 - Inspiration:  Snowflake.
(Scribbled Pencil)


Nov. 20 - Inspiration:  Last of the Leaves.
(Melted Crayon Shavings)


Nov. 21 - Inspiration:  Bluebirds.
(Watercolors)


Nov. 22 - Inspiration:  Bluebirds.
(Watercolors)


Nov. 23 - Inspiration:  Last of the Mums.
(Watercolors)


Nov. 24 - Inspiration:  String of Squares.
(Micron Pens)


Nov. 25 - Inspiration:  String of circles.
(Micron Markers)


Nov. 26 - Inspiration:  It's a Maze Thing.
(Micron Marker)


Nov. 27 - Inspiration:  Peppermint Candy.
(Micron Markers)


Nov. 28 - Inspiration:  Holiday Flannel Pajamas.
(Micron Markers)


Nov. 29 - Inspiration:  Time to Tangle.
(Micron Marker, Pencil)


Nov. 30 - Inspiration:  Message of the Month.
(Watercolors and Micron Marker) 


And here is the whole month at once.


I hope you enjoyed viewing this challenge.  I certainly did enjoy keeping up with it.  Thanks again Michelle for the idea. 

Now........on to December.